
CDP / Events
Events are actions your contacts perform, such as making a purchase or booking an appointment. When your system sends one of these events to indigitall, you can use it to start a journey. Before you use an event, you need to create its event type. The event type defines the event’s name, code, and the data fields it carries.
To access event management in the console:
- In the left-hand navigation menu, click Utilities.
- Under the Journey section, click Events.
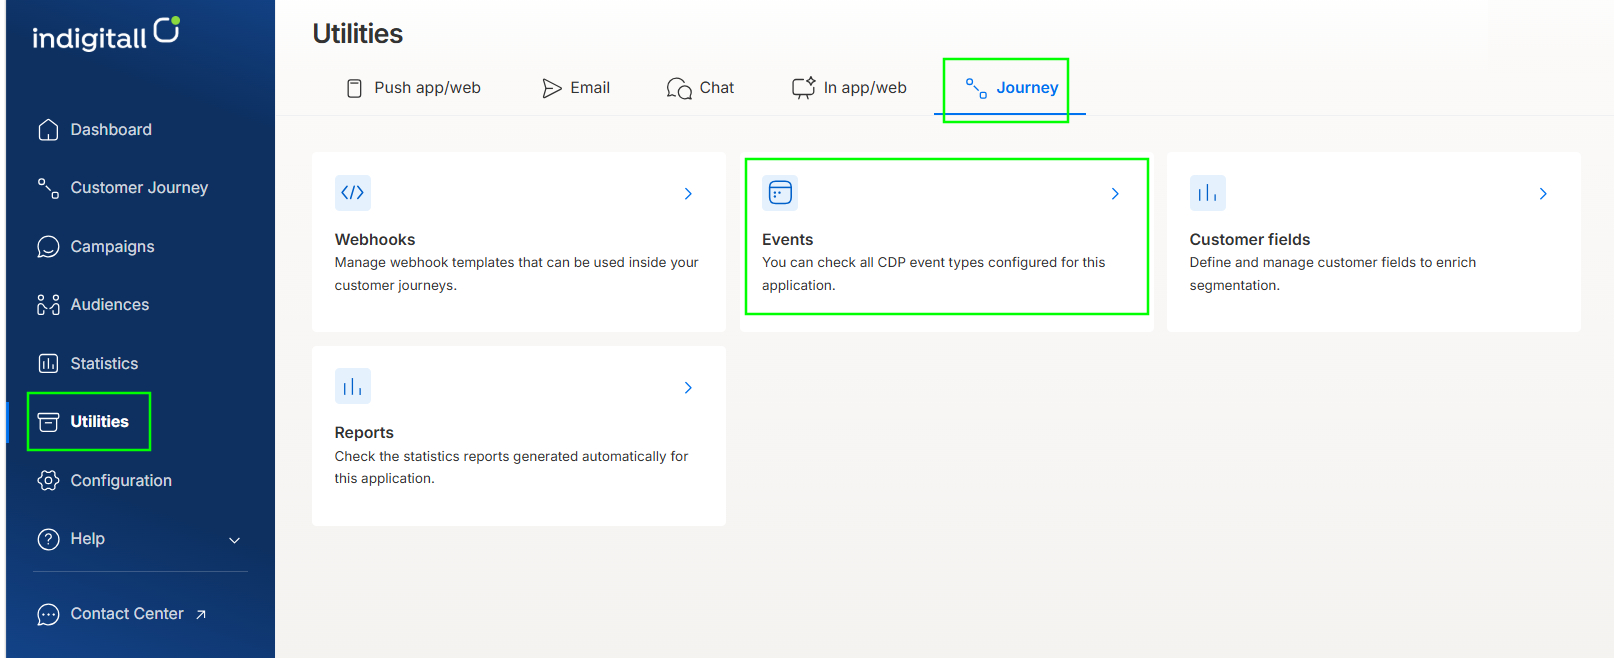
Events Dashboard
The Events page displays all CDP event types configured for your project.
- Code: The unique system identifier used by APIs/SDKs when dispatching the event payload.
- Name: The user-friendly display name assigned to the event type.
- Retention days: The duration (in days) that event records and payload data are stored in the platform.
- Status: The current operational state (Enabled or Disabled).
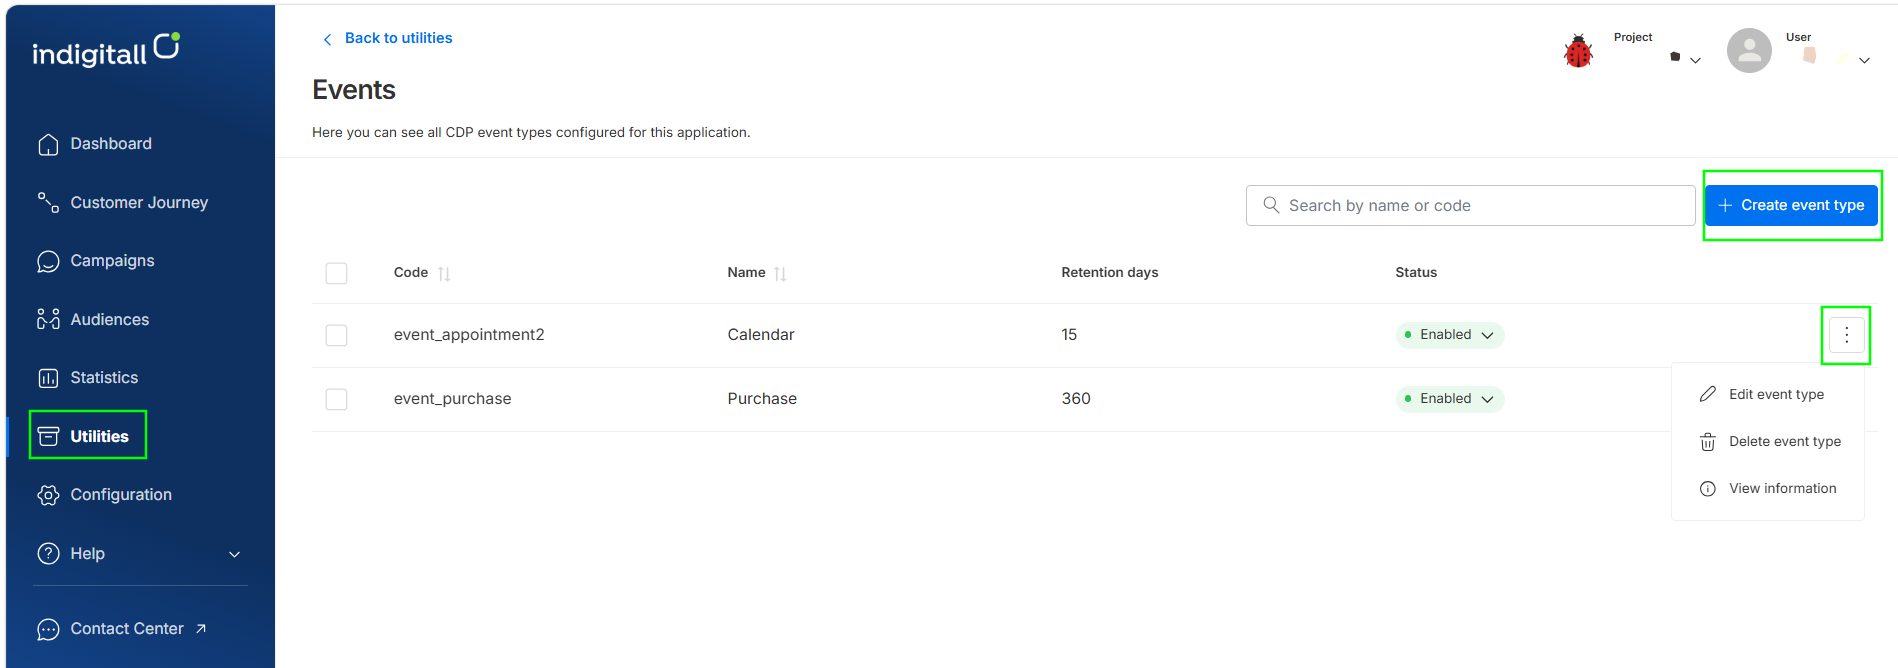
Creating an Event Type
-
On the Events page, click + Create event type.
-
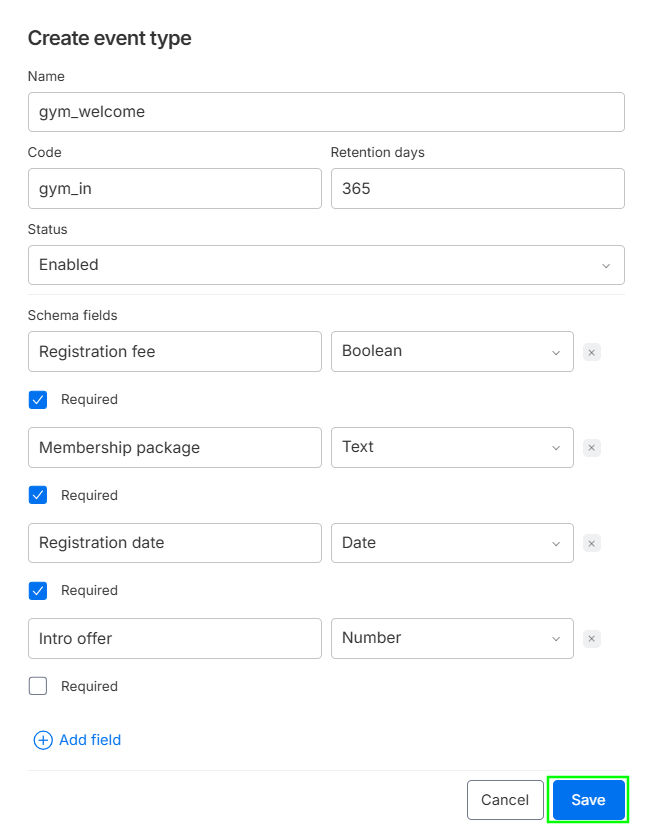
In the Create event type modal, configure the primary settings:
-
Name: Enter a descriptive, human-readable name (e.g., Purchase).
-
Code: Enter the programmatic identifier your system will send in the API/SDK payload (e.g., event_purchase). Important: The Code field cannot be modified after creation. Choose a standardized, permanent naming convention.
-
Retention days: Set the data retention window in days (e.g., 360). Expired event payloads are automatically purged.
-
Status: Set to Enabled to allow incoming data immediately, or Disabled to stage the schema without processing live events.
-
-
Under Schema fields, define the payload properties this event carries:
- Field Name: Enter the exact key name expected from your API payload (e.g., amount, order_id, purchase_date).
- Type: Select the appropriate data type
- Text: Alphanumeric strings, codes, or descriptive values (e.g., "Store_Downtown", "Electronics").
- Number: Integers or floating-point numerical values (e.g., 49.99, 3).
- Boolean: Binary logic values (true or false).
- Date: Standardized date and timestamp formats (ISO-8601) (e.g., "2026-11-04T15:30:00Z").
- Required: Check this box if the field is mandatory. Events missing this field in their incoming payload will be rejected.
-
To add more parameters, click + Add field. To remove an entry, click the × icon at the end of the row.
-
Click Create.
Once saved, the event type appears immediately in the table and becomes available for selection in journey triggers.
Managing Existing Event Types
Click the more options menu (⋮) at the end of any event row to access configuration actions:
- View information: To copy the Event Id.
- Edit event type: Modify configurable settings:
- Update the Name, Retention days, or Status.
- Add new schema fields, change data types, toggle the Required constraint, or remove unused attributes.
- Click Save to apply changes.
Note: The Code field remains locked and cannot be edited. If a code change is required, you must create a new event type and update your integration endpoints.
- Delete event type: Permanently remove the schema from your project.
Warning: Before deleting or disabling an event type, verify that it is not actively referenced by any running Customer Journey. Deleting or deactivating an active trigger event will disrupt connected automations and cause contact processing to halt.
Updated 10 minutes ago