
The indigitall plugin is a powerful, all-in-one solution designed to bridge the gap between your website and your customers through WhatsApp Chat and Web Push Notifications. To get started, you can choose the installation method that best fits your workflow: you can search for and install the plugin directly from the official WordPress Plugin Directory within your dashboard, or manually upload the provided .zip folder for a quick and customized setup. Both methods grant you full access to our suite of engagement tools in just a few clicks.
You can easily install the indigitall plugin directly from your WordPress Dashboard to integrate both WhatsApp Chat and Push Notifications into your site. Alternatively, you can download the plugin manually from this page.
Watch our Quick Guide Video below for a step-by-step walkthrough of the installation process.
Integration
- In the left side menu, click on Plugins> Add new
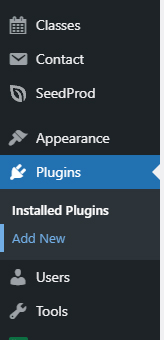
- Use the search bar at the top right to find our plugin by typing the word indigitall:
- Only need to click on Install Now.
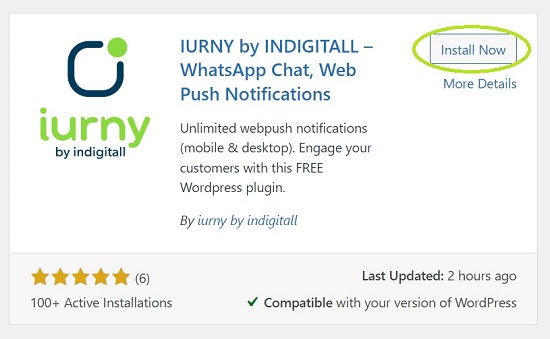
- After installing, please click on Activate.
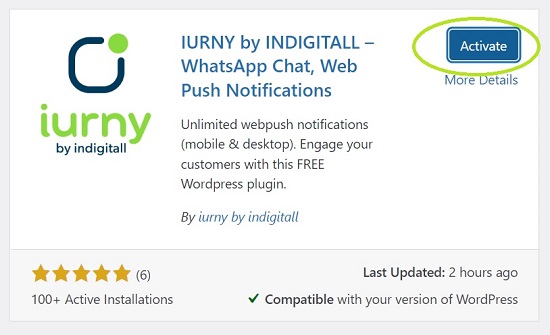
- Once the plugin is activated, it will appear in the plugin area. Find out and click on Settings.

Now you can enter into the principal area where you see two tabs, at the left area, to choose the service you want to activate: WhatsApp Chat and Web Push. As usual you can develop the web push campagins via indigitall console but WhatsApp Chat is only configurable from the iurny by indigitall plugin.
Web Push Features
If you click on Web Push tab and want to activate, you click on the screen and then a login pop up appears to write your user and password. Watch our video to see how to activate it:
Login / Create account
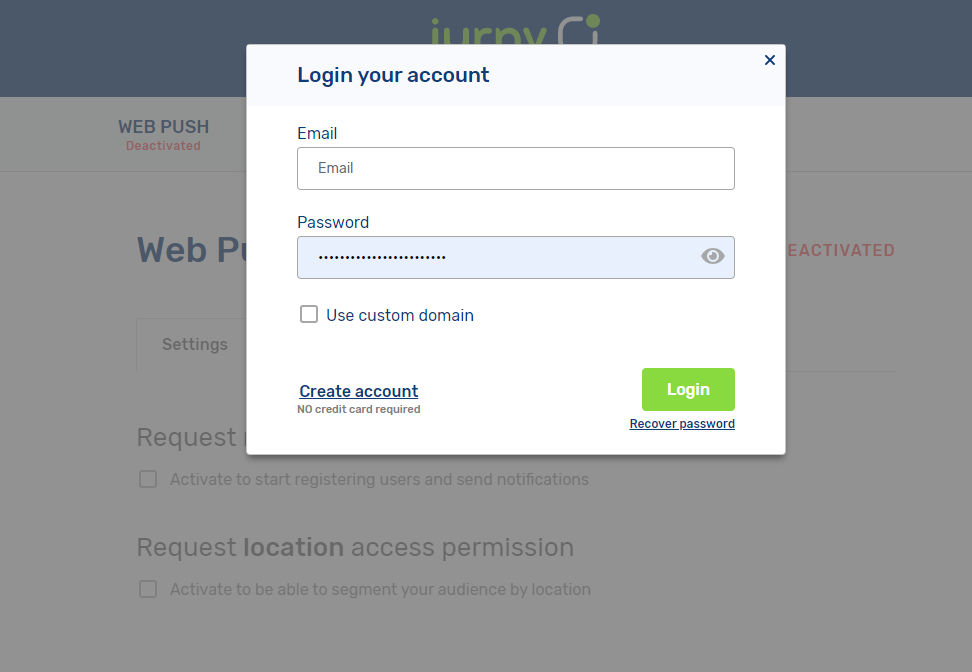
If you don't have it, you can create a FREE account by clicking on the Create account button. To create a free account, please fill your email and password. And pulse on Create Account.
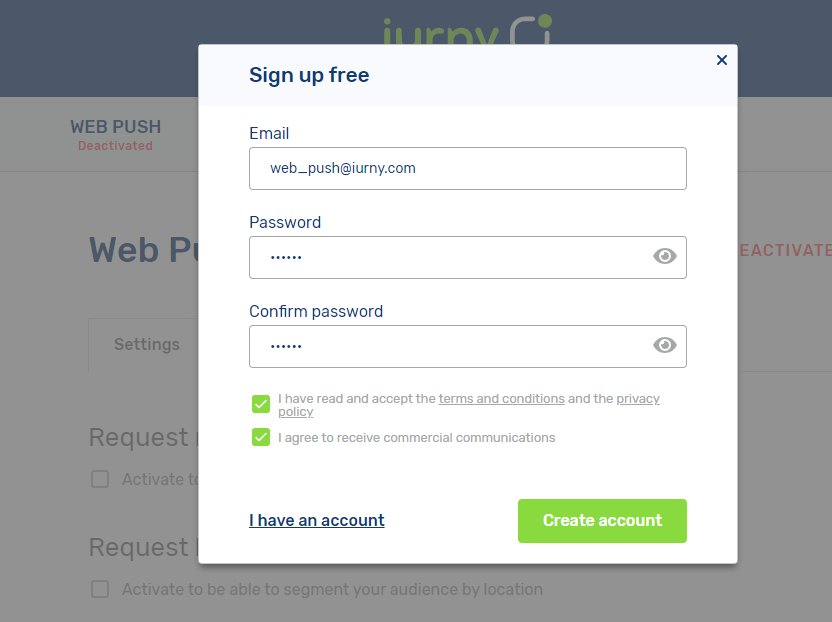
Now you have activated your web push service to send pushes. Congratulations!
Request notifications permission
It is necessary to click on the first option: Request notifications permission in the Web Push Customization area. If you don't click, then the service is deactivated. The second option, Request location access permission, is optional (we recommend its activation). If you activate it, then you can segment your audience by location. Please click here to see use cases.
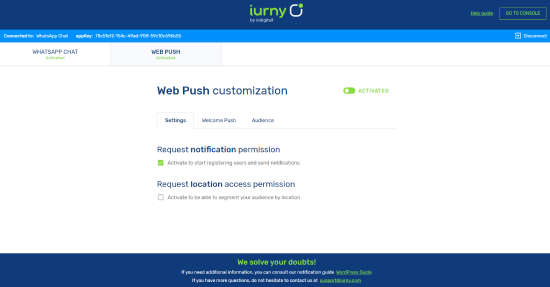
Check the integration
To confirm that everything works, follow these steps:
Access your website and see if the Show notifications box is displayed. Click Allow to accept them.
Open the developer console (F12 key) and go to the Console tab, you should see something like this:
[IND]Client:  Method: PUT
URL: https://device-api.indigitall.com/v1/device?appKey=xxxxxxxx-xxxx-xxxx-xxxx-xxxxxxxxxxxx&deviceId=xxxxxxxx-xxxx-xxxx-xxxx-xxxxxxxxxxxx
Request Body: {
  [...]
    "pushToken": "https://fcm.googleapis.com/fcm/send/xxxx",
    "browserPublicKey": "xxxxxxxxxxxxxxxxxxxxxxxxxxxxxxxxxxxx",
    "browserPrivateKey": "xxxxxxxxxxxx"
}
Response Code: 200
Response Message: OK
Response Body: {
    "deviceId": "xxxxxxxx-xxxx-xxxx-xxxx-xxxxxxxxxxxx",
    "enabled": true,
    "platform": "webpush"
}
Notice that Response Code has the value 200.
If everything is correct, congratulations, you can start sending notifications!
If you have had problems, please contact us here.
Some WordPress optimization plugins as Autoptimize block our plugin execution.If you have this problem, add the folder "wp-content/plugins/indigitall-web-push-notifications" to your exception list.
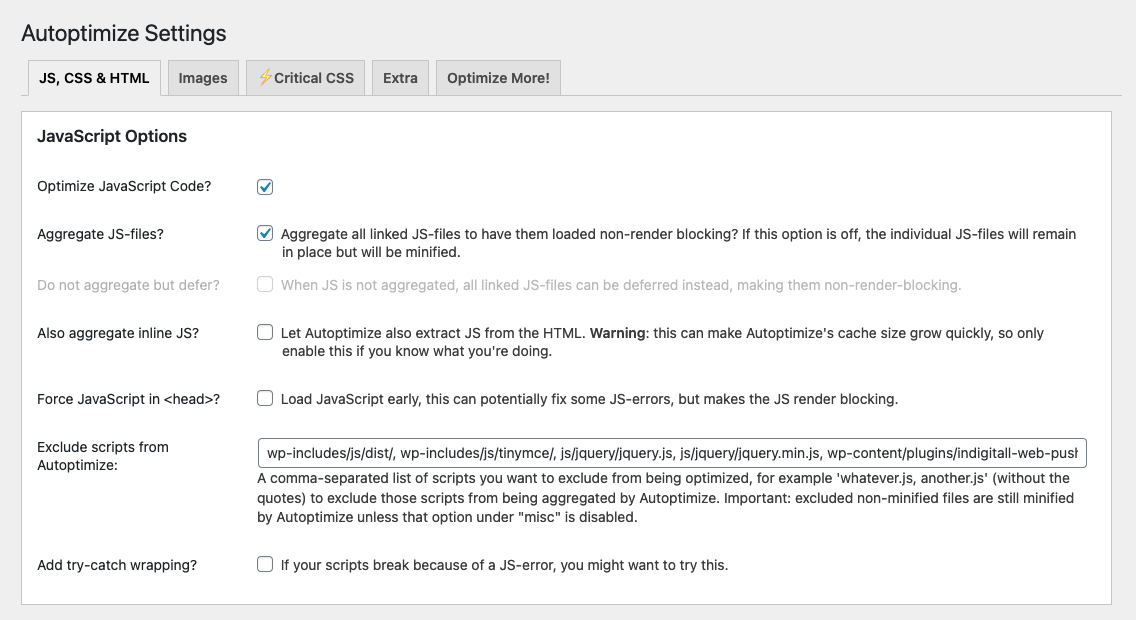
It is necessary to click on the first option: Request notifications permission. If you don't click, then the service is deactivated. The second option, Request location access permission, is optional (we recommend its activation). If you activate it, then you can segment your audience by location.
Upload and Install the Plugin
This guide will walk you through the manual installation of our WordPress plugin using the .zip file provided to you.
Prerequisites
Before starting, ensure you have:
- The indigitall-plugin.zip file saved on your computer.
- Administrative access to your WordPress Dashboard.
- Your indigitall App Key (available in the indigitall console).
Step 1: Upload and Install the Plugin
Since you have the plugin file in a compressed format (.zip), follow these steps to upload it directly to your WordPress site:
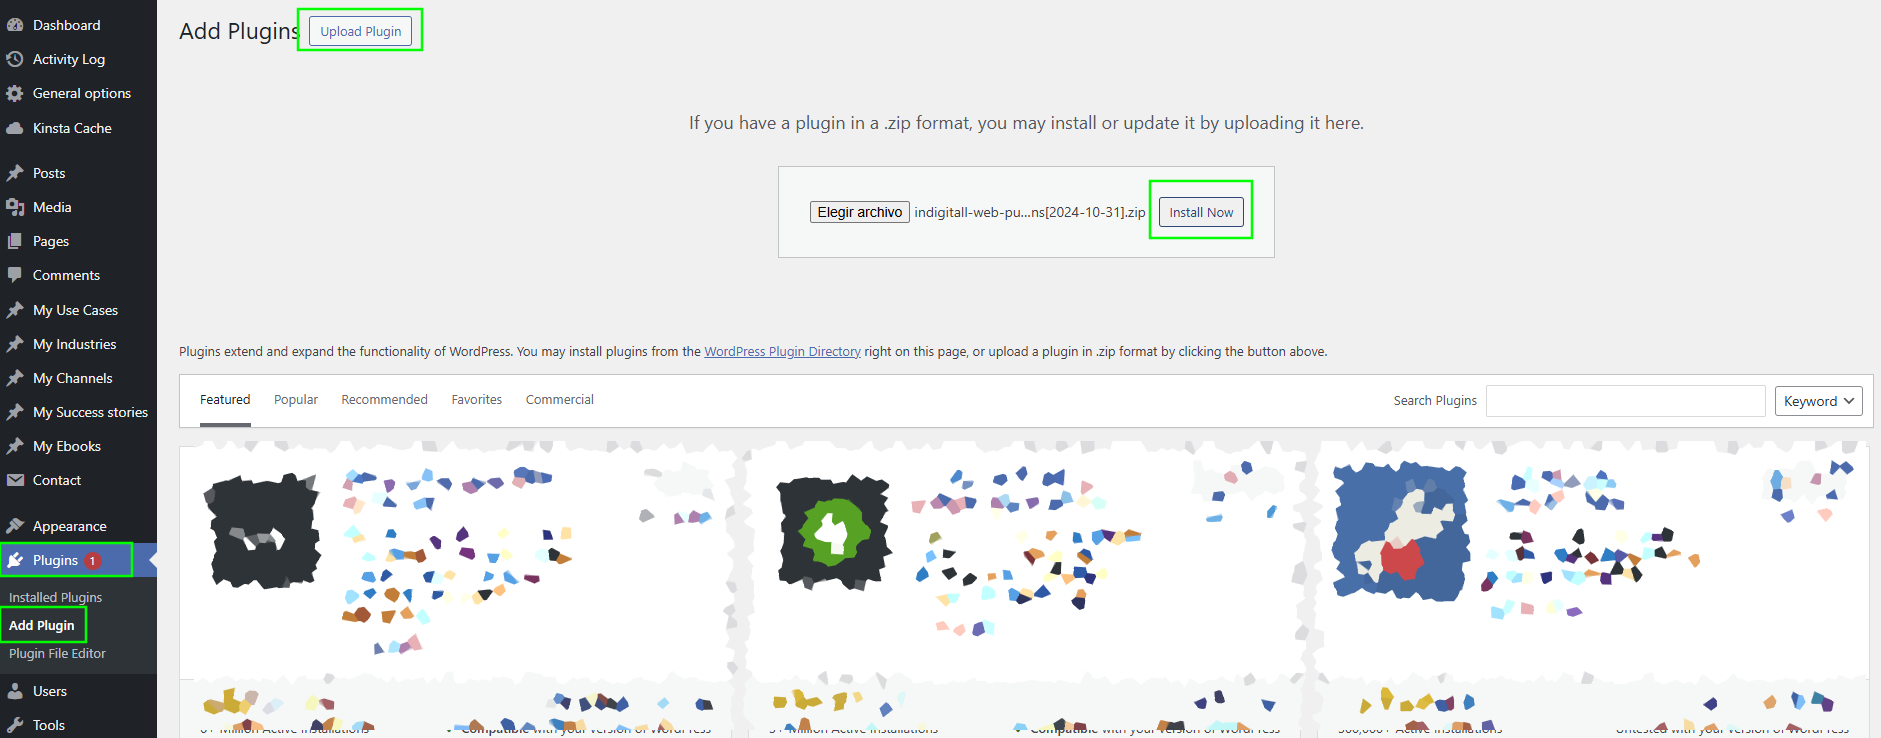
- Log in to your WordPress Admin Dashboard.
- In the left-hand menu, navigate to Plugins > Add New.
- At the top of the page, click the Upload Plugin button.
- Click Choose File and select the indigitall-plugin.zip file from your local storage.
- Click Install Now.
- Once the installation is complete, click the Activate Plugin button.
Step 2: Initial Configuration
After activation, a new menu labeled indigitall will appear in your WordPress sidebar.
-
Click on the indigitall menu.
-
To complete the integration, you will need your unique App Key. You can find this credential within the indigitall console by navigating to your Project Settings and selecting the General tab.
For a detailed visual guide on where to find your project credentials, please see this page.
-
Paste your key into the designated field and click Save Settings.
Step 3: Enabling Features
Our plugin allows you to manage multiple engagement channels from a single interface:
- Web Push Notifications: Enable this toggle to start collecting subscribers and sending browser notifications. You can configure the appearance of the permission prompt directly from the settings tab. For a full breakdown of customization options, please refer to the Web Push Features section above.
- WhatsApp Chat: Enable the Chat feature to add a floating WhatsApp button to your site. You can customize the phone number, the welcome message, and the button's position. For a full guide on customizing your chat interface, visit this page.
Step 4: Verification
To ensure everything is working correctly:
- Open your website in an Incognito/Private window.
- Verify that the WhatsApp button appears (if enabled) and check if the browser asks for permission to "Show Notifications" (if Web Push is enabled).
Troubleshooting & Support
- File Size Errors: If WordPress prevents the upload due to file size limits, please contact your hosting provider to increase the upload_max_filesize in your PHP configuration.
- API Connection: If the App Key is not validating, double-check that there are no extra spaces before or after the key when pasting it.