
Filter
The Combined Filter is a powerful tool that allows you to segment your contacts with precision. Depending on the logic you choose, you can either create a hyper-specific niche or cast a wide net for your campaign.
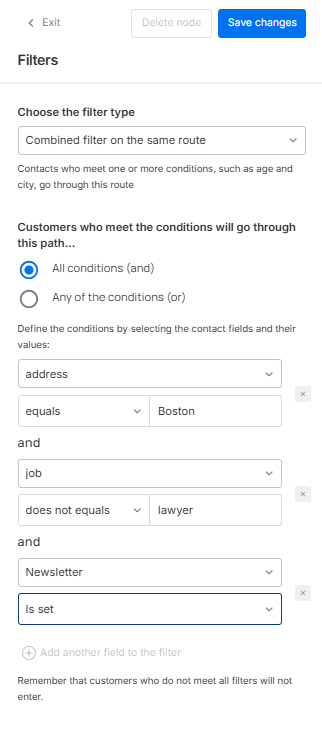
1. Harnessing "AND" Logic (Narrowing Your Audience)
By selecting All conditions (and), you are creating a restrictive filter. A customer must meet every single criteria you list to qualify.
- Best for: Highly personalized campaigns where you only want to target a very specific profile (e.g., Customers in the "UK" AND who have a "VIP" status).
- Scalability: You can add as many fields as you want using the "Add another field" button. The more you add, the more exclusive your audience becomes.
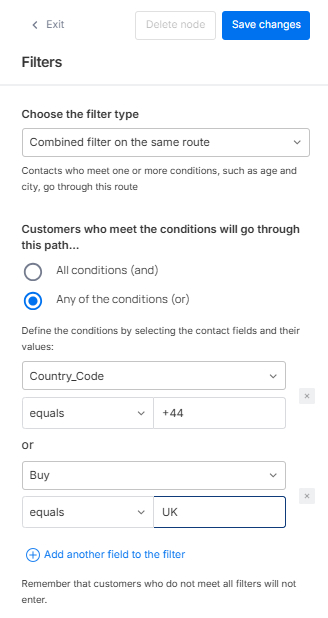
2. Harnessing "OR" Logic (Broadening Your Audience)
As shown in the screenshot below, selecting any of the conditions (or) allows for a much more inclusive approach. A customer only needs to match one of the listed rules to enter the route.
- Best for: Reaching broader audiences. If a customer matches either the country code "+44" OR the buy location "UK," they are in.
- Infinite Flexibility: Just like with the AND logic, there is no limit to how many fields you can add. This allows you to stack different identifiers (like multiple regions, interests, or behaviors) to ensure no potential customer is left behind.
3. Filter Operators
Building on the Combined Filter logic, the dropdown operators automatically adapt based on the field type (whether it's string, a number, or a date) allowing you to define exactly how the system evaluates your contact data with total precision.
Customer Field
Before choosing the filters, you need to create them on the Customer Fields area: Tools/Customer Fields. Go to Audience page for more info.
1. Click New
2. Write a name and choose the type of your element:
- Number: for numbers (phone, age...)
- String: a sequence of characters (name, country...)
- Datetime: for datetime (birthday, last purchase...)
3. It is created and then it appears on the List of Customer Field.
4. When you want to delete one of them, only need click the specific field, or some of them, and pulse Delete (button in red).

After that, you can upload a .CSV document clicking on the icon of the right side with all your data. Immediately the data are synchronized.
A .CSV file is a document where you can save all your contacts and their corresponding customer fields. Download the example here.
- customerId: A unique identifier for each user
- fieldName: The field that you need to add on the customer field area
- fieldValue: The corresponding value for each customer field


How does it sync with your CRM?
We have a module to create the existing fields in your CRM and thus achieve a perfect integration. You need to add the same fields on this area: Tools/Customer Fields.
- Step 1: The first step is the initial loading of data by uploading a file in CSV format into our platform.
- Step 2: Automatic synchronization: Once this first data load is done, every time there is a new user or data update in your CRM, an automatic synchronization will be carried out on our platform thus avoiding any erroneous duplication.
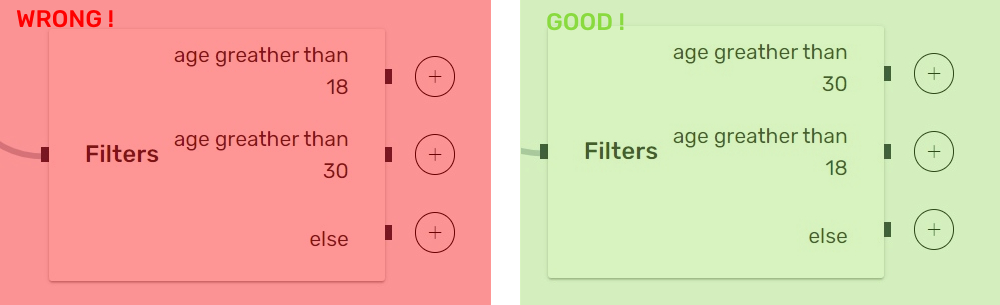
Practical Case
To be sure you do correctly the filter, you need focus on what you need and think about the way to communicate. For example, if you need a filter for people over 18 years and over 30 years, fisrt you need to choose the people over 30 years and secondly the people over 18 years.
If you put the filter over 18 years as a first step, then you won´t receive nothing in the second step because 30 is more than 18 so automatically this segment goes to else.
Birthday Filter
This filter is specifically designed for use with dates (e.g., birthdays, service start dates, contract end dates, etc.). It has been named "Birthday" because it represents a relevant and widely used example across various industries.
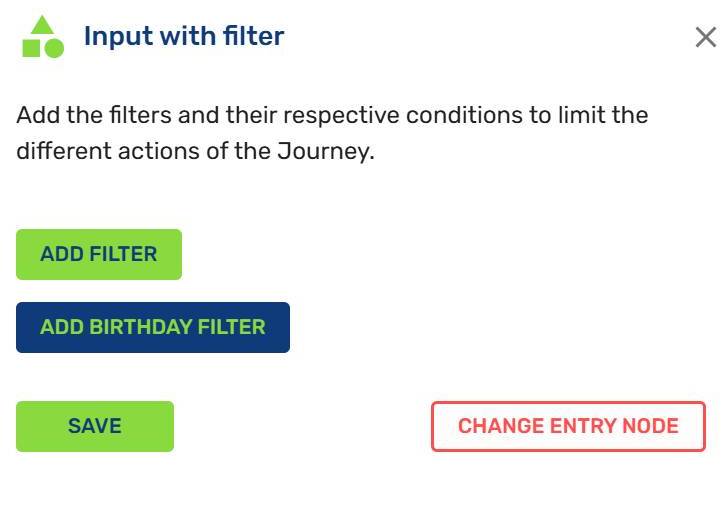
When you want to use a date as a selector, click on the Add Birthday Filter. Then, you'll need to choose the customer field, which must have been previously created in this section with the datetime type. Click on the selector and choose the field you want (e.g., End_of_subscription). Below, you’ll find an option to add a specification for sending the communication either days before or after the date associated with the field (for instance, as shown in the image below, 7 days before the subscription end date).

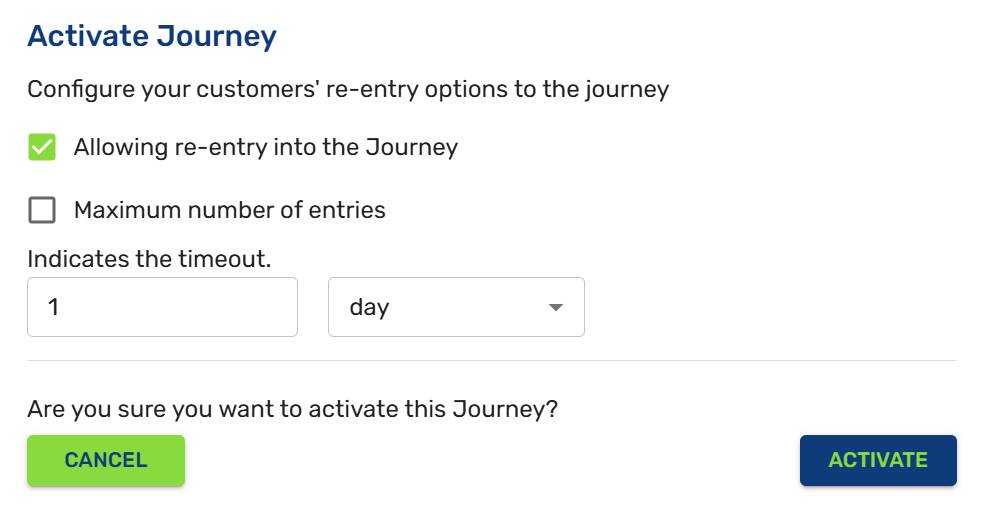
Once the customer journey is set up, click the Activate button. It’s essential to consider the following options:
- Allowing re-entry into the Journey: If enabled, the system will check for conditions every ten minutes. For birthdays, you should obviously leave it enabled so the system checks daily whose birthday it is (it's also very important to correctly set the timeout in the third option).
- Maximum number of entries: Define how many times you want the customer journey to repeat. If left blank, it will repeat indefinitely (e.g., for birthdays). For instance, if you’re running a week-long discount campaign, you might want to send one promotion daily, so you would set this value to 7.
- Indicates the timeout (minutes/hours/days): This defines how often the system re-checks the conditions. For date-related journeys, you should set this to 1 day to avoid sending multiple notifications on the same day.
TimeoutRemember to set a 1-day in filters related to date compliance. Otherwise, they will receive the same message multiple times in the same day.
Updated 5 months ago