
HubSpot
The indigitall connector integrates seamlessly with HubSpot, allowing you to add App Push, Web Push, SMS, and WhatsApp actions directly into your Workflows. By expanding your omnichannel capabilities, you can reach your contacts exactly where they are most active.
Follow the onboarding steps below to connect your indigitall and HubSpot accounts and start automating your campaigns.
Step 1: Connect the App
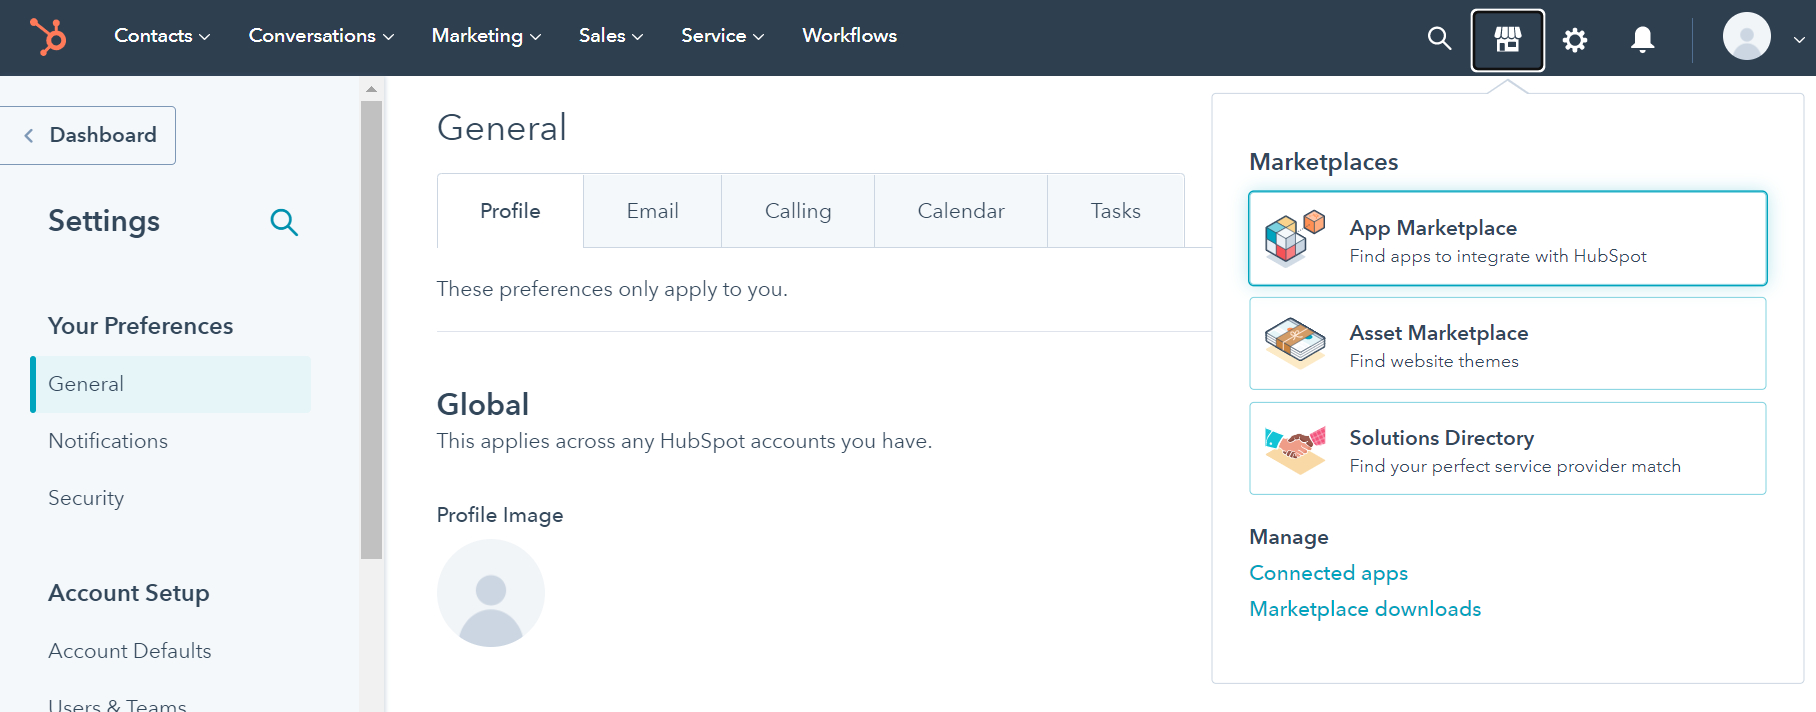
Go to Market icon and click on App Marketplace. Feel free to reach out to our support team or your account manager for the direct link to set up the integration.
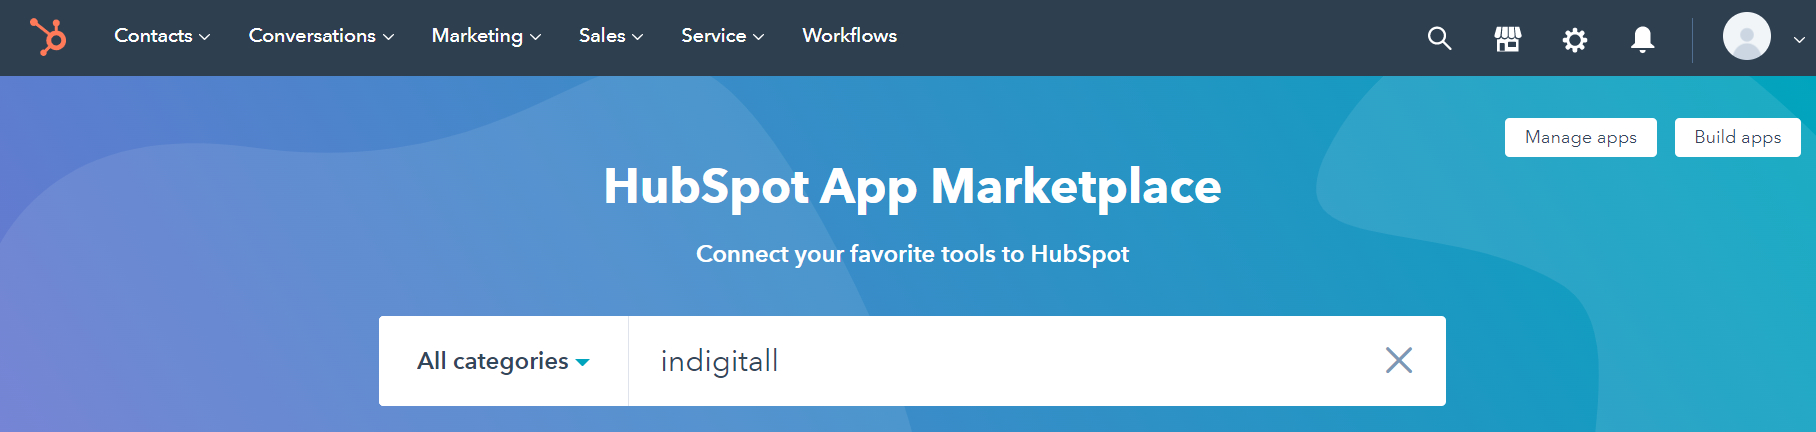
On the searcher, you can looking for indigitall.
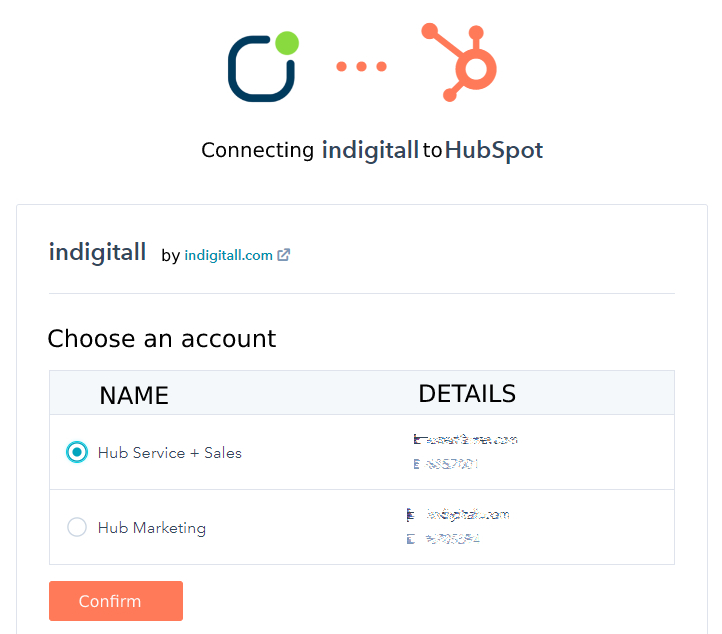
An administrator must initiate the installation for the desired business unit or account:
- Review the requested permissions on the connection screen.
- Clicking on Manage apps button, you can see what connectors you have integrated. Only it is necessary to click and to choose the account to integrate as the image below shows:
Grant HubSpot Permissions
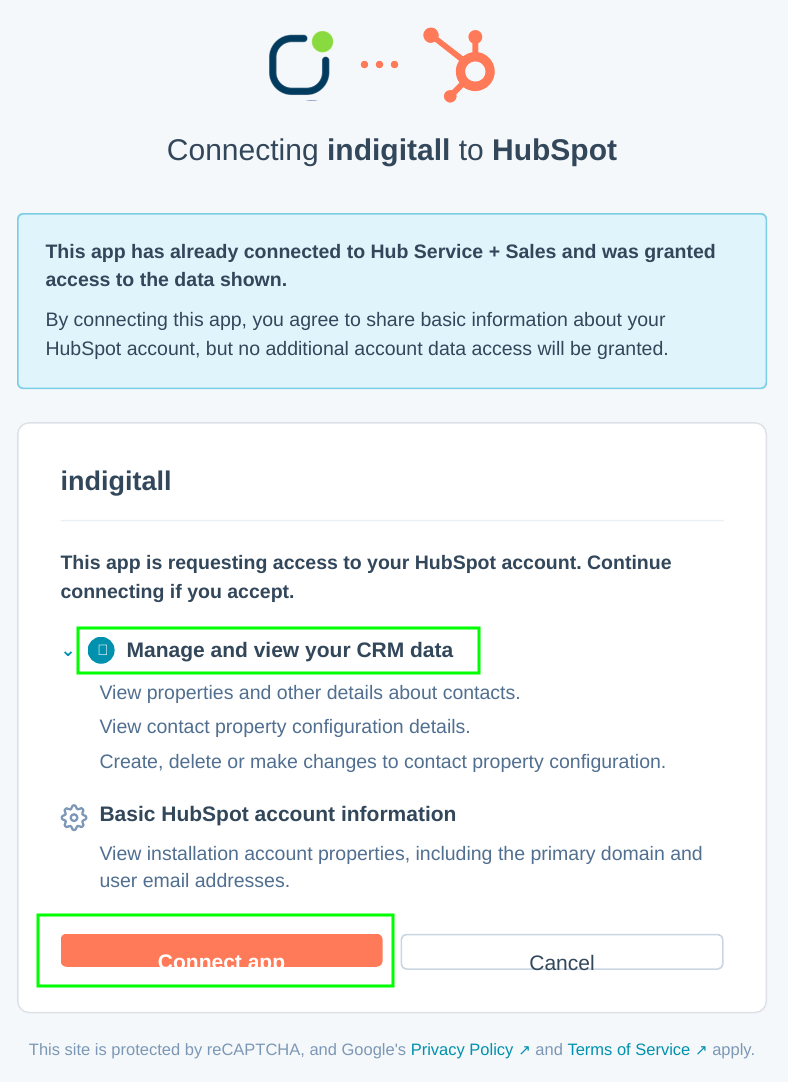
When you initiate the integration, HubSpot will display a permission authorization screen to connect indigitall to your portal.
- Review Requested Permissions: The integration requires specific access to function properly. It will request permission to Manage and view your CRM data (allowing the connector to view contact properties and details necessary for targeting your workflows).
- Authorize the Connection: After reviewing the permissions, click the orange Connect app button at the bottom left of the window to proceed.
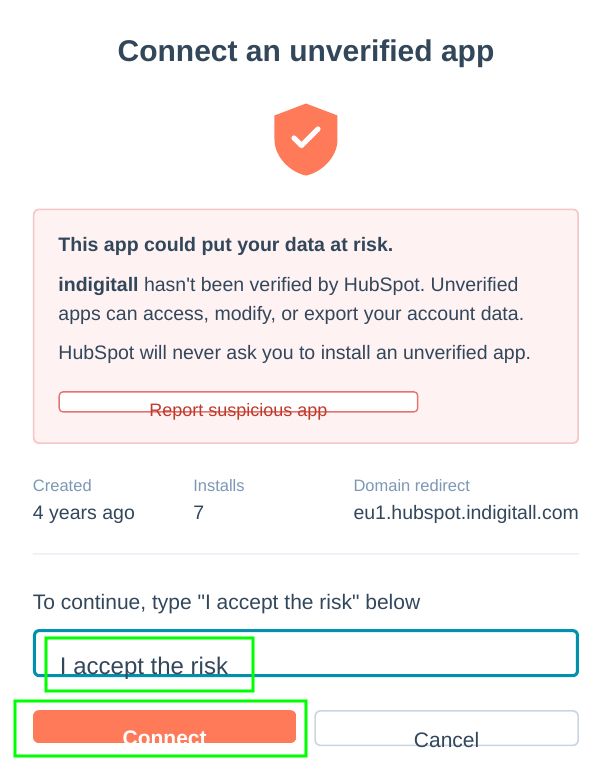
Accept the Unverified App Prompt
Depending on your HubSpot portal's configuration, you may see a warning indicating that the application is unverified.
- To bypass this, type the exact confirmation phrase requested by HubSpot into the text box: I accept the risk.
- Click the orange Connect button.
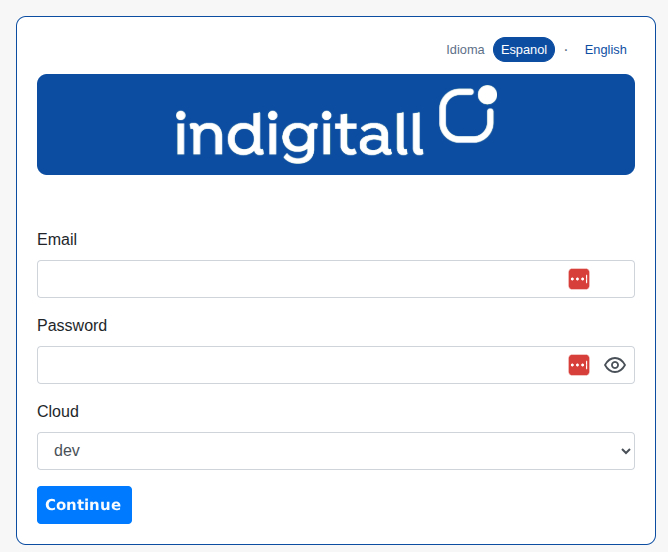
Step 2: Log in to indigitall
You will be redirected to the indigitall login page.
- Enter your administrator Email and Password.
- Select the appropriate Cloud environment from the dropdown menu.
- Click Continue to finalize the integration.
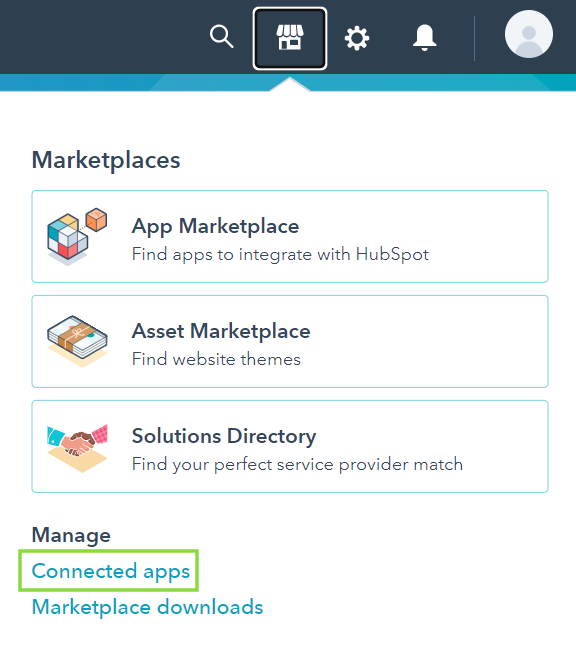
Choosing an indigitall Action in HubSpot Workflows
Once the integration setup is complete, all available indigitall messaging capabilities become accessible directly within your HubSpot Workflow builder.
You can see and manage your tools from Market / Connected apps:
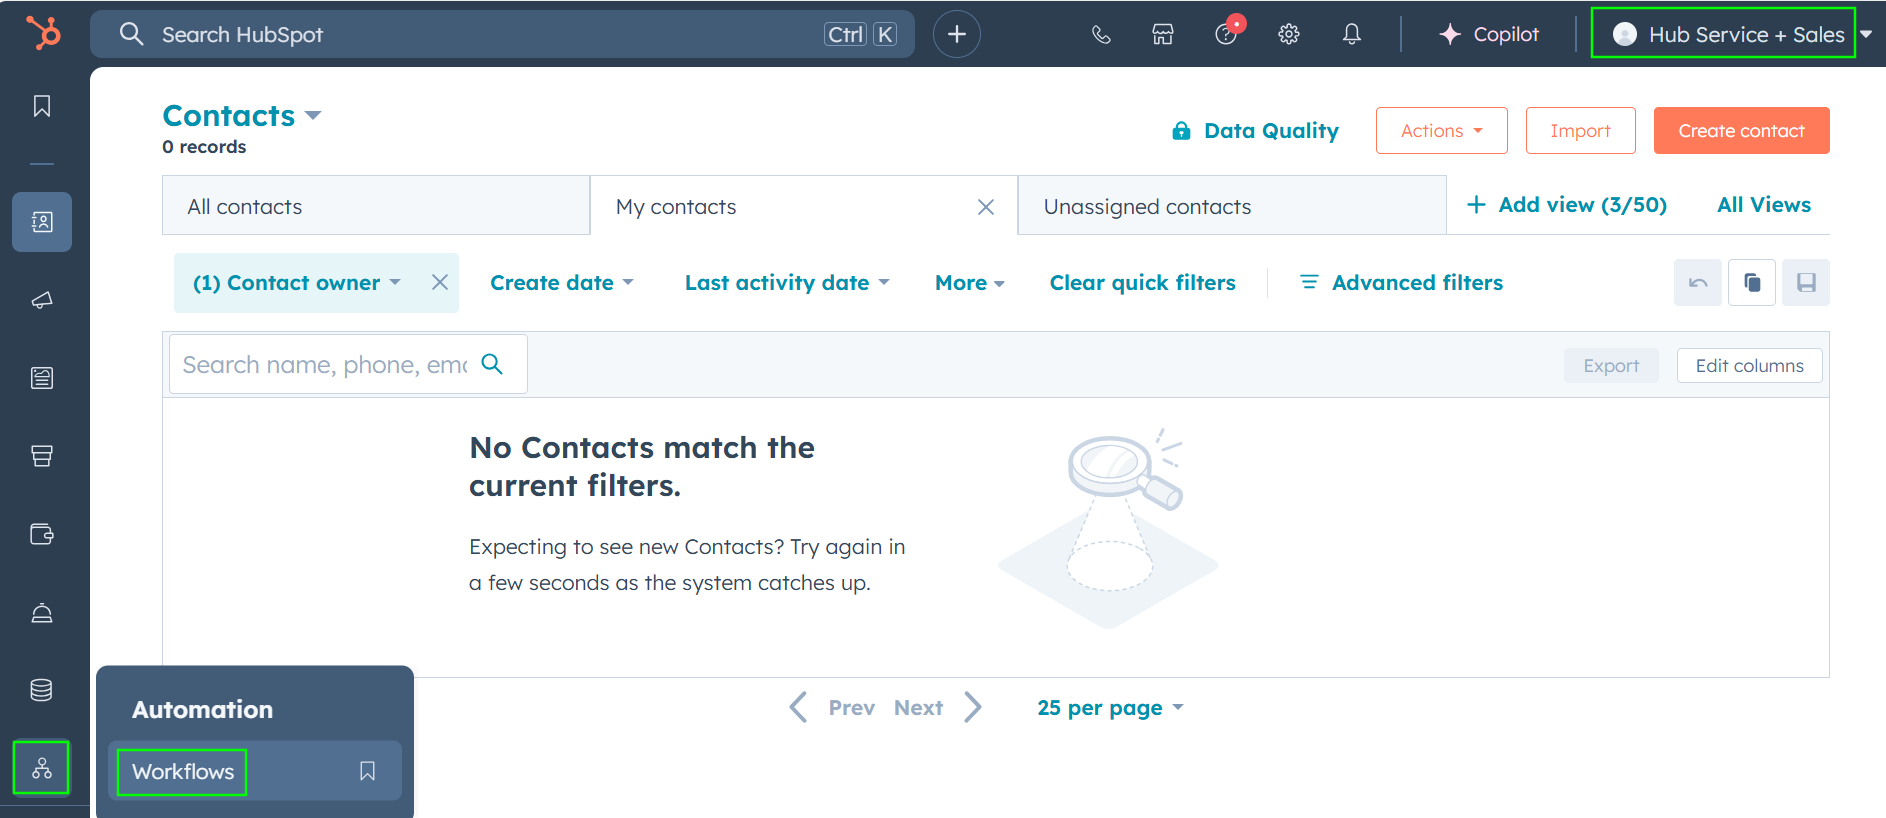
Starting a workflow
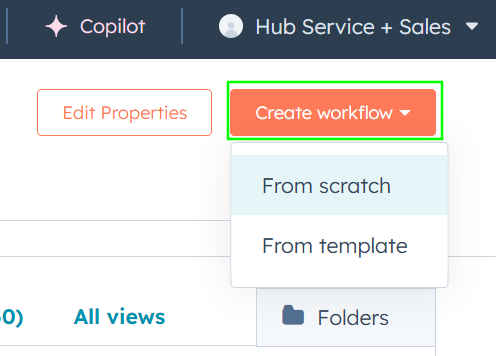
Go to the left-hand menu and click on the icon with three little circles, then click on Workflow. Next, in the top menu, a button will appear to create a workflow from scratch or from a template.
Then, build your workflow as you normally would. Once you have configured your options, click the Next button in the top-right corner. You can add indigitall actions (Push, WhatsApp, or SMS) at any step of your workflow sequence.
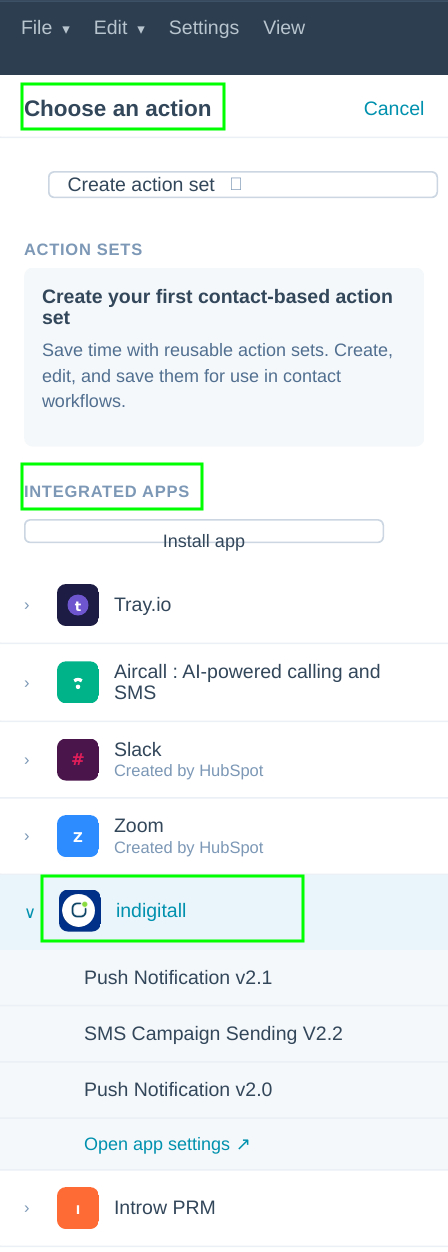
- The Choose an action sidebar panel will appear on the right side of your screen.
- Scroll down to the Integrated Apps section and click on indigitall to expand the dropdown menu.
- From this menu, you can select the specific indigitall connector or action you wish to utilize for your automated customer journey:
Push Notifications
Click on the Push Notification cell to go to another screen where you can fill in the fields for your previously created push campaign in the console. Complete all the required information and click the Save button in the top-right corner.
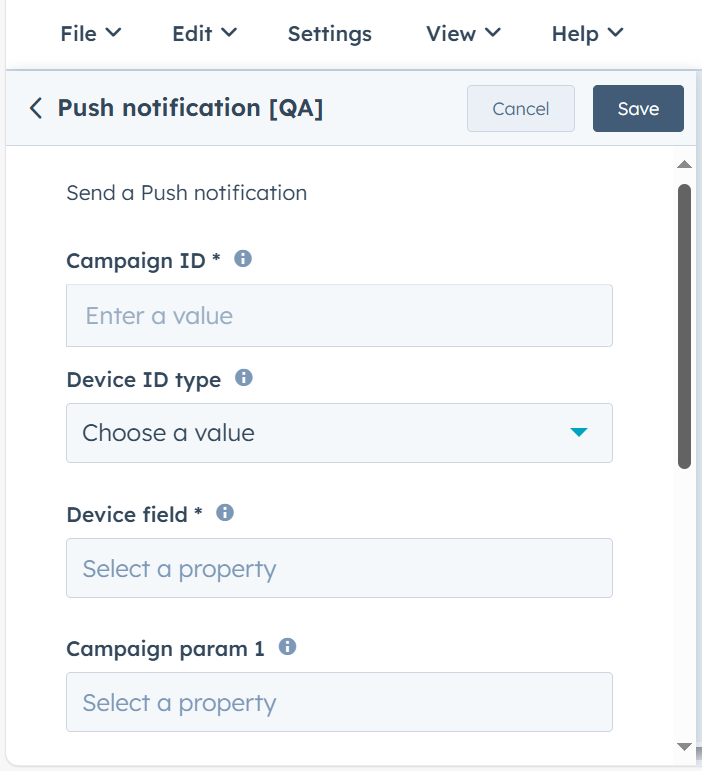
Campaign ID:
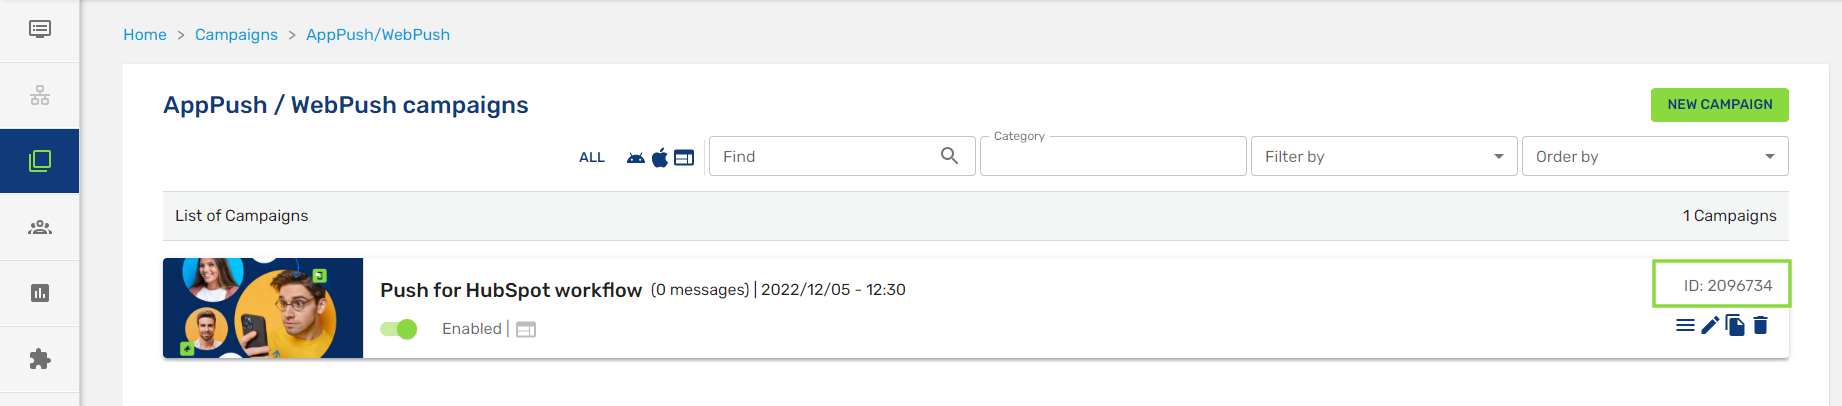
The campaign ID is the identifier for the push you want to use. Previously you have created and saved it on the indigitall console. Go to Campaigns>AppPush / WebPush and copy the ID of the selected campaign to use.
- Device ID Type:
Now you can choose the type of Device ID between deviceId and externalCode. We recommend the use of externalCode for a quick and easy integration method (the integration will be more complicated if you choose deviceId).
The externalCode is the encrypted identifier that you have selected to identify each user. Go to the data synchronization page to learn more.
- Device field:
According to our selected trigger, we choose the device field that the system will take into account to send the push notifications. For example, as we have chosen the city as a trigger, we choose the field city to know what users are living in London.
- Campaign param 1...:
In this field and the following ones, enter the names of the variable fields used in your campaign. Fill in only the ones that are necessary.
Then you can click on Save button below.
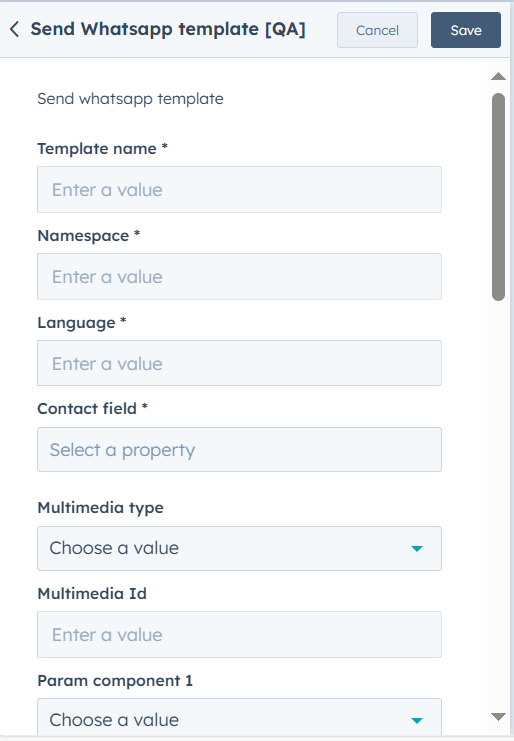
WhatsApp messages
Go to the WhatsApp campaign in the console and fill in all the required fields with the correct data copied from that campaign. In the "Multimedia Type" section, select between Image, Video, or Document.
Remember that if you’ve used variables, you must use the "Param component 1" field and the following ones to ensure they display correctly.
SMS
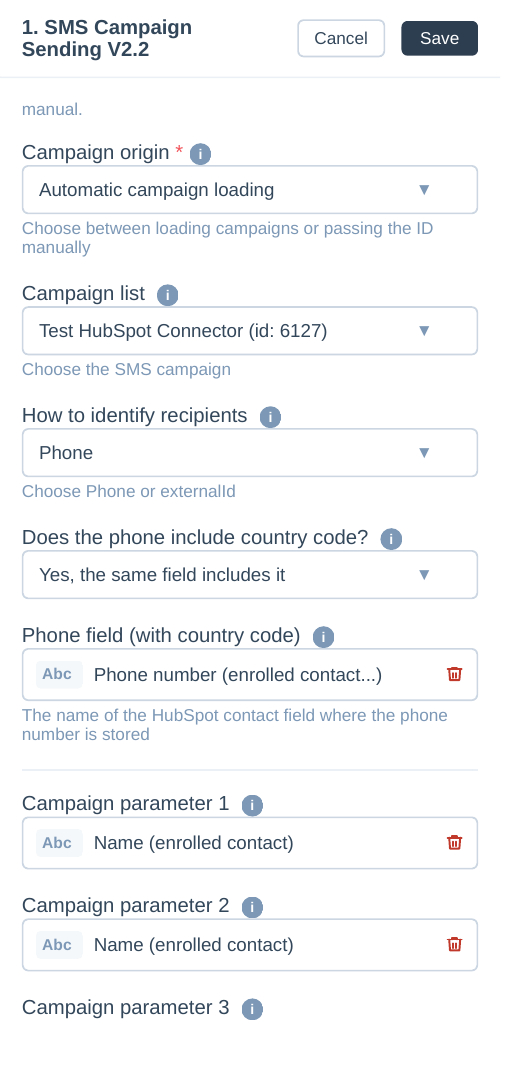
Fill out the action details using the configuration panel. Here is a breakdown of the required fields:
- Campaign Origin: Choose how to load the campaigns. Select Automatic campaign load to pull existing campaigns directly from indigitall, or manually pass the ID.
- Campaign List: Select the specific SMS campaign you want to trigger from the dropdown menu.
- How to identify recipients: Choose the identifier used to route the message. You will typically select Phone.
- Does the phone include a country code? Specify whether the phone numbers in your database already include the country prefix (e.g. Yes, it's included in the same field).
- Phone field: Select the specific HubSpot contact property that stores the recipient's phone number (e.g., Phone number or Mobile phone number).
- Campaign Parameters: If your SMS template in indigitall uses variables (like a contact's first name), use these fields to map them. Select the corresponding HubSpot contact properties in order (e.g., map Parameter 1 to First Name, Parameter 2 to Last Name, etc.) so they dynamically populate the message.
Once configured, click Save at the top right to apply the action to your workflow.
Review and publish
Once your workflow is completed, you can finish it clicking, at the top right area, on the Review and publish button.

NoteYou can send Push notifications, WhatsApp messages, and SMS at any step of your workflow.
You can visit our Customer Journey area to discover the indigitall journeys using all digital channels from a single console. Don´t miss out!
Troubleshooting
You might see logs indicating missing parameters, similar to the example shown below.
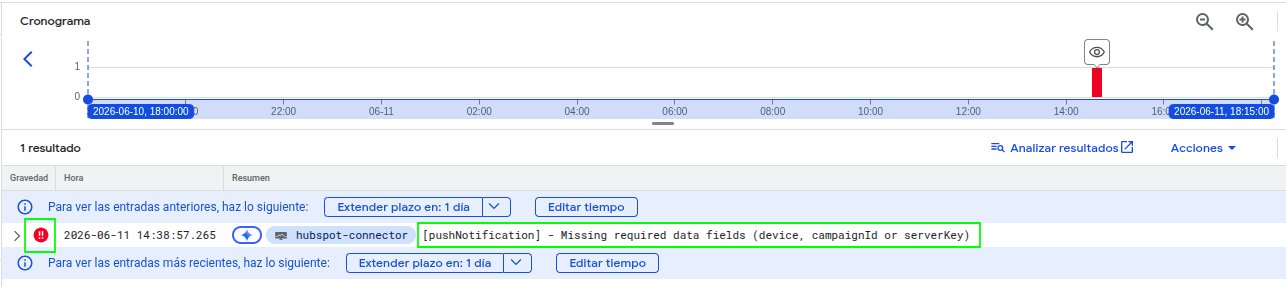
First, check the log's severity level to understand the impact:
-
Missing Core Delivery Parameters (e.g., serverKey, campaignId) ➔ Type: ERROR
Impact: The delivery process cannot run. Action is required.
-
Missing Individual User Parameters (e.g., device, phone) ➔ Type: WARNING
Impact: The specific user will be skipped, but the integration keeps running.
How to Resolve It
- Expand the log entry in your console to view the complete error payload.
- Check which specific field is missing inside the brackets.
- Add the missing field or mapping in your HubSpot configuration or payload to ensure correct data sync.
Updated about 1 month ago