
Managing Push
API
Go to Campaigns >AppPush/WebPush.

Campaign Management Overview
This section displays a comprehensive list of all campaigns created to date. Each entry includes the following details:
- Name: The title of the campaign. You can sort this list alphabetically by clicking the double arrow icon.
- Creation: The date the campaign was created. Click the arrow icons to sort by "Newest" or "Oldest."
- Campaign Type: Specifies the platform, such as Web or App (Android and iOS).
- Sending Type: Indicates the campaign category, including: Welcome, Immediate/Scheduled, Geofencing, Loyalty, Retargeting, Recurring, and Journey.
- Status: Shows the current state of the campaign:
- Disabled: The campaign is inactive.
- Enabled: The campaign is currently active.
- In Use: The campaign is active within the Journey category.
Action Button
On the right side of each campaign row, you will find three action icons:
- Pencil Icon: Click to edit the campaign.
- Statistics Icon: Click to view analytics and performance data.
- Three Dots: Click to copy the campaign ID, clone or delete the campaign.
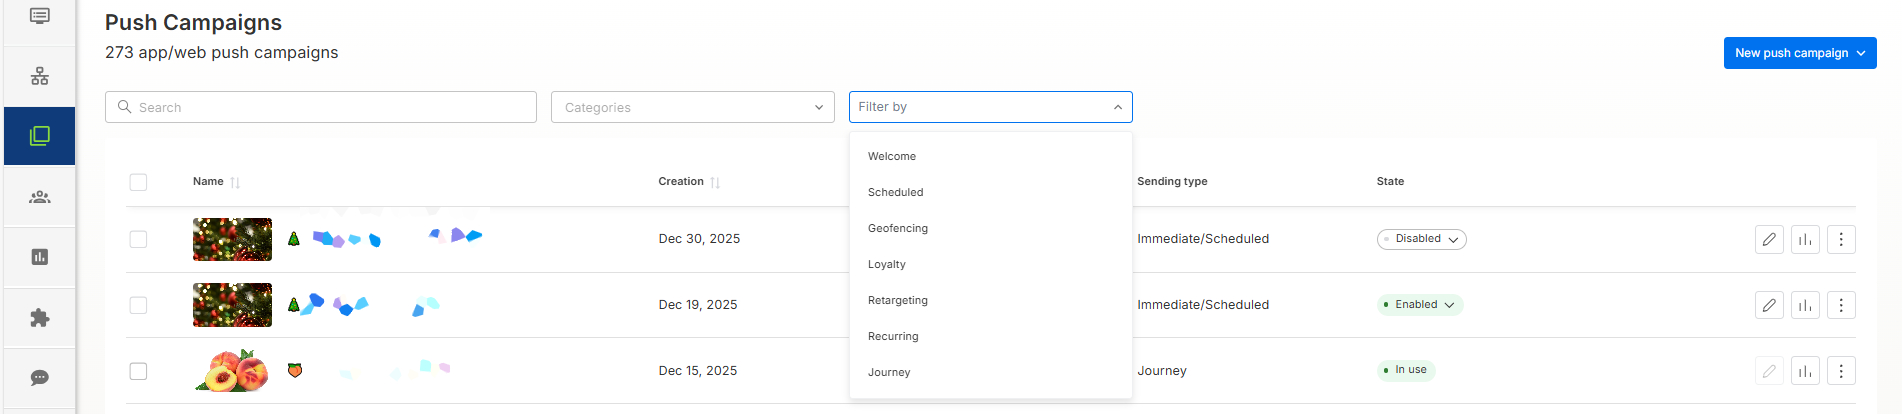
Top Menu: Search and Filters
The top navigation bar allows you to quickly locate specific campaigns:
- Search Bar: Search for a campaign by typing its name.
- Categories: Filter your view by specific organizational categories.
- Campaign Type Filter: Narrow down results by type (Welcome, Immediate/Scheduled, Geofencing, Loyalty, Retargeting, Recurring, or Journey).
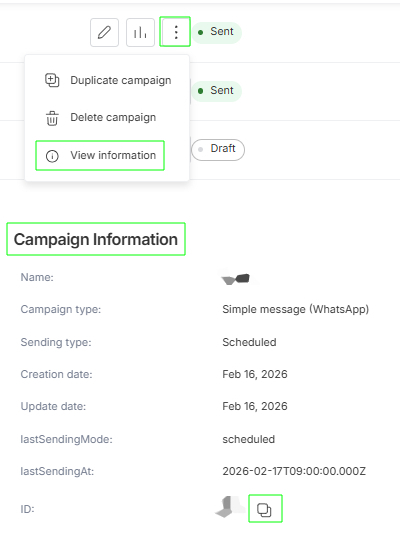
How can I find the Campaign ID?
If you need to retrieve a specific Campaign ID for your records or API integrations, locate the campaign you are interested in within your dashboard. On the right-hand side of the campaign row, click the three vertical dots (icon) to open the action menu.
From the dropdown menu, select the View information option. A details panel will appear, displaying comprehensive data about your campaign or customer journey, including the name, type, and creation date. You will find the ID at the very bottom of this list. You can easily copy it by clicking the "copy" icon next to the ID string.
Alternatively, you can locate the ID by simply clicking on the campaign to open it. Look at your browser's address bar; the number appearing at the end of the URL is the Campaign ID.

Updated 5 months ago