
Create a Journey
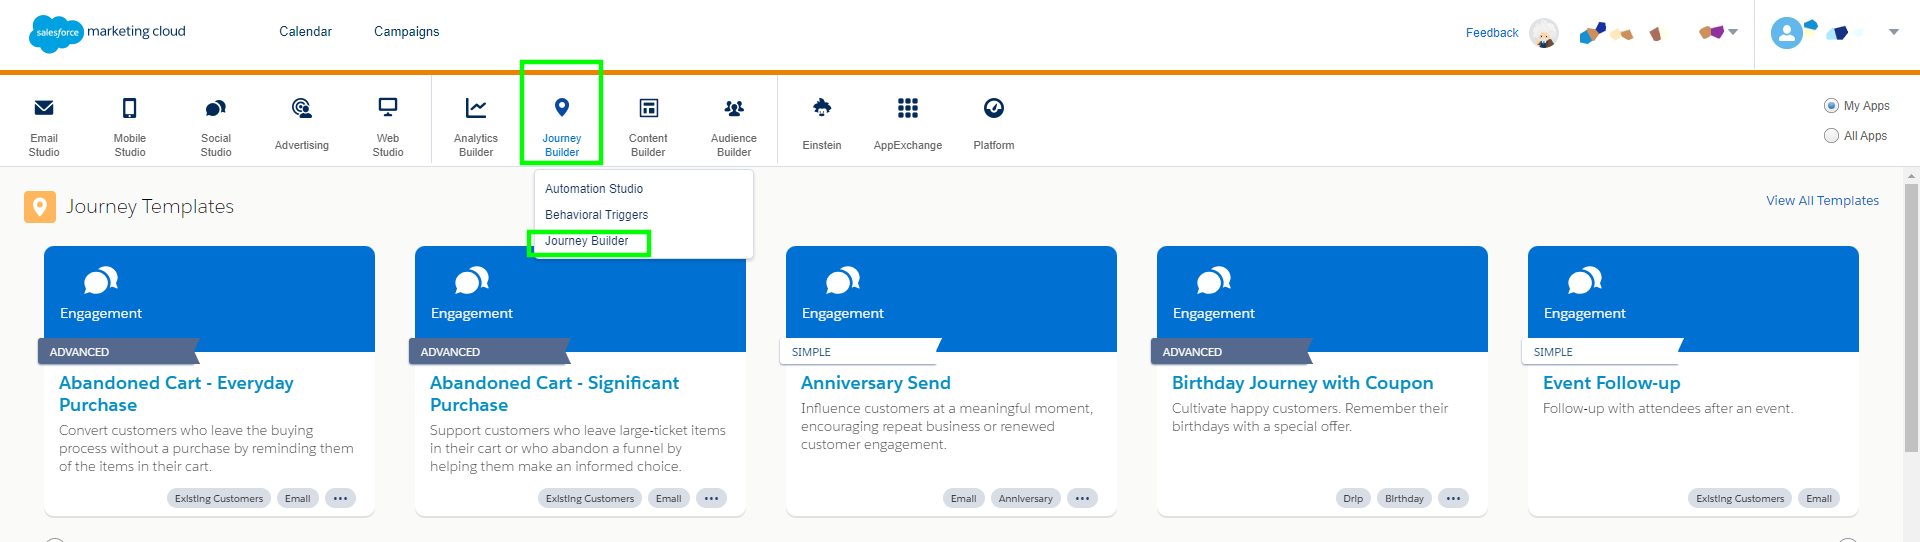
To create a Journey inside the Salesforce Marketing Cloud, login into your account and go to the Journey Builder / Journey Builder on the top menu.
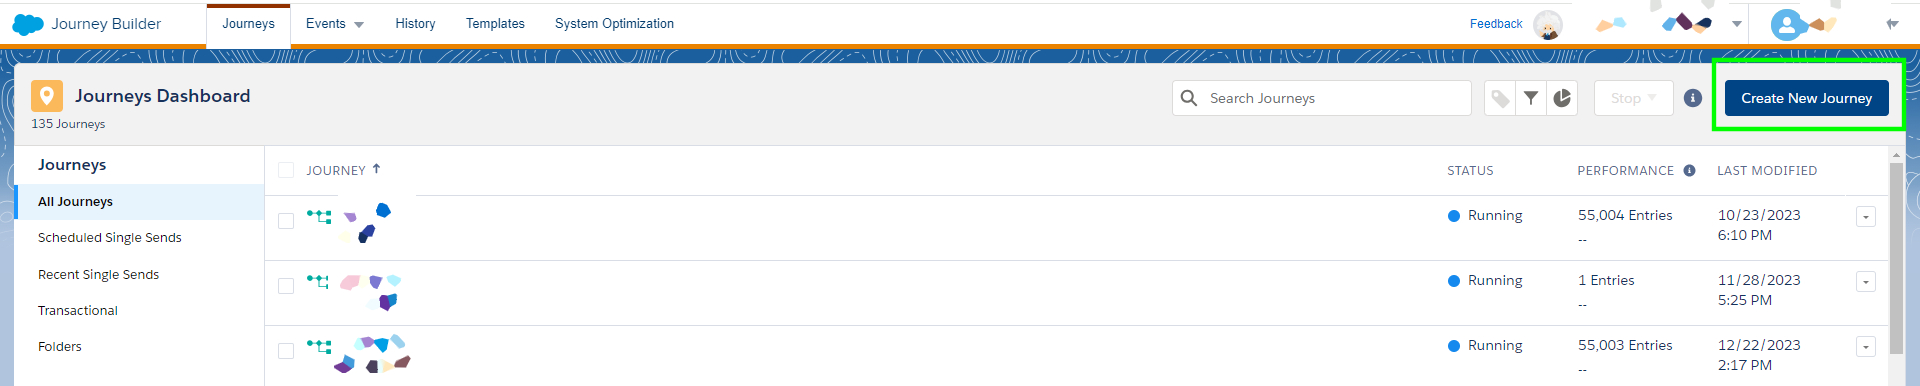
Then the Journeys Dashboard appears. You can search a journey to edit or simply to create a new one clicking on Create New Journey, blue button at the top right area.
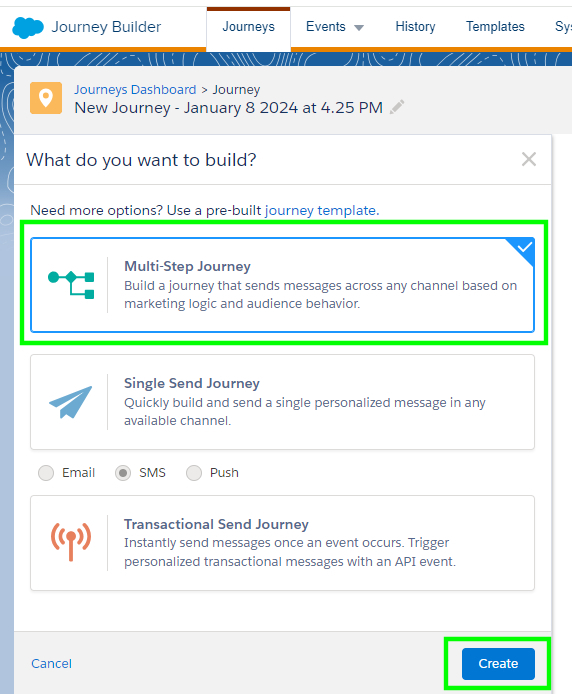
The next step is choosing the type of the journey template. To use the indigitall connectors, please click on Multi-Step Journey.
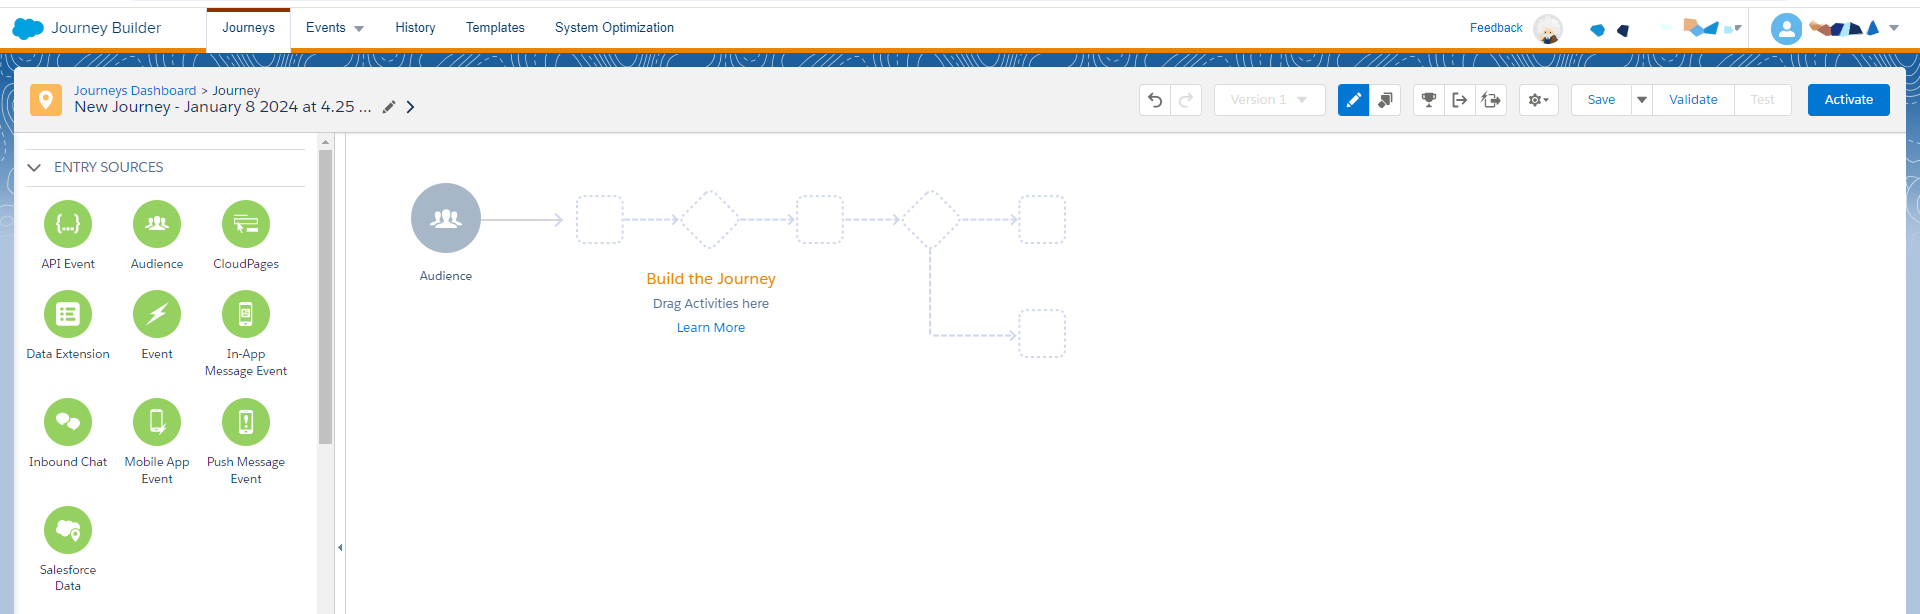
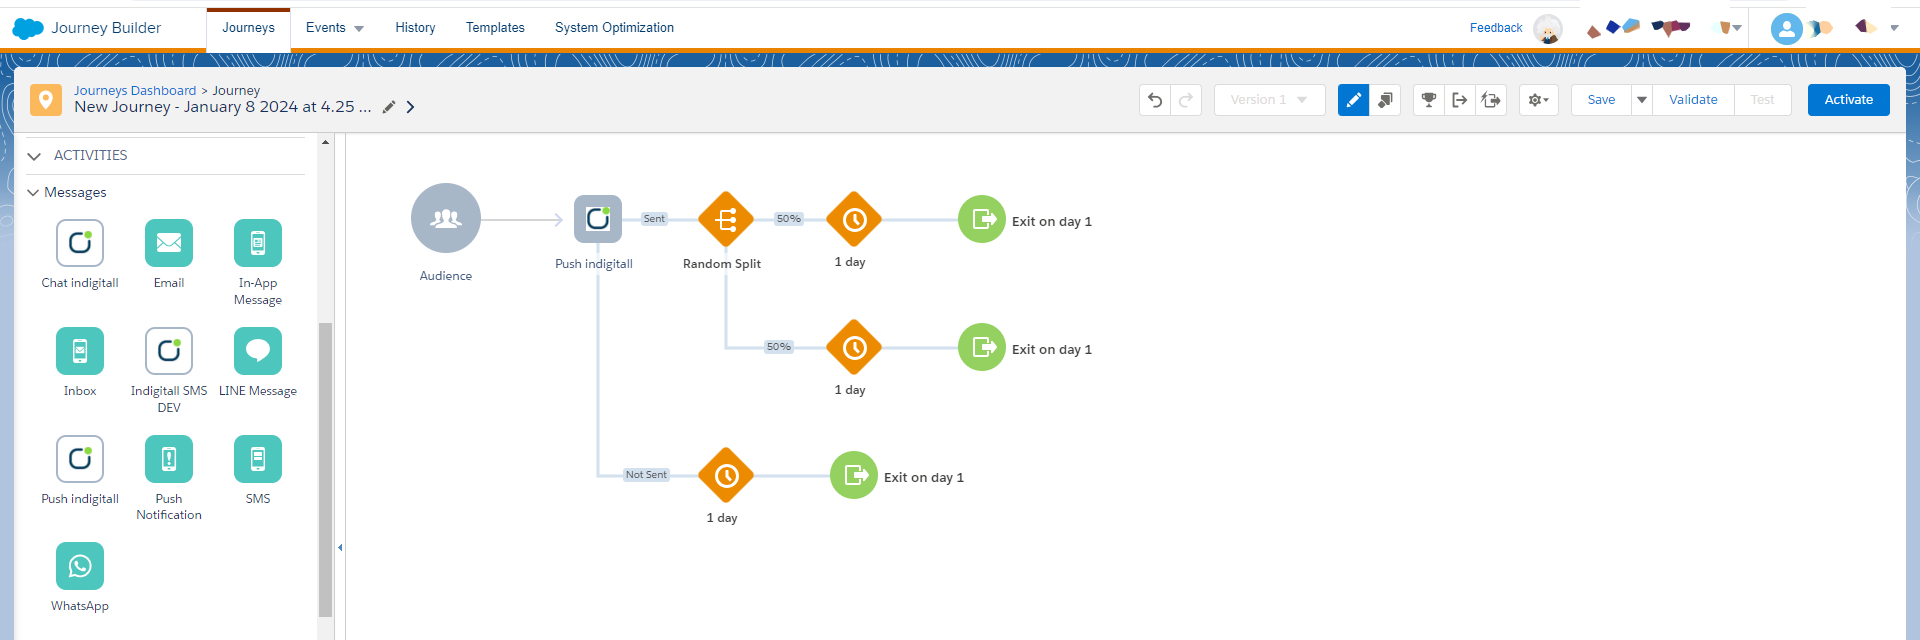
To build a journey, first you can choose the entry source from the left area and drag & drop inside the empty journey as you can see on the video.
The next step is choosing the message you want to send. Again please drag and drop into the journey. indigitall has several connectors:
- Push Notifications (web push + app push)
- Chat Messages
- SMS
- Custom Solutions (inWeb + inApp)
- Topic Manager
Clicking on the selected connector, a pop up appears to fill the data. Before doing it, you need to create the campaign into a project of the indigitall console.
Depending of the connector type, you need to fill the following information:
Push notifications
This window has a preview screen to see your message in the different devices (Android, iPhone and Web).
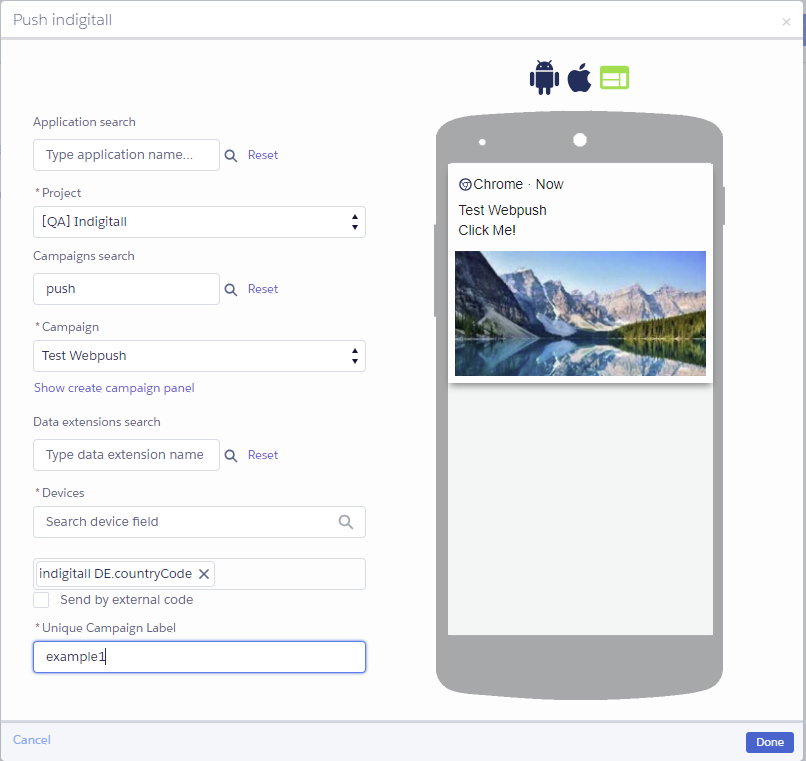
- Application search: To find your projects, writing the name or any word of the name of your project.
- Project: Select your project from the list.
- Campaigns search: To find your campaign by the name.
- Campaign: Select the campaign from the list.
- Data extension search: To find the data to identify for sending the push notification.
- Devices: Select the database with the devices to send the push notification.
- Unique Campaign Label: Write the unique name for your campaign. You can't repeat it for another campaign.
Chat messages
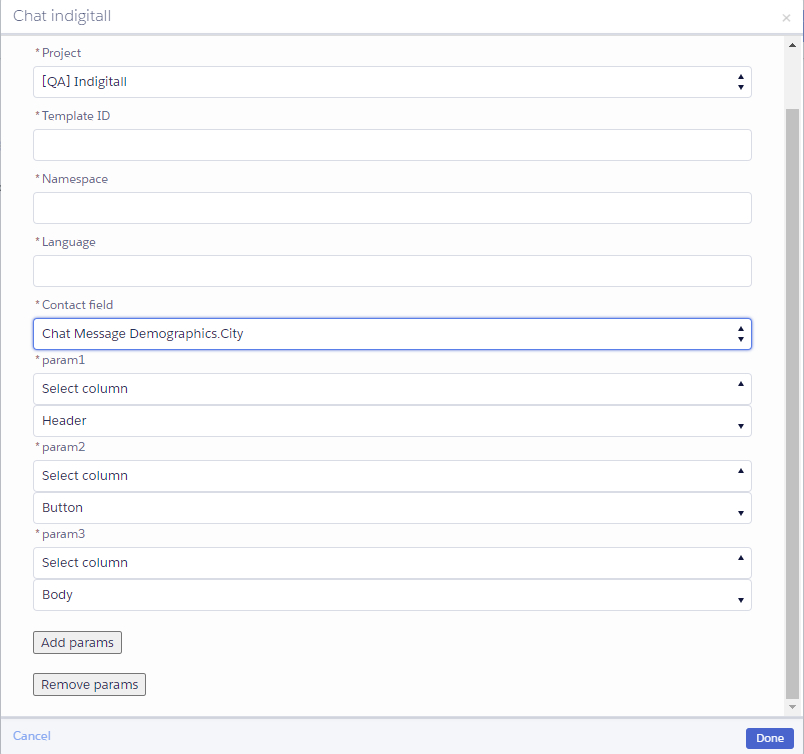
- Project: Choose the project (indigitall console) where you have created your template.
- Template ID: Write the requested item. This data is visible in the created template.
- Namespace: Write the requested item. This data is visible in the created template.
- Language: Write the language of your created template.
- Contact field: Choose the data to send the created template.
- Add/Remove params: Choose the parts of your created template that you want to add: Header, Body, Footer and Button.
SMS
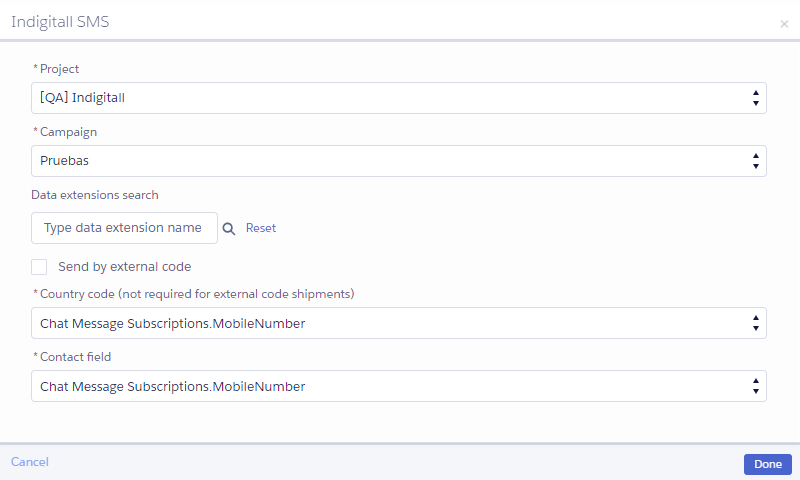
- Project: Choose the project (indigitall console) where you have created your SMS campaign.
- Campaign: Choose the campaign from the list.
- Data extensions search: Find the data to send your SMS campaign.
- Country Code: Select the database to obtain the Country Code field.
- Contact Field: Select the database to obtain the Phone Number field.
Custom Solutions (inWeb + inApp)
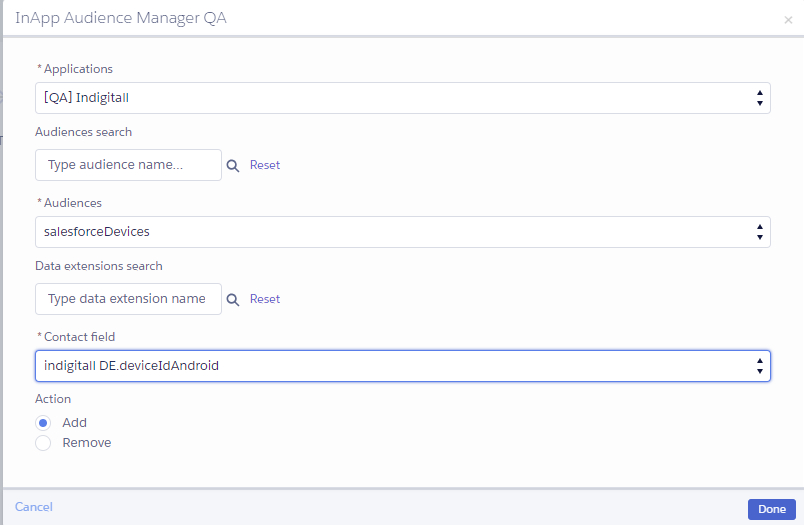
- Application: Select the project where your custom solution (inWeb / inApp) is created.
- Audience Search / Audiences: Search for and select the target audience for your inWeb / inApp message.
- Audiences: Select the audience from the list.
- Data Extension Search: Locate the data extension needed to manage this solution.
- Contact Field: Select the specific contact field that will be used to manage the solution.
- Action: Choose whether to add or remove the inWeb / inApp space for the selected contact.
Topic Manager
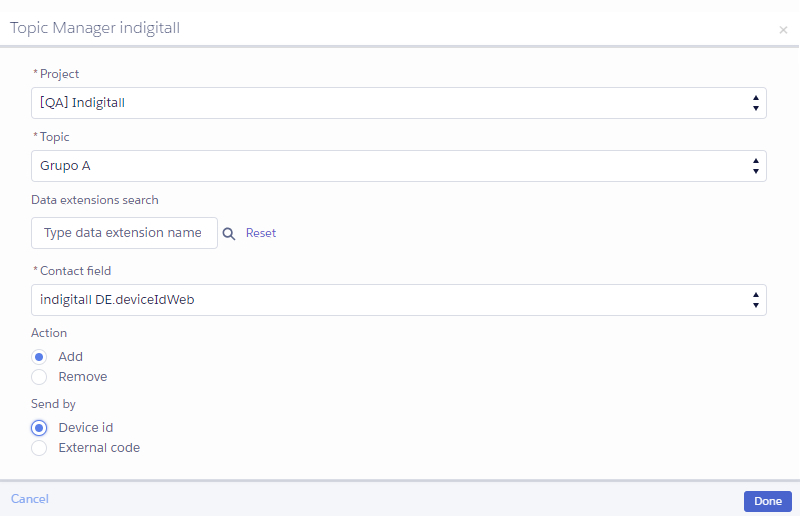
- Project: Write the project where you have created the topic.
- Topic: Select the created topic.
- Data extensions name: Find your data to manage your topic.
- Contact field: Select the data to manage your topic.
- Action: Add/Remove the topic for the selected contacts.
- Send by: Choose to add/remove the topic by deviceId or externalCode.
Step-by-step guide
The indigitall integration for Salesforce is designed to bridge the gap between your CRM data and real-time, multi-channel communications. By integrating any of the indigitall connectors as Custom Activities (CAs) within Journey Builder, organizations can trigger automated, highly personalized campaigns across all supported channels (Push, InApp/InWeb, SMS and Chat) based on complex user behaviors and data attributes managed within Salesforce.
How the Connector Works
The connectors act as native extensions within the SFMC interface. They enable:
- Synchronized Delivery: Seamlessly trigger messages across multiple communication channels directly within a single Journey.
- Identity Mapping: Real-time correlation between Salesforce contact keys and indigitall identifiers.
- Data Loopback: Behavioral data (clicks, sends, bounces) is written back into specific Data Extensions for reporting and further segmentation within Salesforce.
Campaign Setup
In the following section, we will walk you through the entire setup process step by step. We are using the indigitall Push Custom Activity for this example, but you can apply these same steps to configure any of our connectors.
Configuration Breakdown:
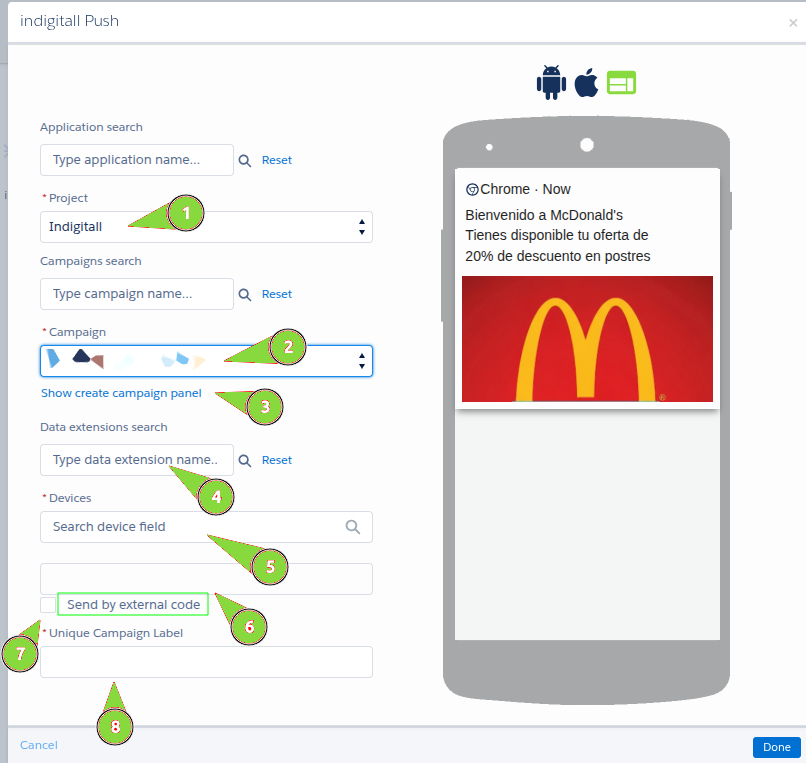
- Project: Automatically populated based on your Business Unit (Country). No manual selection is required.
- Campaign Selection: Select a pre-existing campaign created in the indigitall console.
- Create Campaign: Alternatively, you can create a new campaign directly from this panel without leaving Salesforce.
- DE Search: Enter the name of the Data Extension containing your user mapping.
- Data Extension Selection: Choose the specific DE and the attribute containing the company. Note: The push is only sent to users entering the CA based on your journey logic.
- Attribute Confirmation: Displays the selected mapping for verification.
- CRITICAL: ExternalId (Send by External Code): You must ALWAYS select the Send by external code option. This ensures the delivery is targeted using indigitall's unique identifier linked to your CRM records, rather than a generic broadcast. This is essential for 1-to-1 personalization.
- Unique Campaign Label: A unique identifier used to track statistics and results within the generated Data Extensions.
Decision Splits
Beyond simple delays, the integration allows you to branch journeys based on user interaction with the push notification.
- Implementing Behavioral Nodes: To perform follow-up actions (like sending a second push or an SMS) based on whether a user interacted with a previous message, you must use a Decision Split linked to the IndigitallConversations Data Extension.
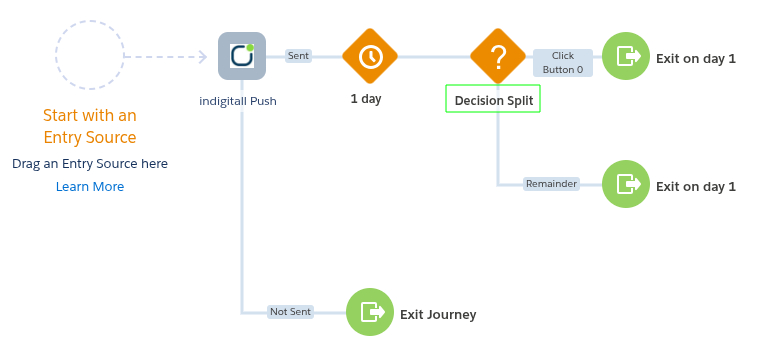
- Configuring Filter Criteria: You can drag and drop the following attributes into your Decision Split to define user paths:
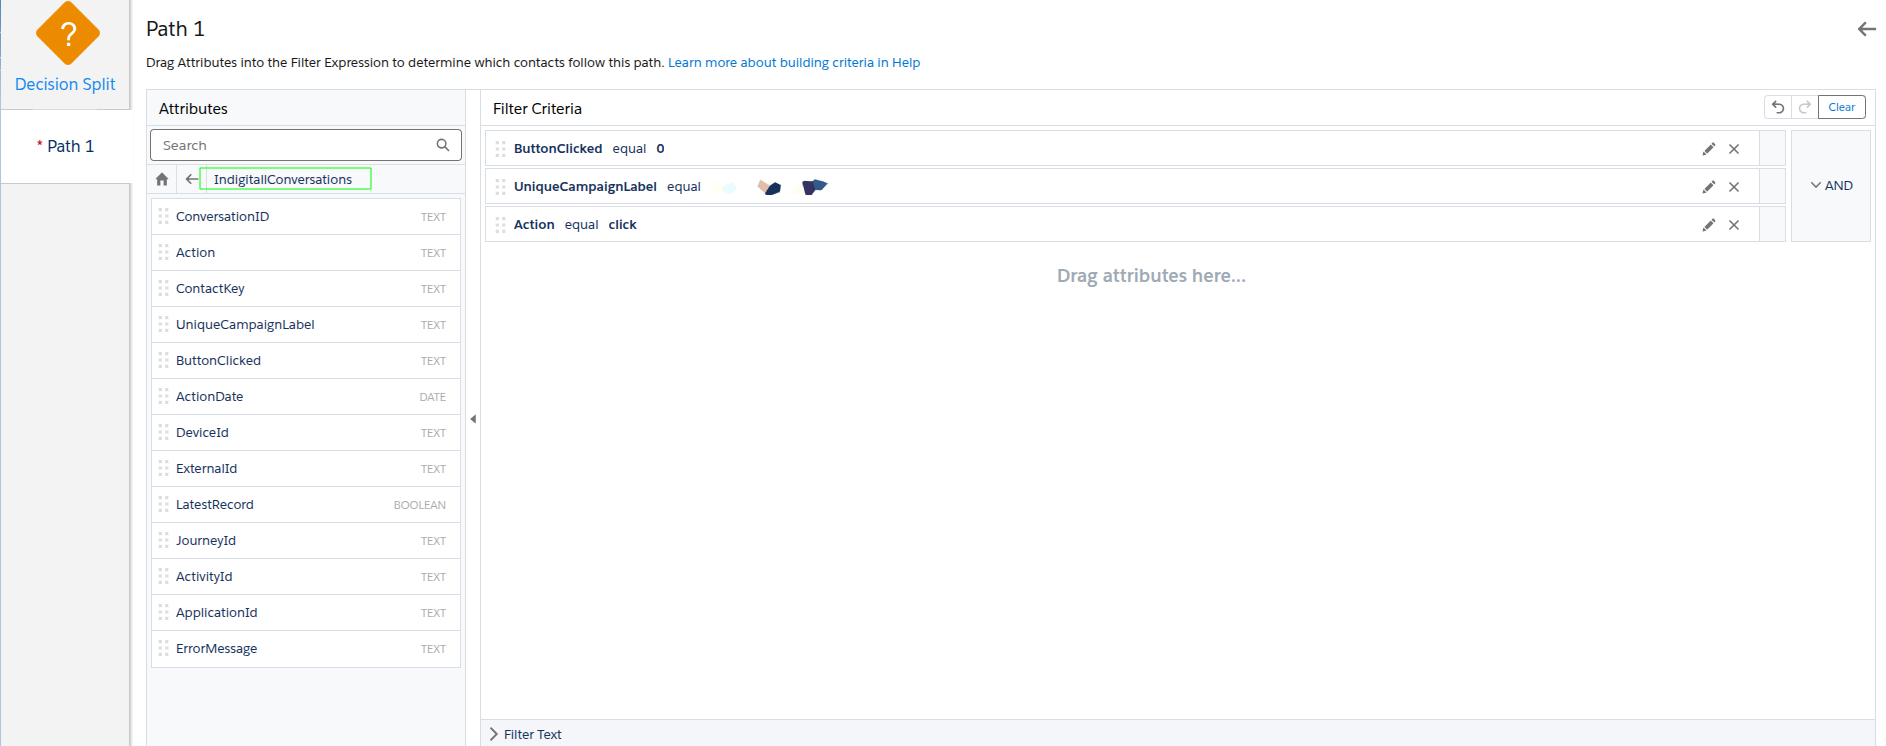
ButtonClicked: Defines where the user clicked.
0: Click on the push body or image.
1: Click on the first action button (if applicable).
2: Click on the second action button (if applicable).
UniqueCampaignLabel: Crucial. This value must match exactly (literal string) with the label configured in Step 8 of your Custom Activity.
Action: Define the status to check, typically click (to reward engagement) or sent (to follow up with those who didn't click).
Because behavioral branching relies on external data feedback, we highly recommend performing internal end-to-end tests to verify that the UniqueCampaignLabel matches perfectly between the CA and the Decision Split.
Data & Reporting
The system automatically generates a Shared Data Extension named IndigitallConversations. This serves as the single source of truth for all your campaign statistics and customer interaction data within Salesforce Marketing Cloud.

This Data Extension automatically tracks key behavioral and system metrics in real time, including:
- ConversationID: A unique identifier for the specific chat session or message thread. It groups multiple back-and-forth messages belonging to the same interaction.
- Action: The type of event or message status. This logs behaviors like send or click.
- ContactKey: The unique identifier for the contact or subscriber within Salesforce Marketing Cloud. This is the master key that maps this record to the rest of your customer data.
- UniqueCampaignLabel: A user-friendly, internal text label assigned to the campaign for quick identification (e.g., the newtestcacheeeee shown in the screenshot).
- ButtonClicked: Tracks user interactions with message buttons (like WhatsApp Quick Replies) using a zero-based numeric index where 0 represents the first button and 1 represents the second. This field is only populated when the Action column registers a click and remains blank on a send. These numeric values can be used directly within Marketing Cloud Decision Splits to seamlessly route users down custom Journey paths based on their selection.
- ActionDate: The exact timestamp (date, time, and timezone) when the corresponding action occurred.
- DeviceId: The unique physical identifier of the device (mobile, tablet, or browser) where the user interaction took place.
- ExternalId: An optional external ID used to link the subscriber to your internal business systems, such as an external CRM or an in-house database.
- LatestRecord: A boolean value (True / False) indicating whether this entry is the most recent update within that conversation thread. This is highly useful for filtering out historical records and preventing duplicates in your reporting.
- JourneyId: The unique alphanumeric ID of the Salesforce Marketing Cloud Journey that triggered the communication.
- ActivityId: The specific node or activity ID within that Journey, pinpointing the exact step where the Indigitall component executed.
- ApplicationId: The ID of the application or channel configured within the indigitall dashboard that was used to deploy the message.
- ErrorMessage: This field serves as your primary diagnostic tool to evaluate outbound message health and monitor delivery failures (e.g., Invalid phone number, Template mismatch, or Carrier bounce).
⚠️ Troubleshooting: If the IndigitallConversations Data Extension is not visible or available when configuring your Decision Split options, please contact our support team to verify and force a synchronization.