
Groups
The Groups feature allows you to organize your agents logically based on the specific needs of your operations. An agent can belong to a single group, multiple groups, or no groups at all.
Organizing agents into groups is highly useful for managing workloads. You can group agents by:
- Work schedules: e.g., Morning shift, Afternoon shift, Night shift.
- Specialties or Departments: e.g., Invoices / Finance Inquiries, Tech Support, Sales.
Managing your groups
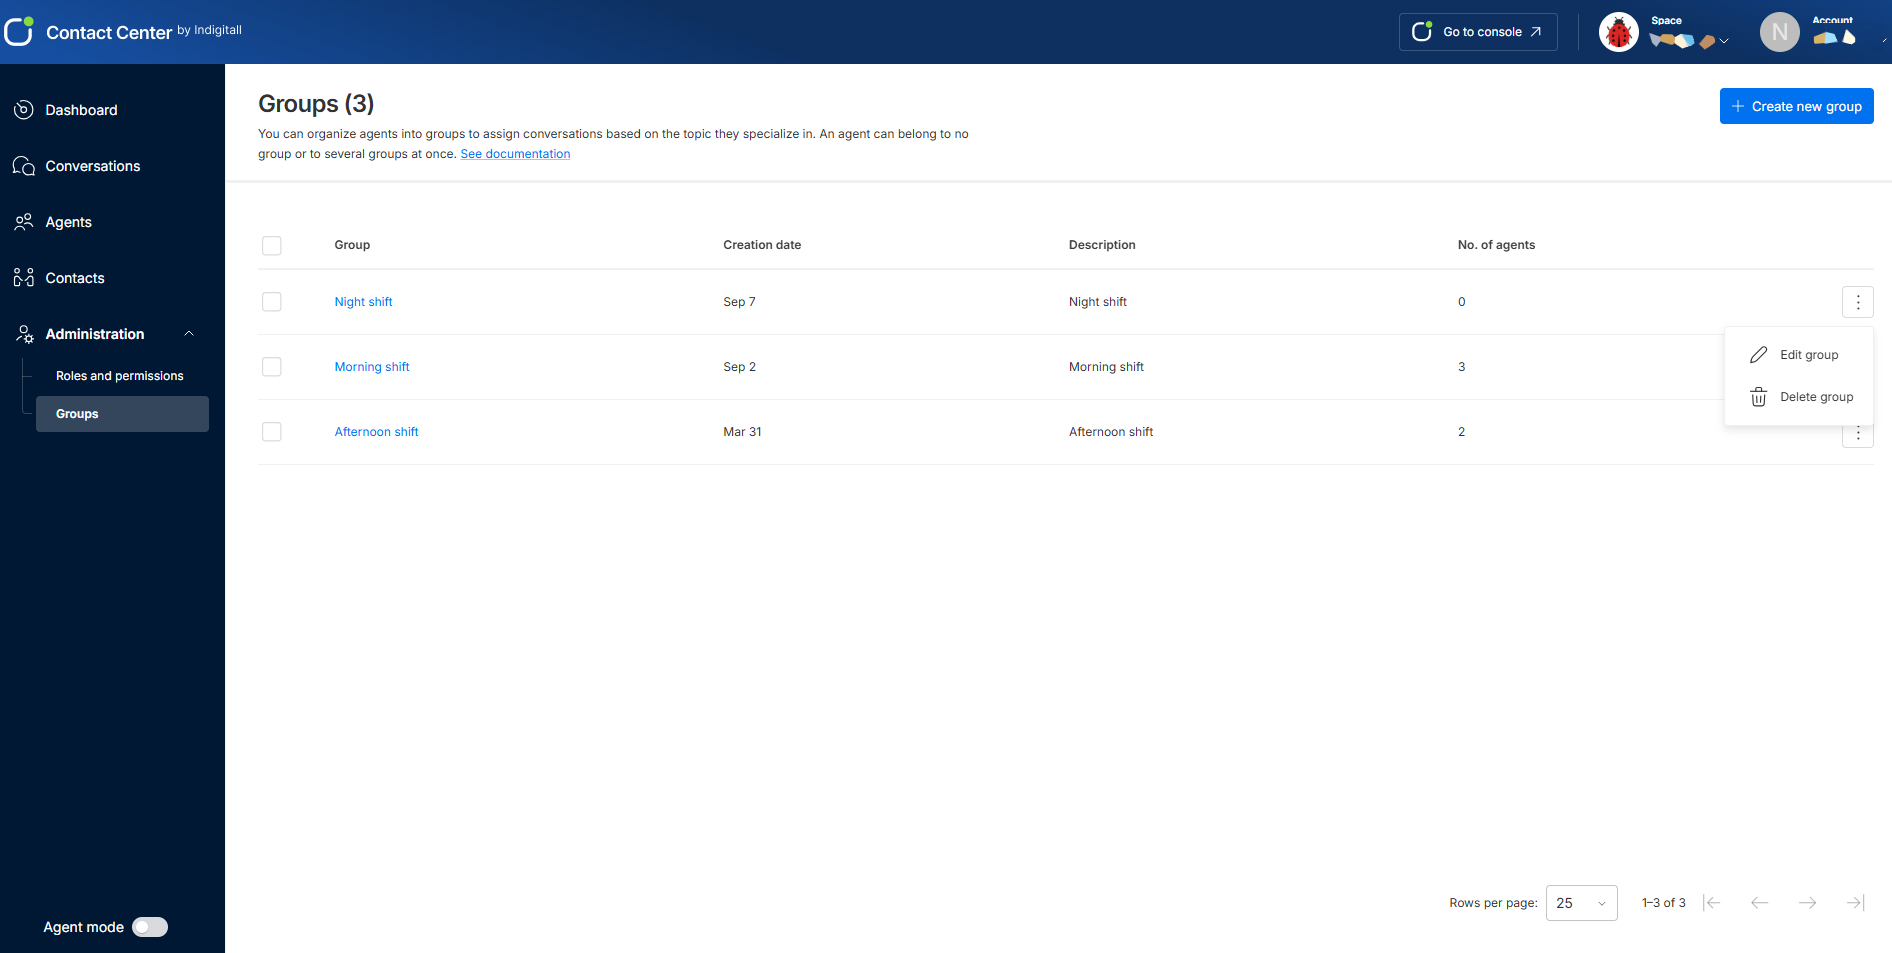
The main Groups dashboard displays a list of all active groups, their creation date, description, and the current number of agents assigned to them.
To modify an existing group's details or delete it entirely, click the three-dot menu (⋮) on the right side of the row and select Edit group or Delete group.
How to create a new group
-
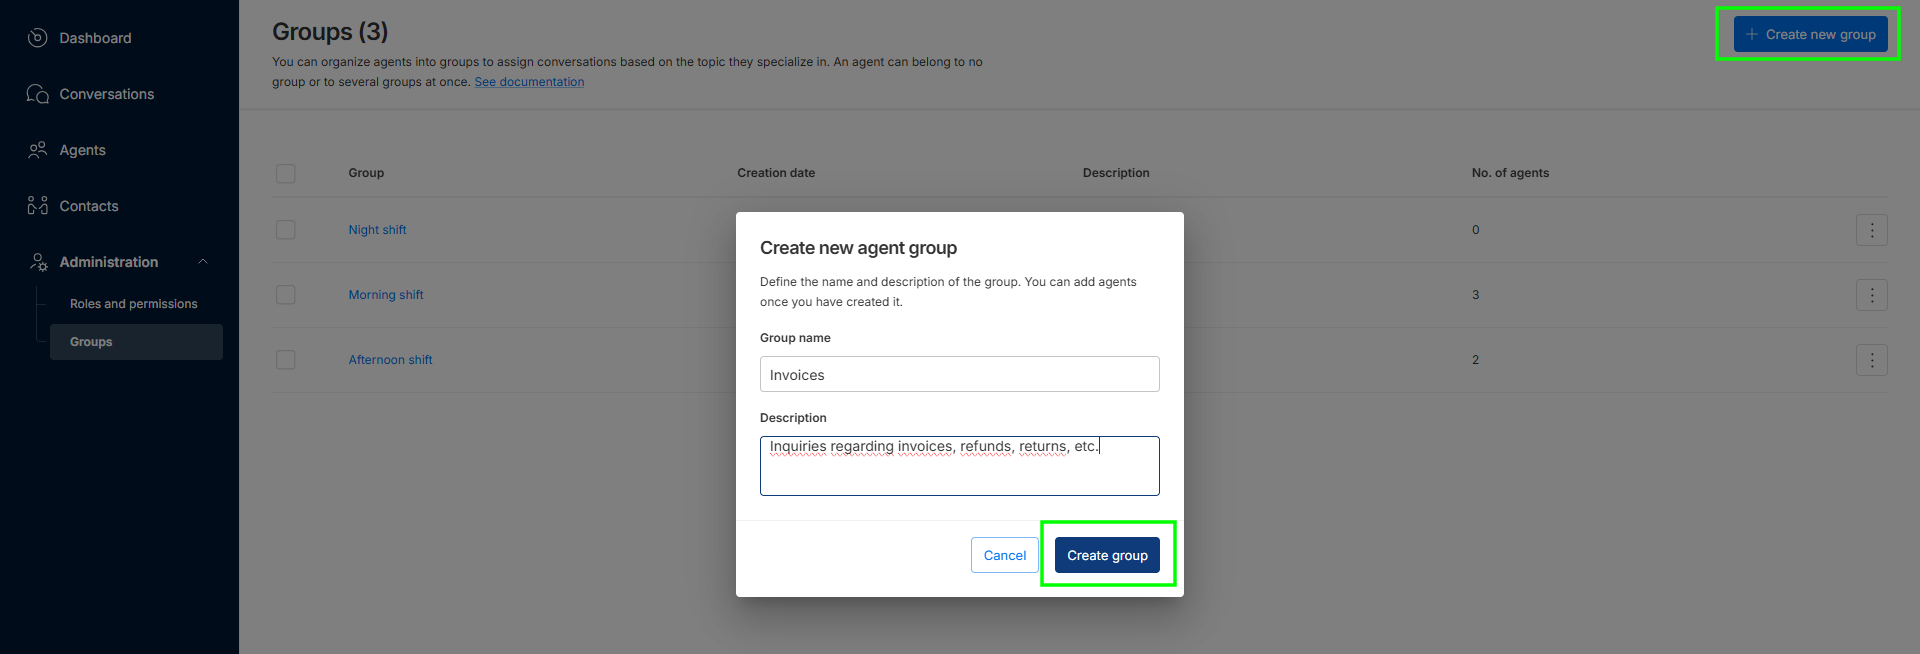
Click the blue + Create new group button in the top right corner.
-
A modal window will appear.
-
Define the Group name (e.g., Invoices).
-
Add a brief Description (e.g., Inquiries regarding invoices, refunds, returns, etc.).
-
Click Create group.
Adding and removing agents from a group
Once a group is created, you need to populate it with your staff:
-
Click on the name of any group from the main list to open its specific detail page.
-
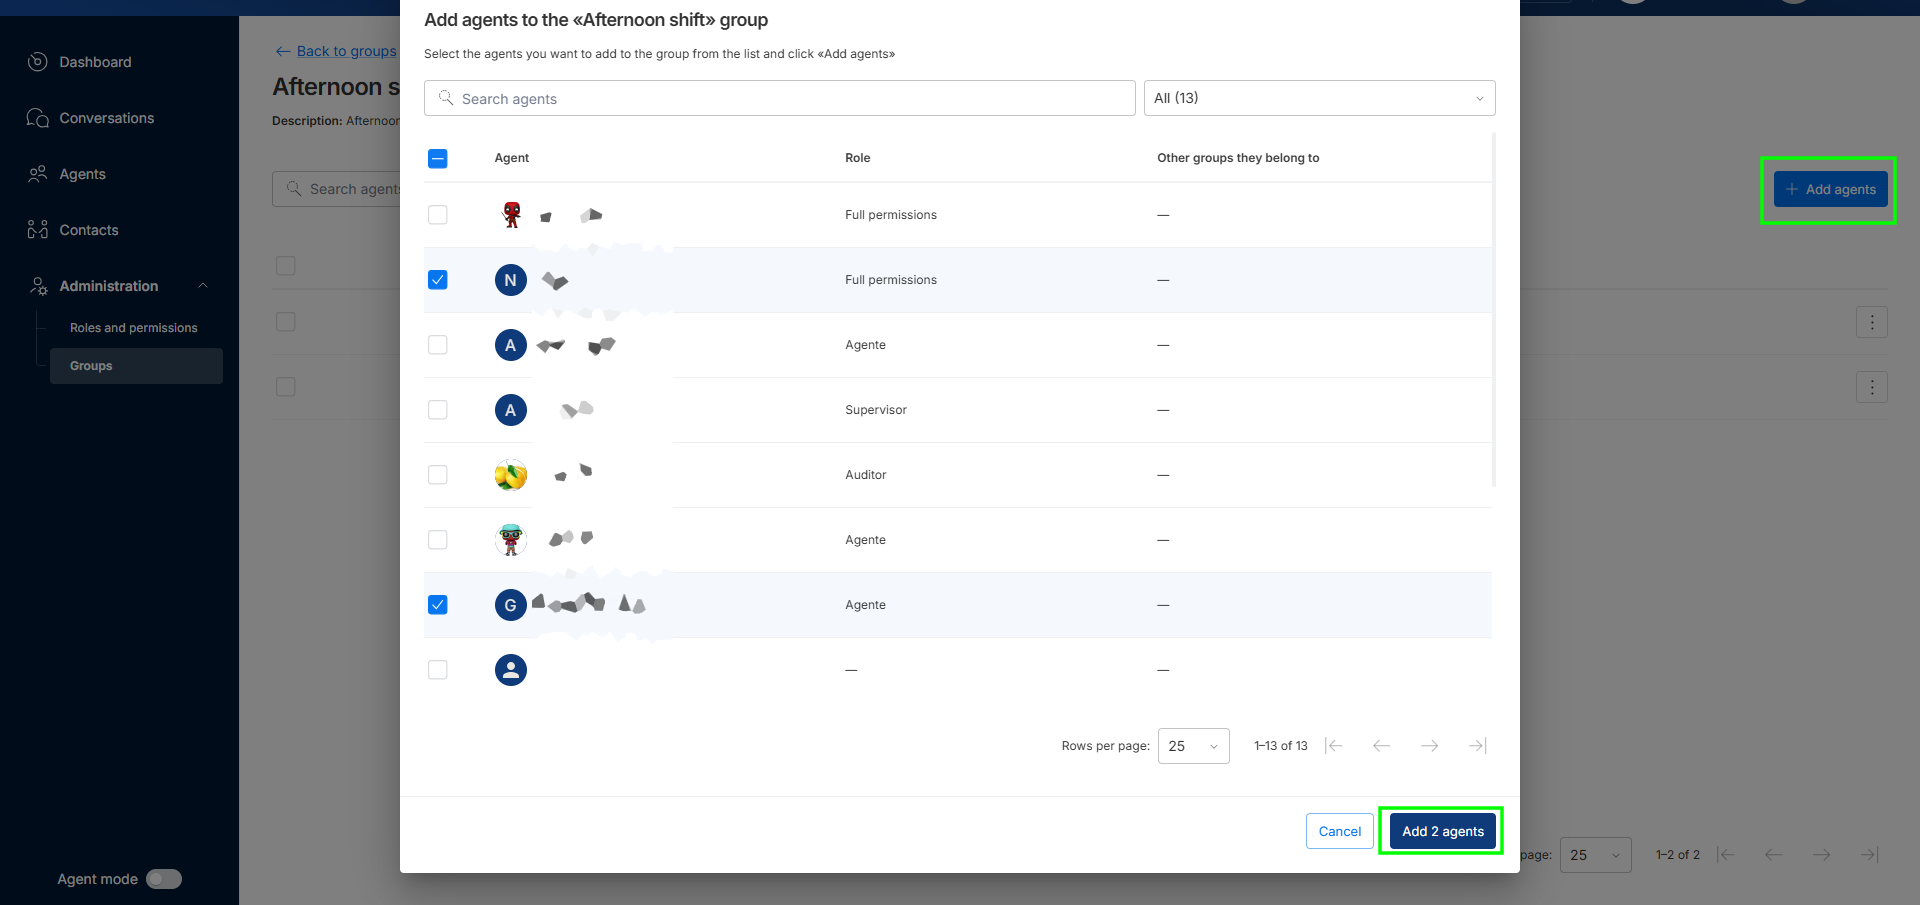
To add agents: Click the + Add agents button. A window will appear listing all available personnel. Check the boxes next to the names of the agents you want to include, and click the Add agents button at the bottom.
-
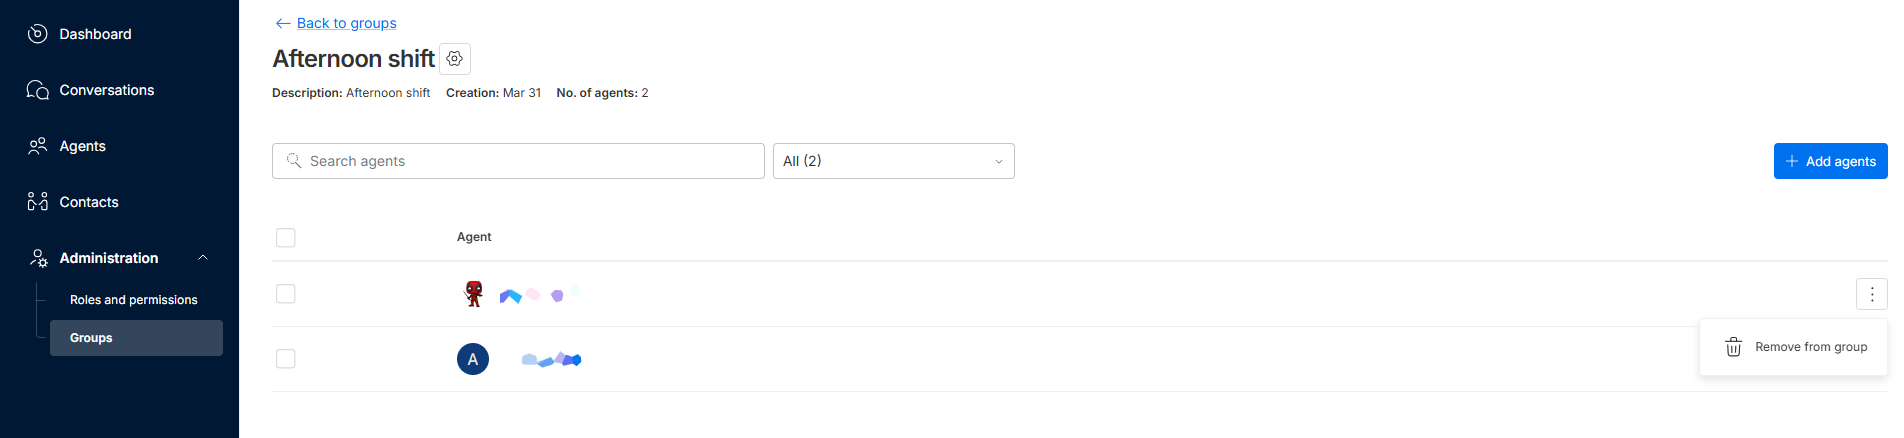
To remove agents: In the group's detail page, find the agent you want to remove, click the three-dot menu (⋮) next to their name, and select Remove from group. (Note: This only removes them from the group, it does not delete the agent from the platform).
Updated 20 days ago