
Salesforce Service Cloud
Salesforce lets you quickly integrate external apps using Canvas. This integration mechanism allows you to embed an existing web application within the Salesforce console, providing access to users from one place.
Multiple apps can be integrated into the Salesforce console through Canvas at the same time.
This guide aims to explain the basic steps to integrate a public web application without going into specific details, such as event management or Salesforce context, which has its own well-developed sections in the official documentation referred to.
Once the app is accessible from a browser, you can continue with the setup from within Salesforce. The easiest way to test is to use AWS App Runner.
Create canvas app in the Salesforce console
Salesforce Requirements
This integration works with any edition of Salesforce.
Account Creation
The first thing is to have a Salesforce account. It is possible to create one for development from here.
When completing the data, you will receive an email verification and the environment will be ready.
Add Canvas App
When entering Salesforce, we are presented with the main page of the console:
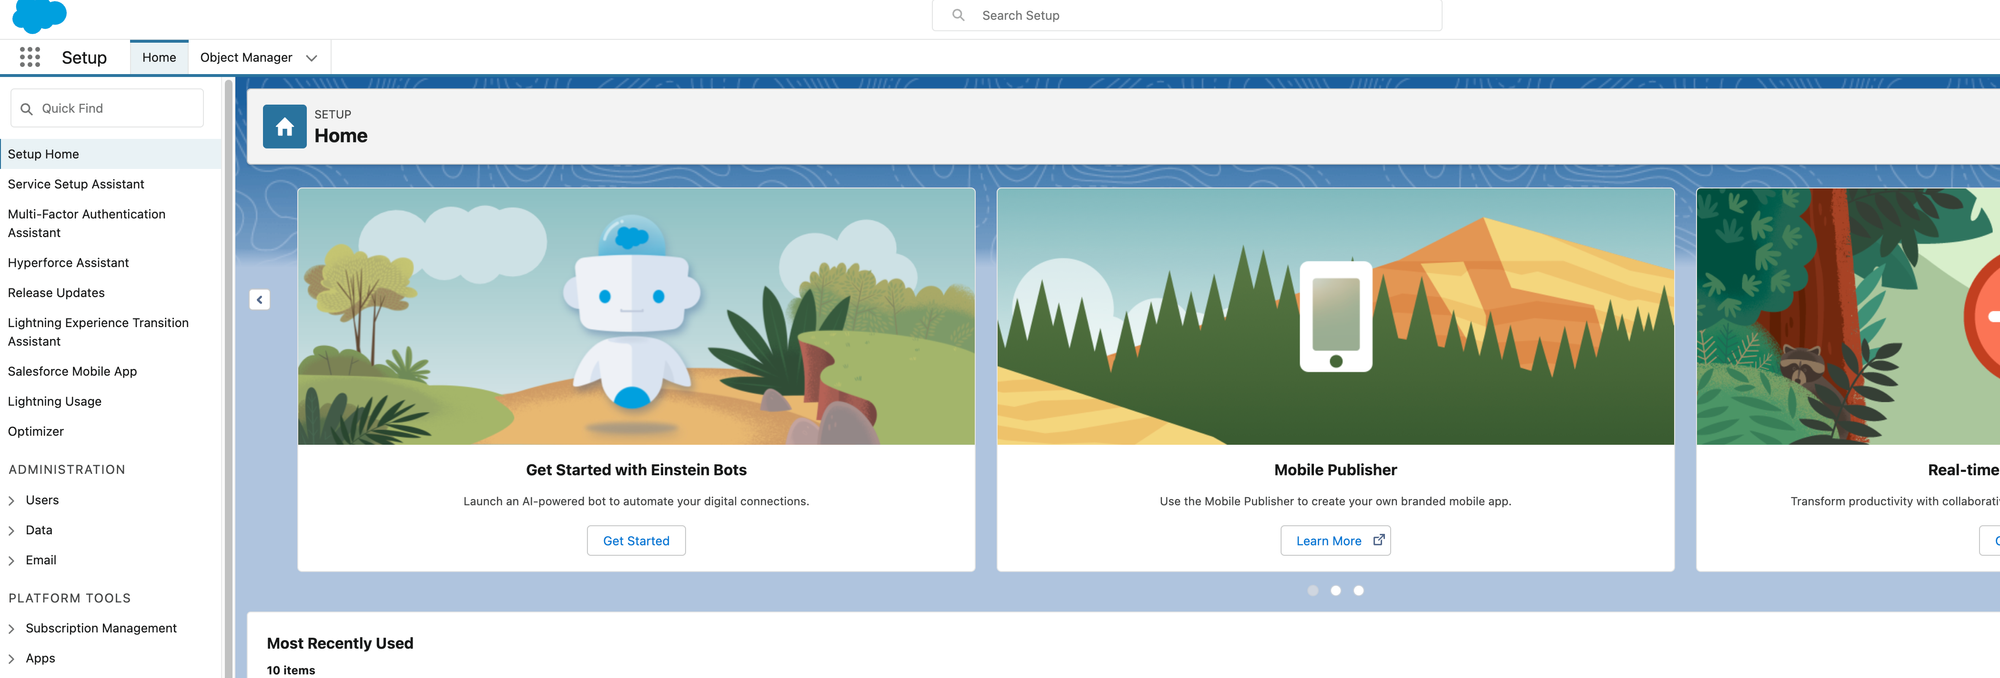
We will not delve into the elements, but as a basis indicate that:
- At the top we have the navigation bar that allows you to switch between apps (dots icon on the left) or select one of the sections.
- On the left side a context menu may appear, depending on the app in which we are. For example, the sales app "Sales console" does not present this part.
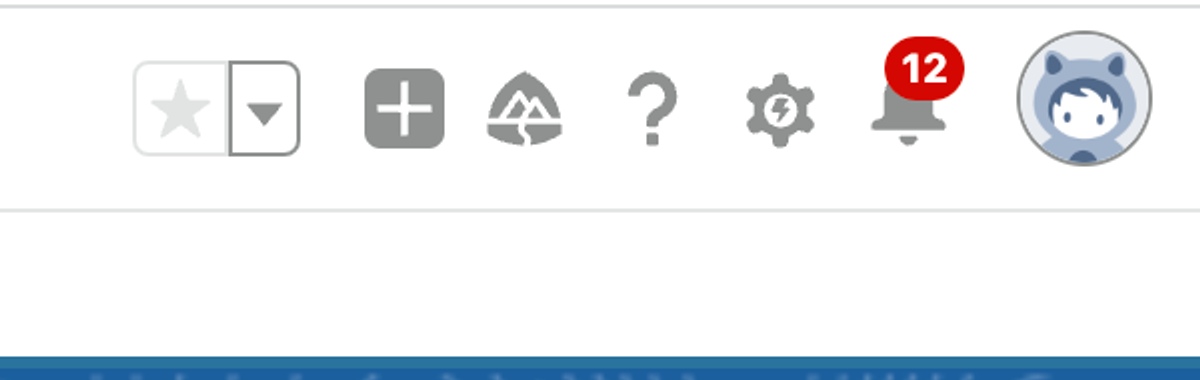
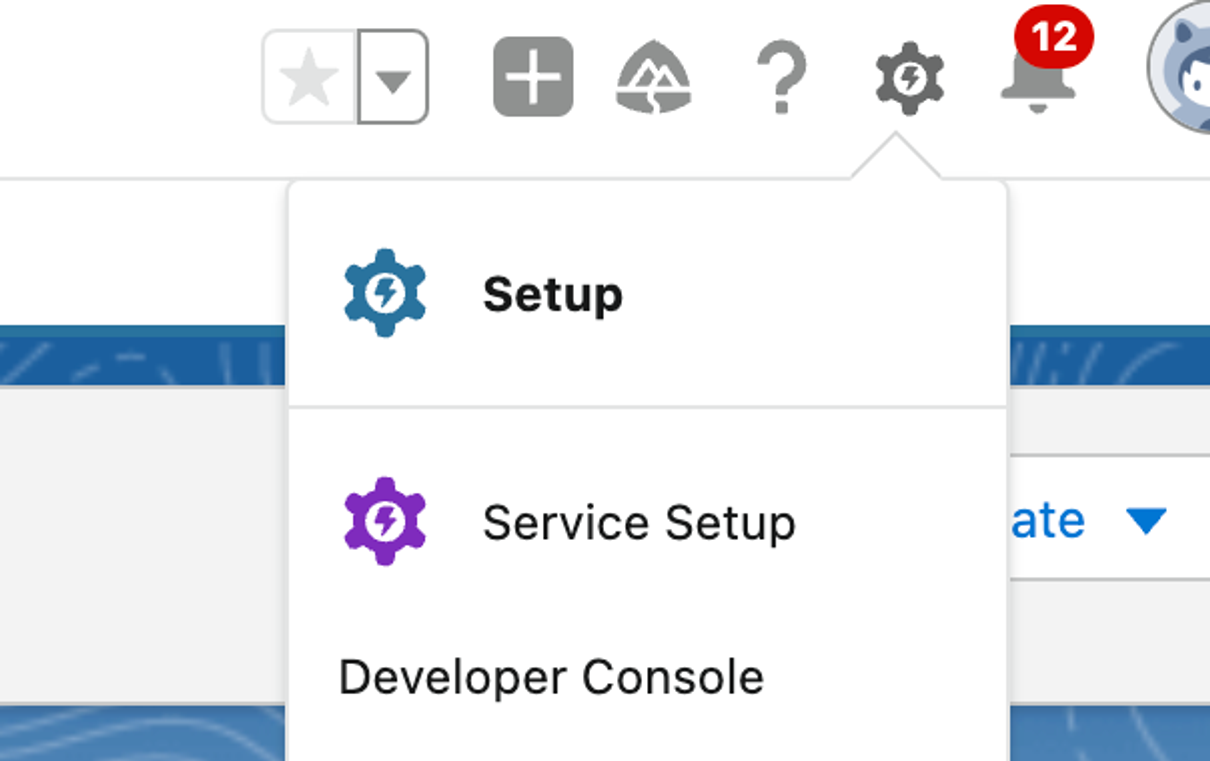
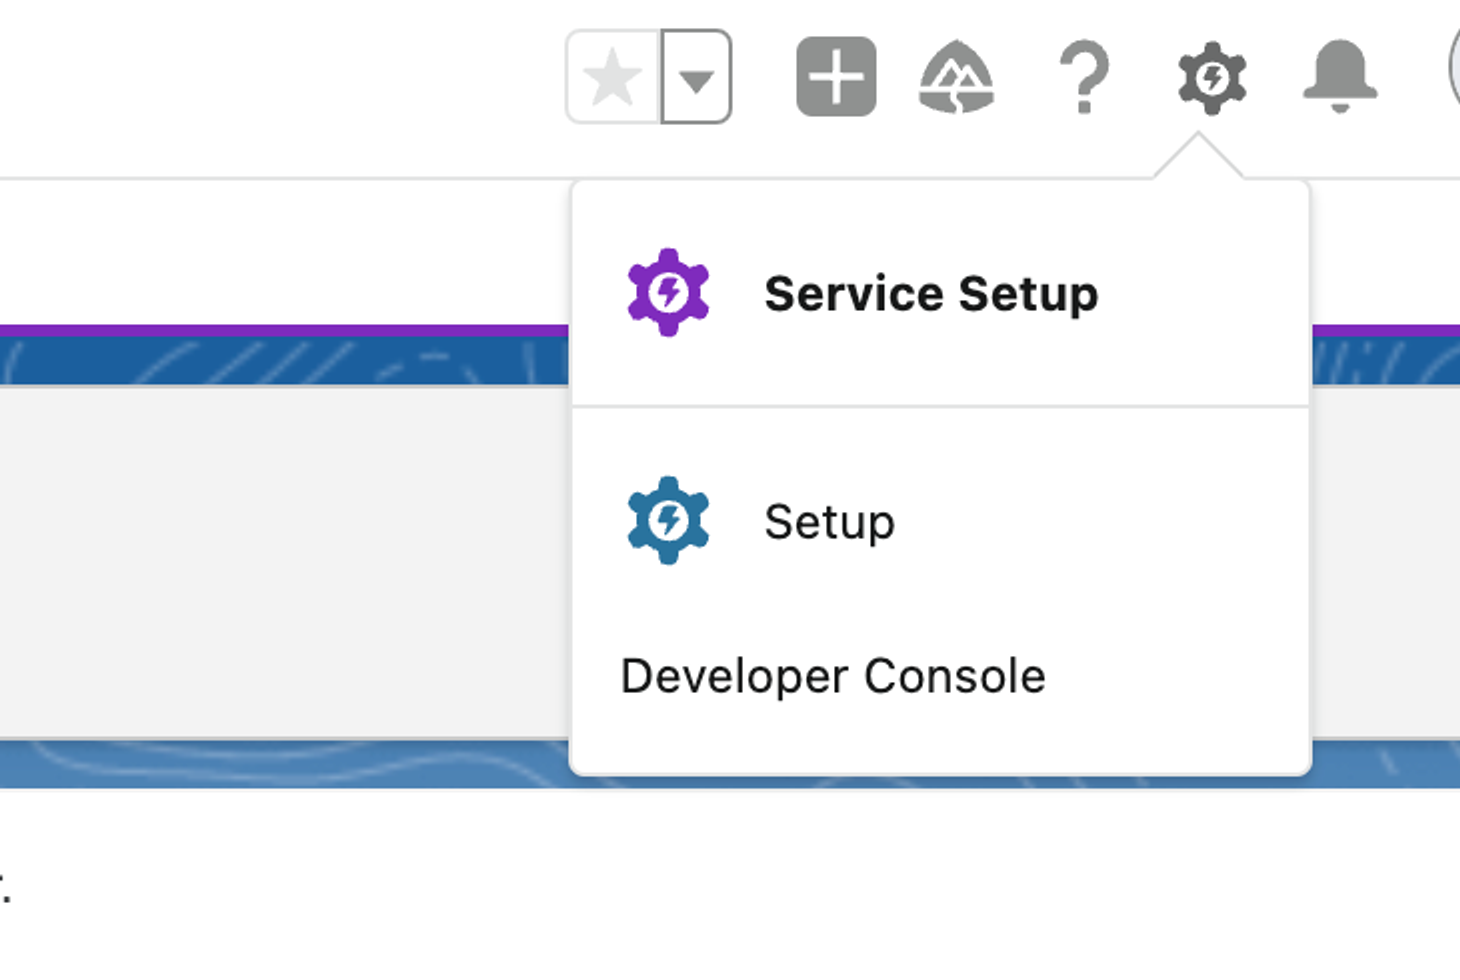
The upper right corner presents the access to our profile and the "Setup" console that we will use to add the app through Canvas:
First, let's determine in which app we want to add the Canvas element to present the external application. In our case, we are going to use the "Sales console".
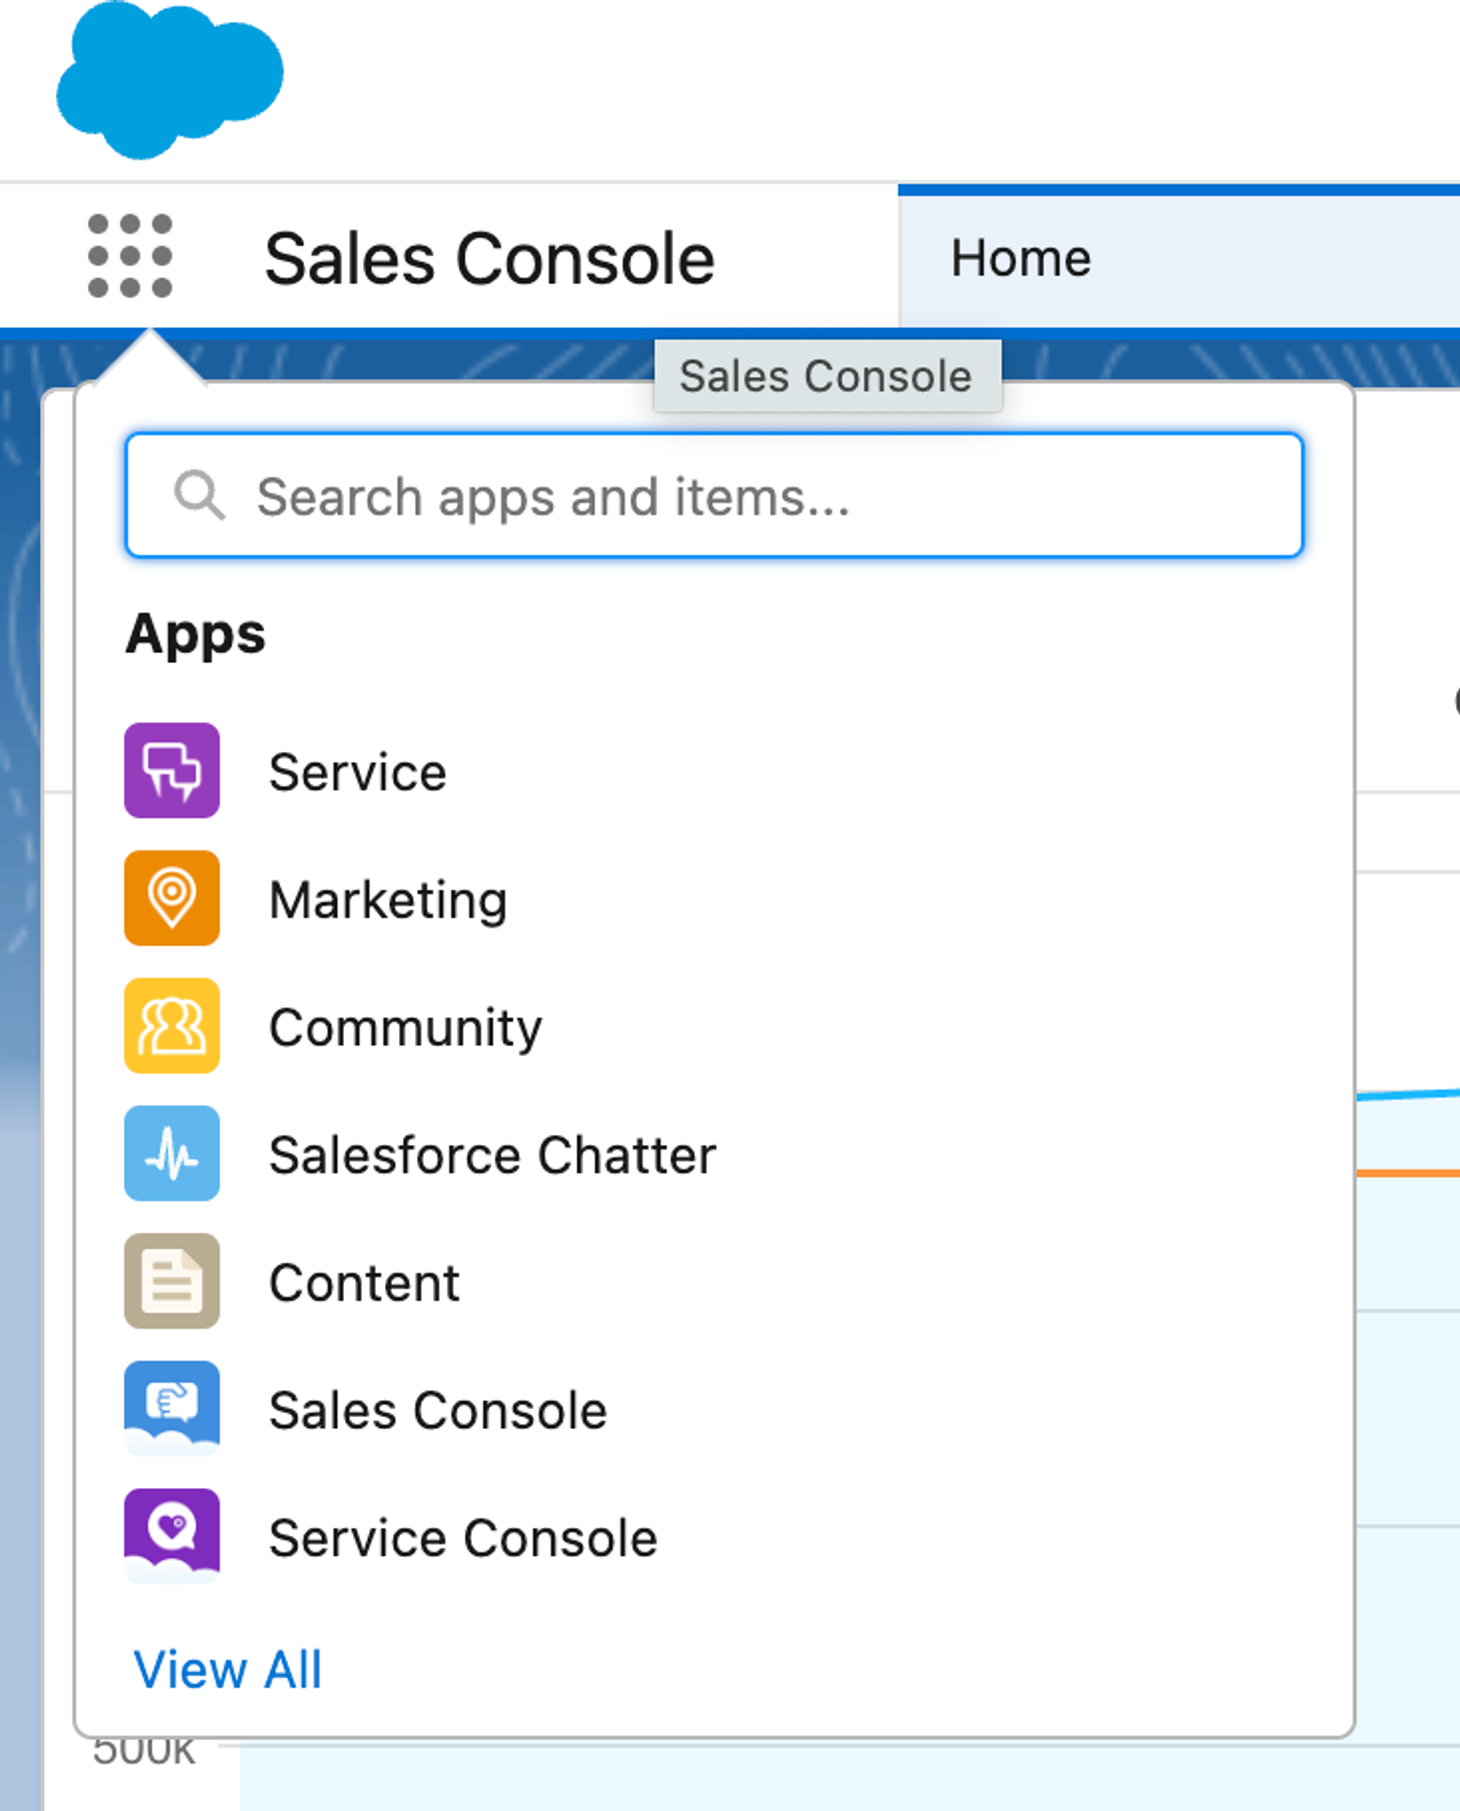
Once inside the "Sales console" application, we go to the top right, and access the configuration through the "Setup" option, which is inside the gear-shaped icon.
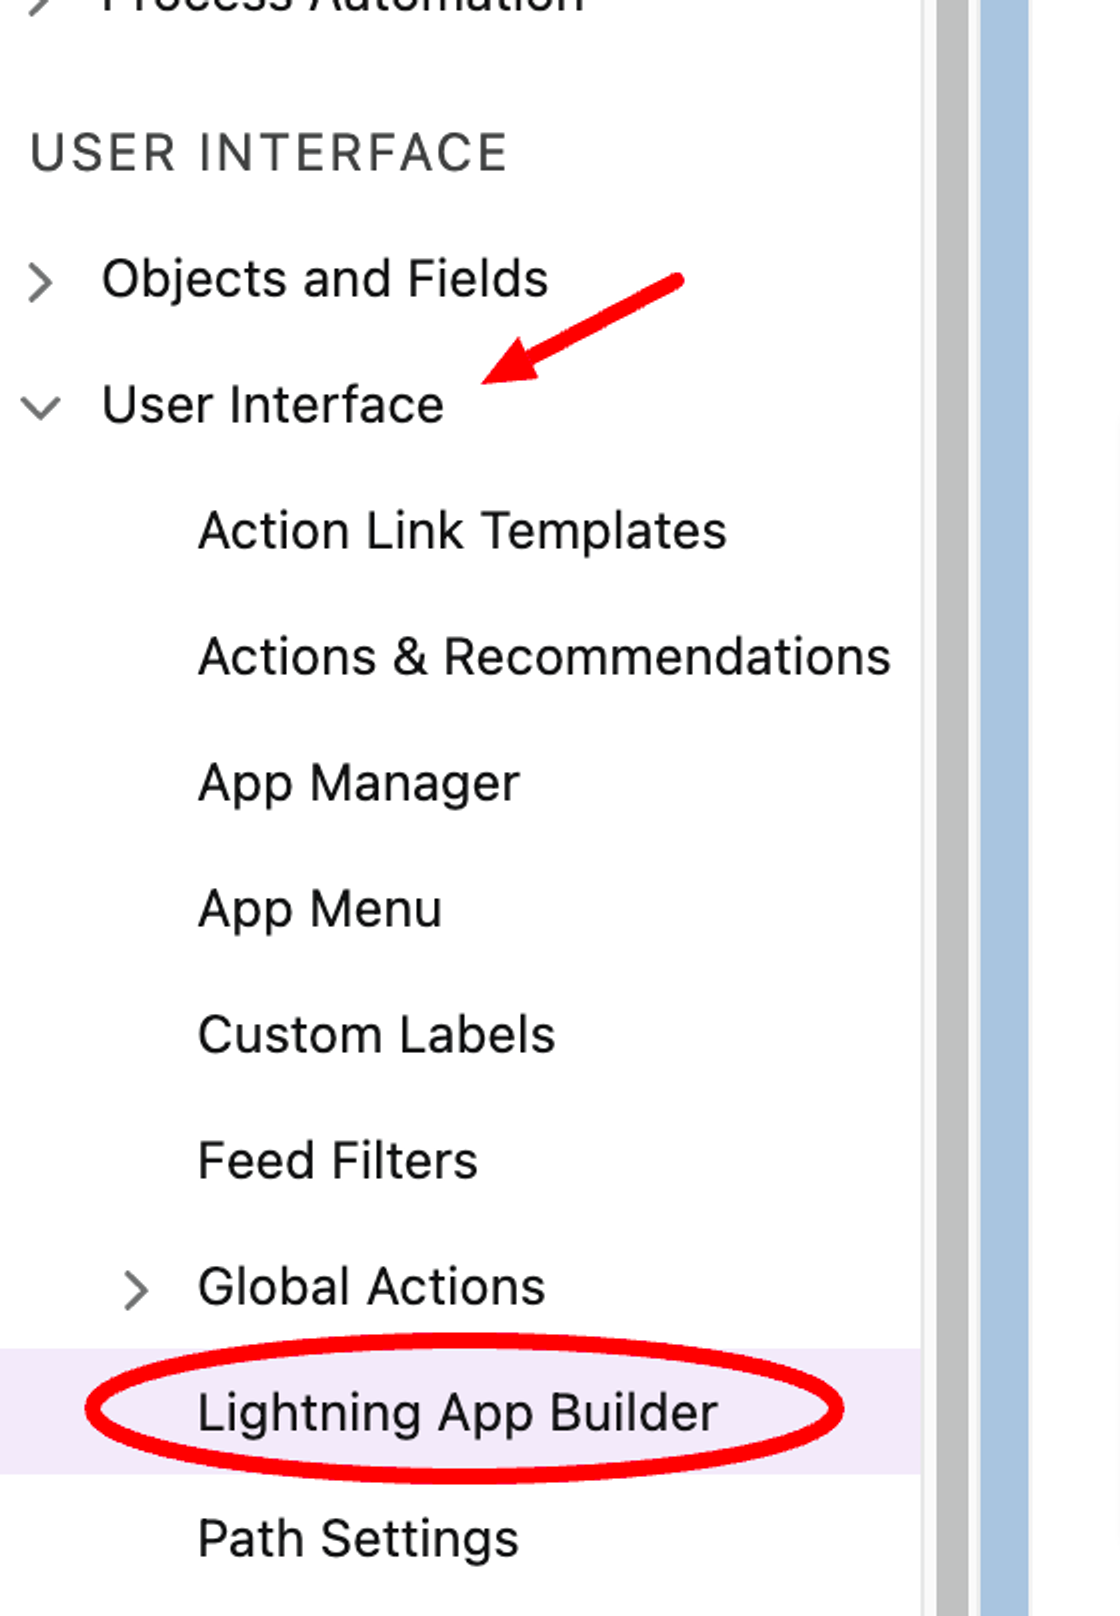
Within the "Setup" page we will see a context menu on the left. Within the menu, we must locate the Apps > App Manager.
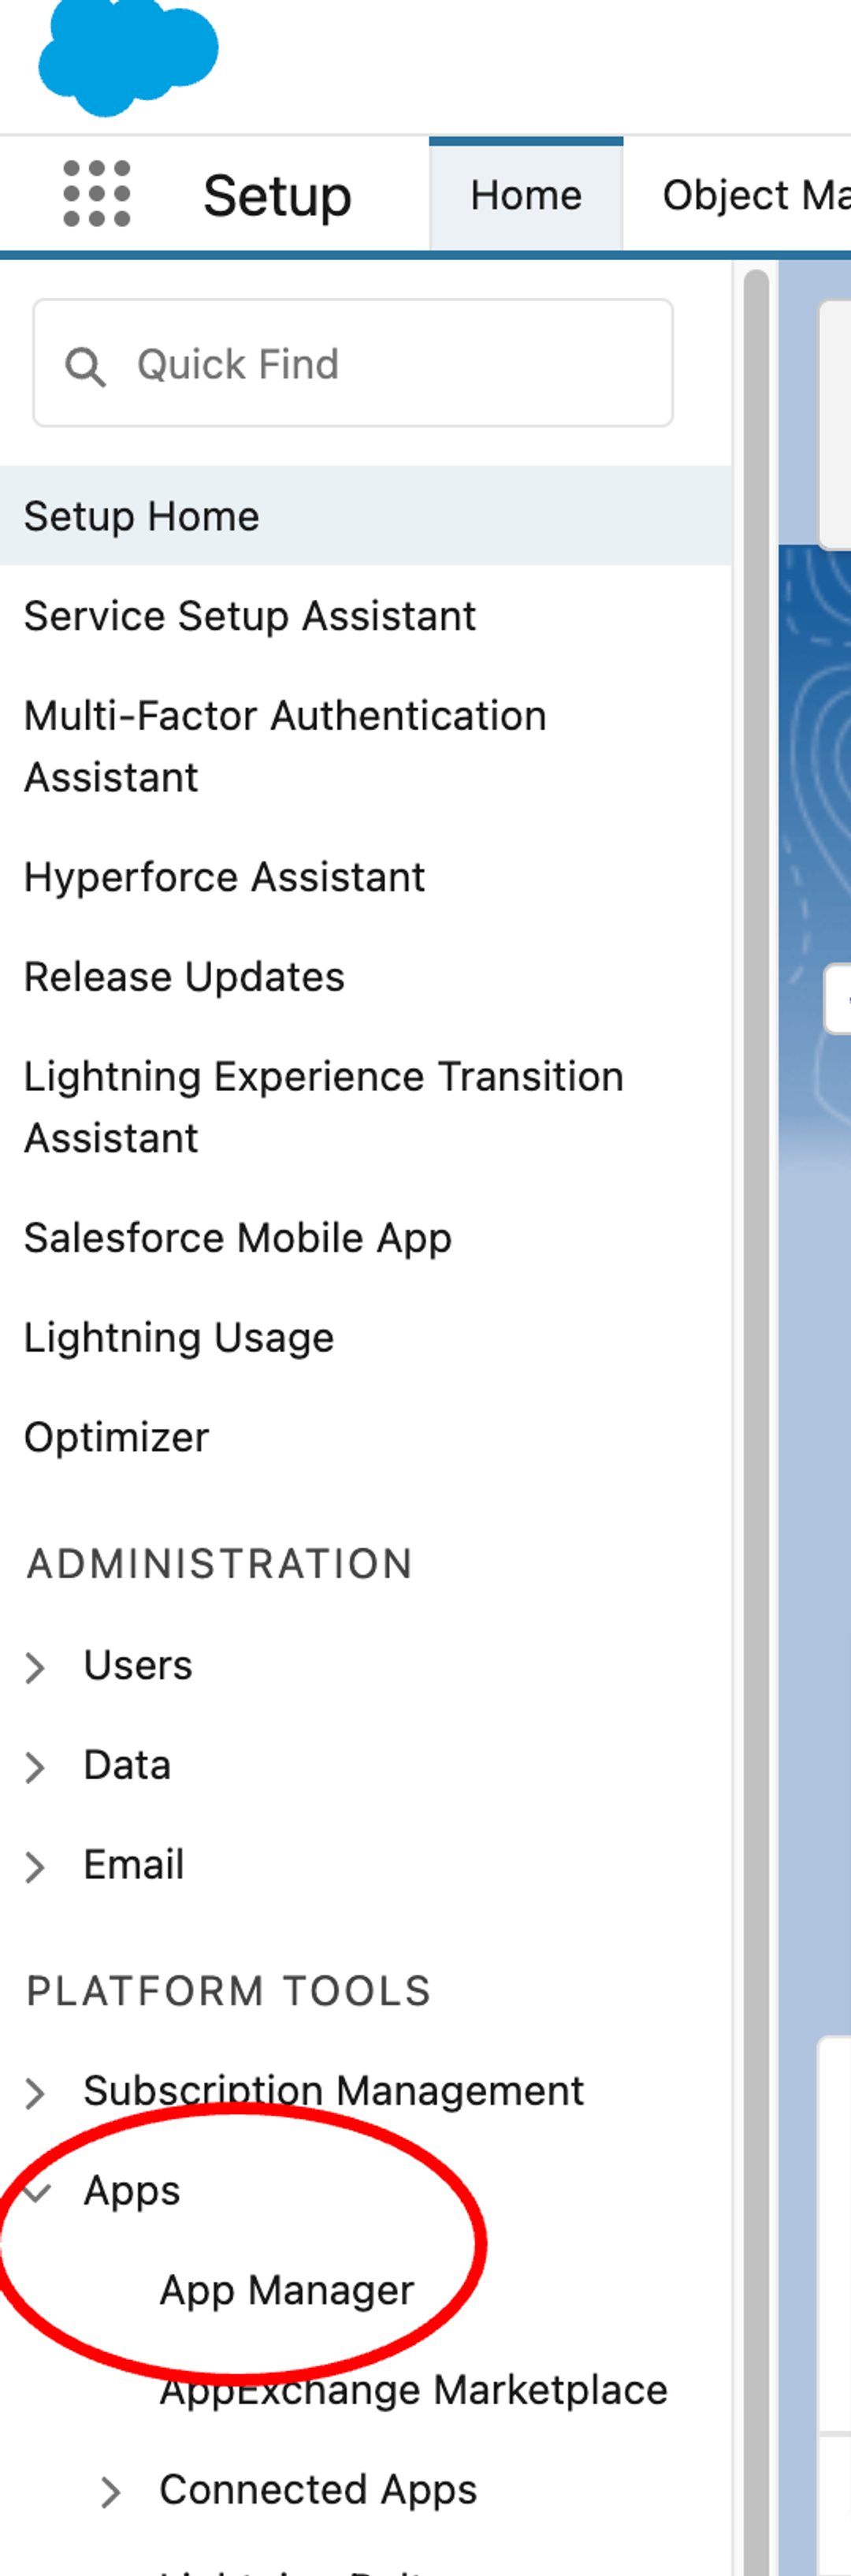
In the App Manager settings we will see the list of available applications and, in the upper right, the option to add new apps. In our case we are going to use the "New connected App" option.

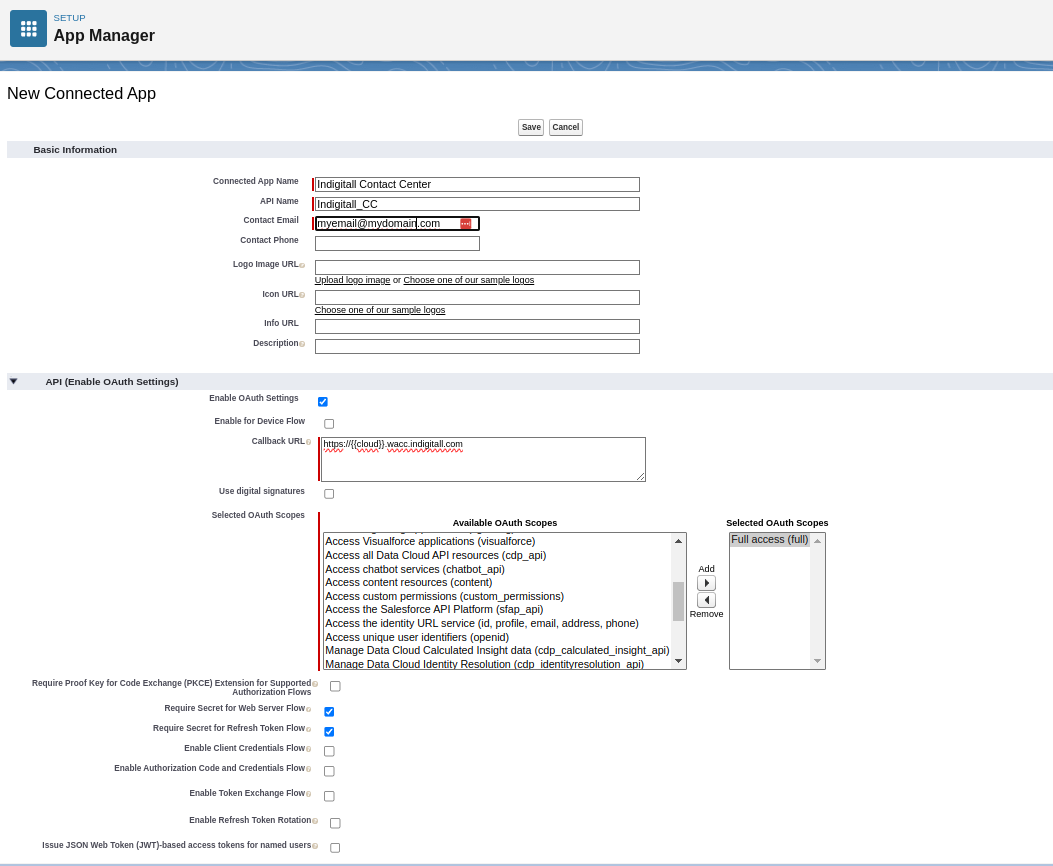
In the application registration form we must complete at least:
- Basic information
- Connected App Name
- API Name (auto generates one in relation to the one provided in the previous field)
- Contact Email
- API (Enable OAuth Settings)
- Enable OAuth Settings should be checked
- Callback URL: one or more URLs where our app is available (domain.wacc.indigitall.com)
- Selected OAuth Scopes: select Full access
- Require Secret for Web Server Flow (checked by default)
- Require Secret for Refresh Token Flow (checked by default)
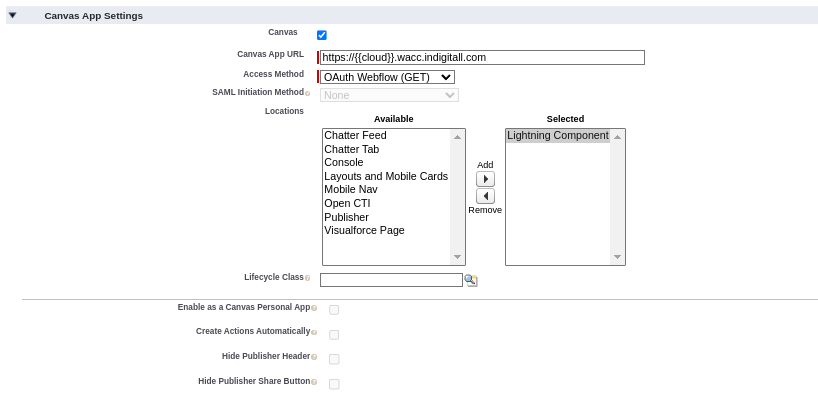
In the Canvas section, at the end of the form, we must:
- Enable the Canvas option
- Fill in the data:
- Canvas App URL: with the URL that receives the POST request to authenticate the Salesforce call:
https://{{cloud}}.wacc.indigitall.com - Access Method: in this section we can use OAuth Web Flow (Get) for implicit authorization or maintain Signed Request (POST) for more security. Using Signed Request requires developing a URL within the target application that verifies the request
- Locations: add Lightning Component
- Canvas App URL: with the URL that receives the POST request to authenticate the Salesforce call:
Enable app usage
Now we return to the list of applications in the "Setup" section, side menu Apps > App Manager.

In the list we must locate our new app and use the drop-down on the right to access the "Manage" option.

Select in "Permitted Users" the option Admin approved users are pre-authorized in the "OAuth Policies" section and save the changes.
Assign permissions in Salesforce
Activate app for corresponding profiles
From ADMINISTRATION > USERS > PROFILES, select the profile to which the users who must access the app through Canvas belong and mark the app to which we want to give access in the Connected Apps Access section.
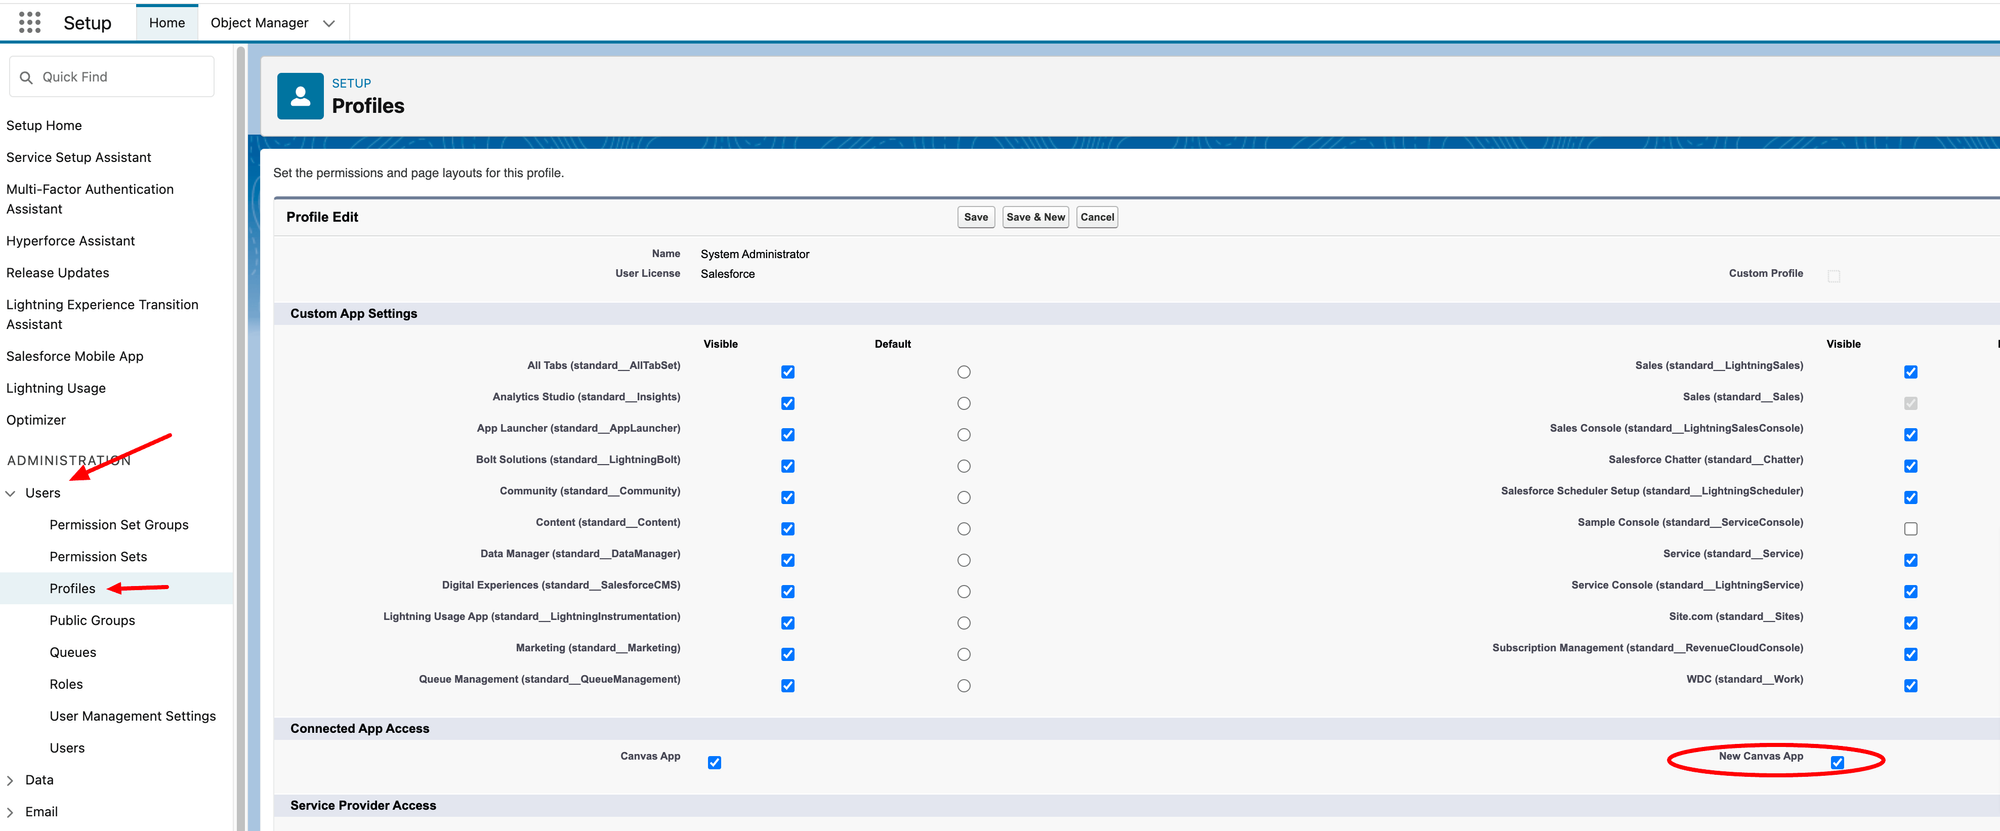
This step can be performed per user, but it is more useful to assign the profile or profiles that will use the app the use so that any new or existing user belonging to that profile has access.
Create Lightning Web Component
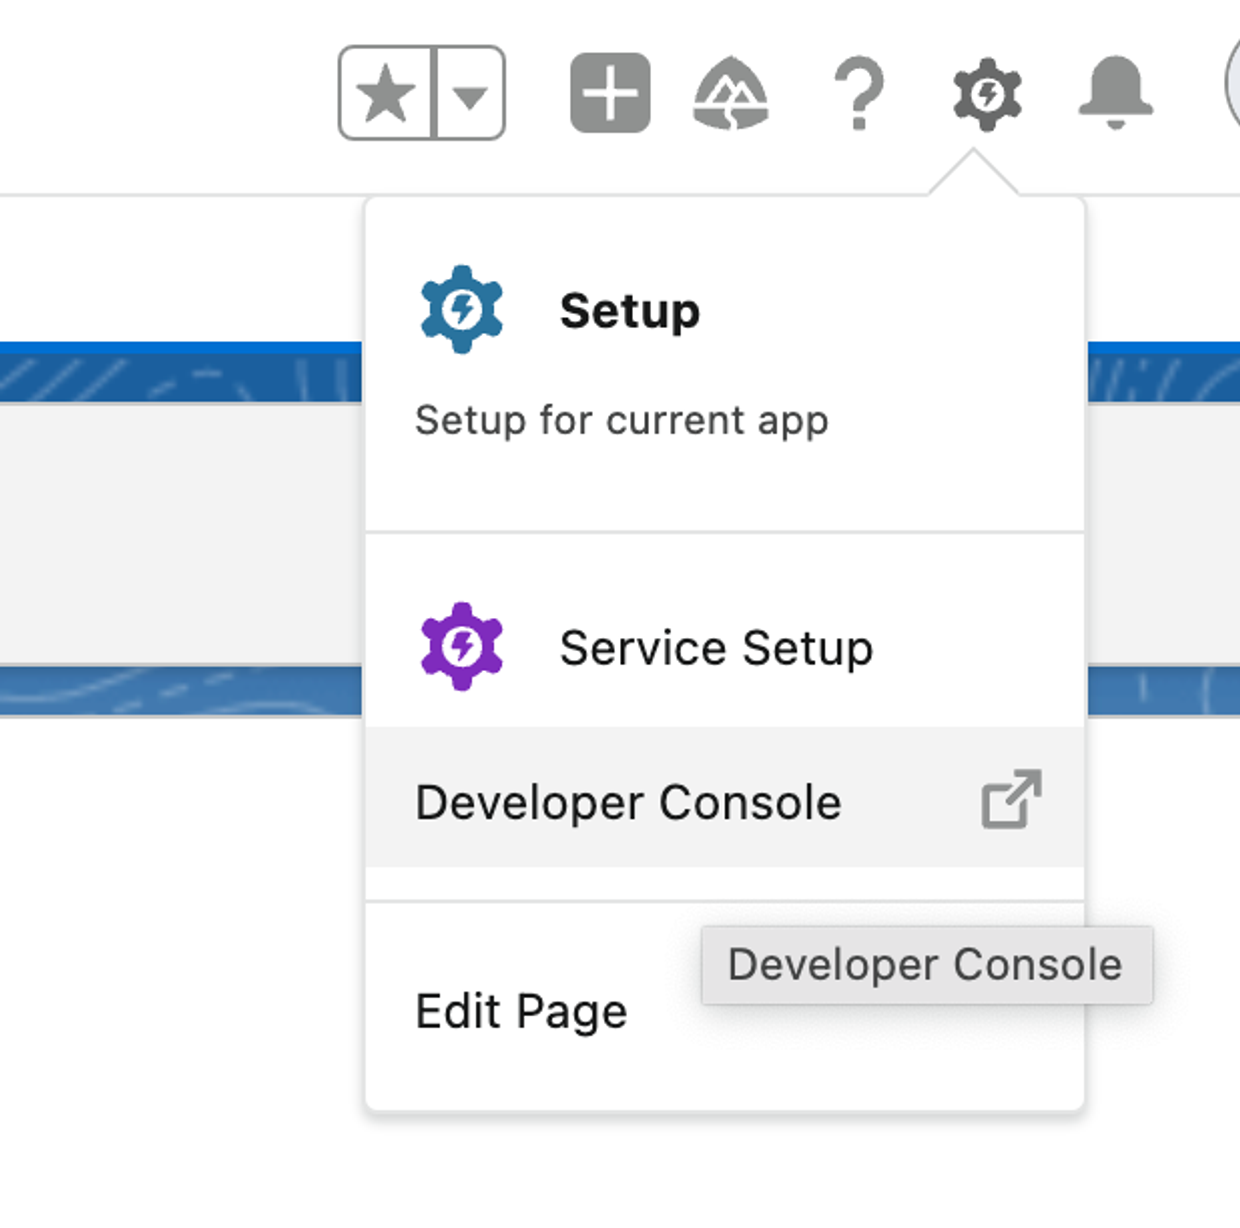
We need to add a Lightning Web Component that uses the Canvas component to render our app. To do this, from the configuration option of the upper right bar select the option "Developer console".
A modal like the following will open:
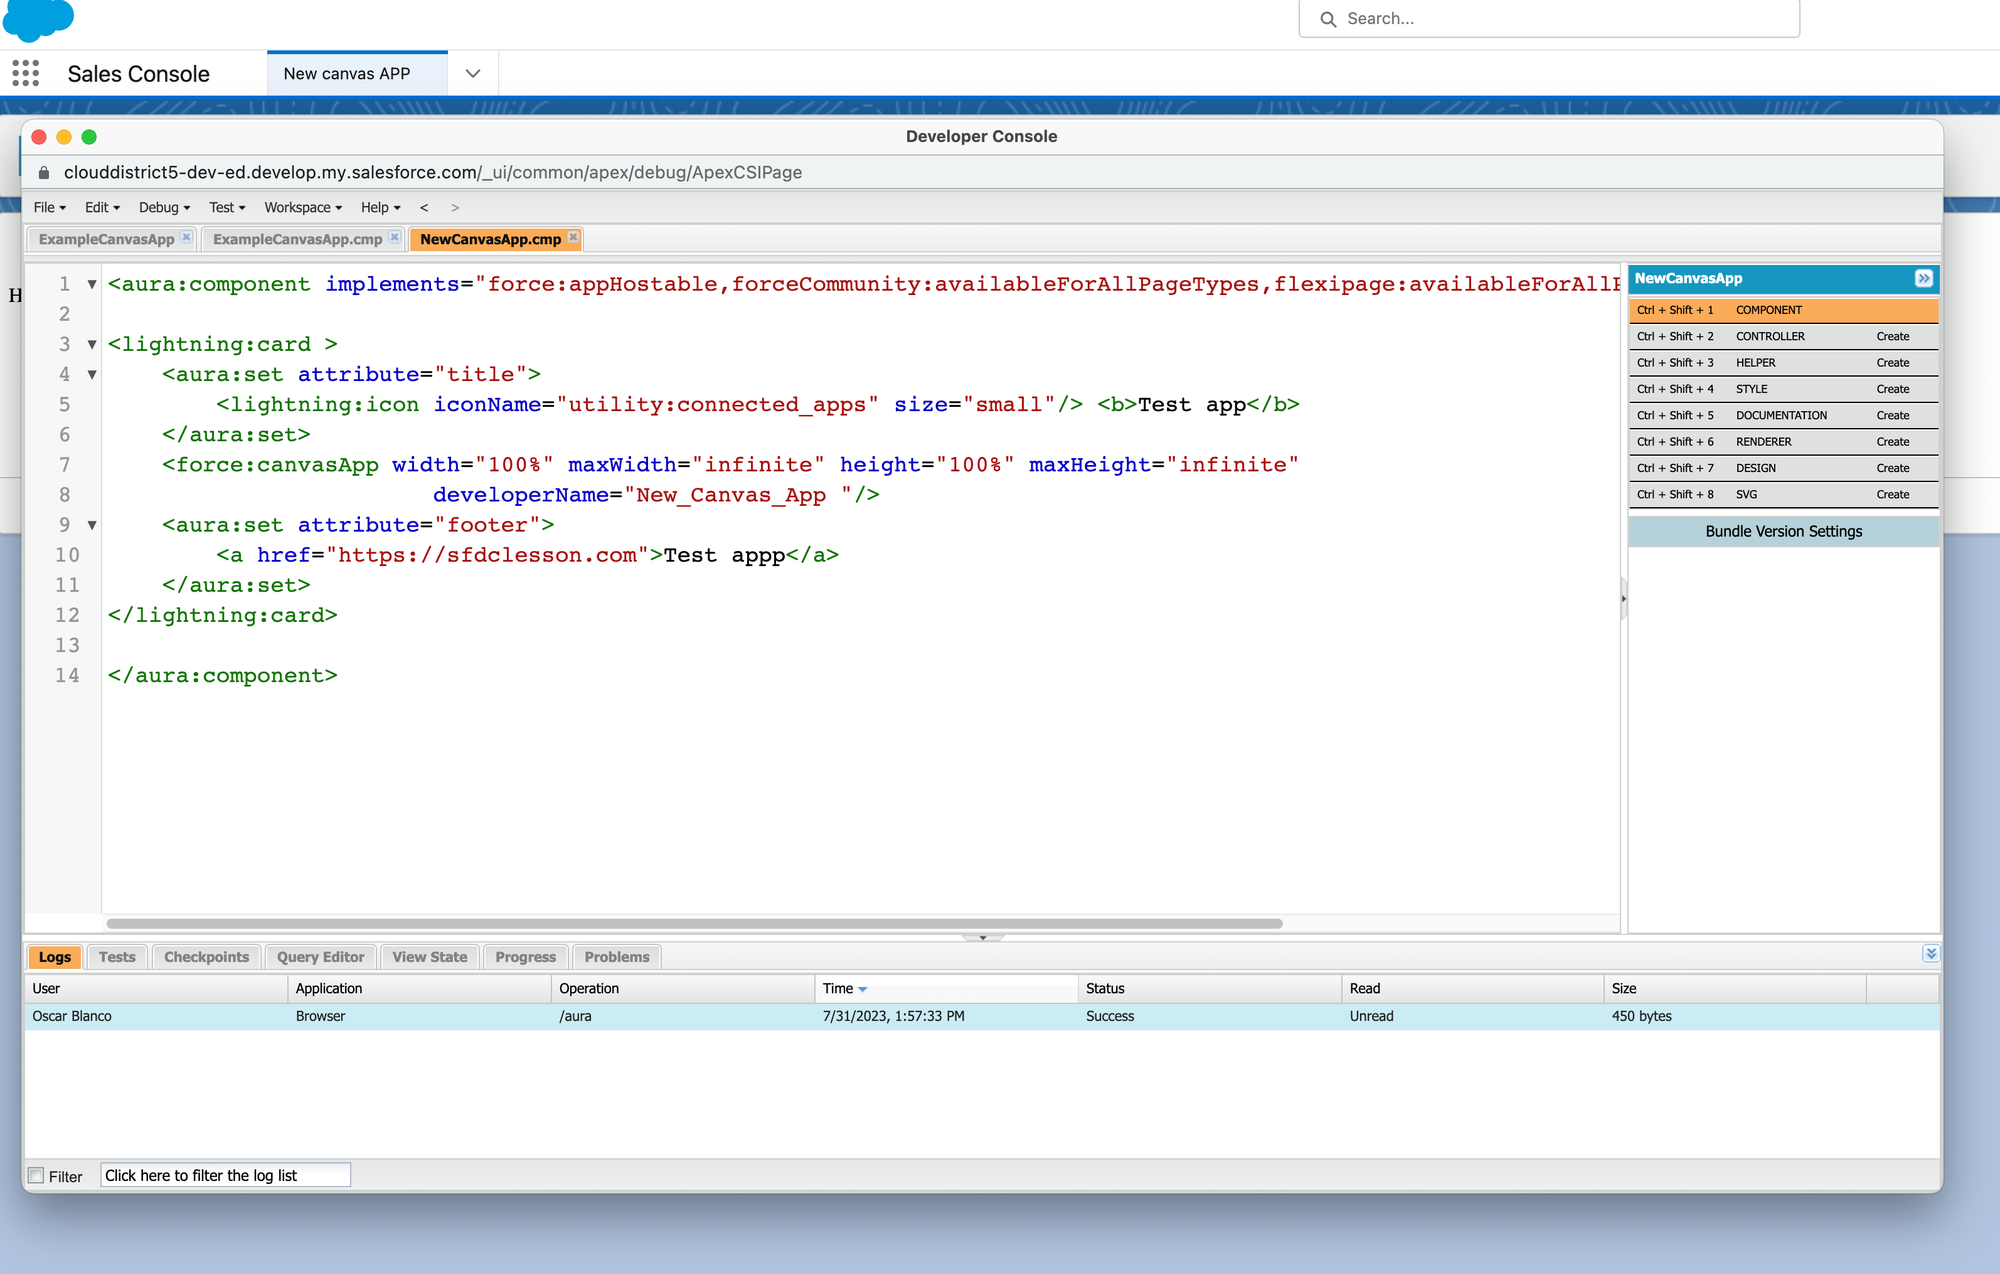
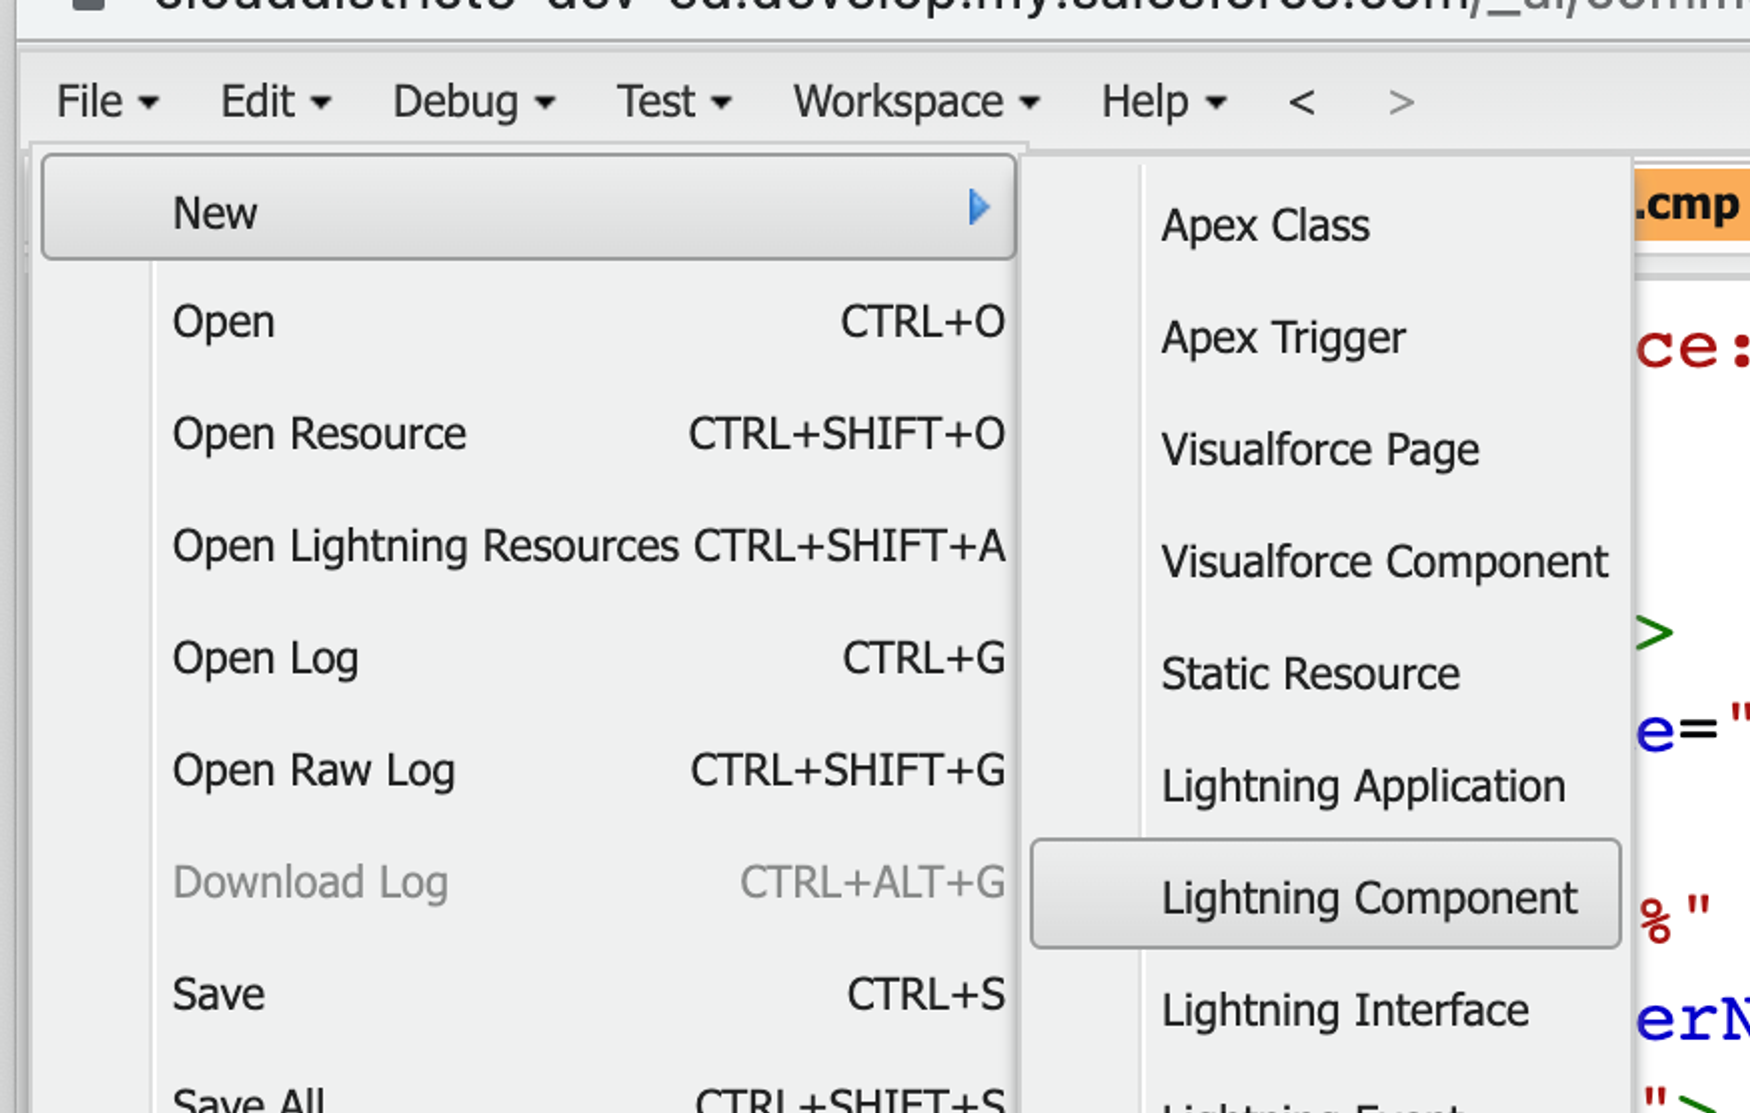
From here, we can use the menu option File > New > Lightning Web Component to create the component, assign a name and description and if necessary a bundle.
To register our web application as a source of the Canvas component we need the API Name parameter that was generated (or assigned) when creating the Connected App. This identifier is assigned in the "developerName" property of the Canvas component:
<aura:component implements="force:appHostable,forceCommunity:availableForAllPageTypes,flexipage:availableForAllPageTypes" access="global">
    <force:canvasApp width="100%" maxWidth="infinite" maxHeight="infinite"
                        developerName="REEMPLAZAR POR API NAME"/>
</aura:component>
Once the component is saved, we can add it to our own page. To add a new page we access the "Service Setup" option in the upper right menu.
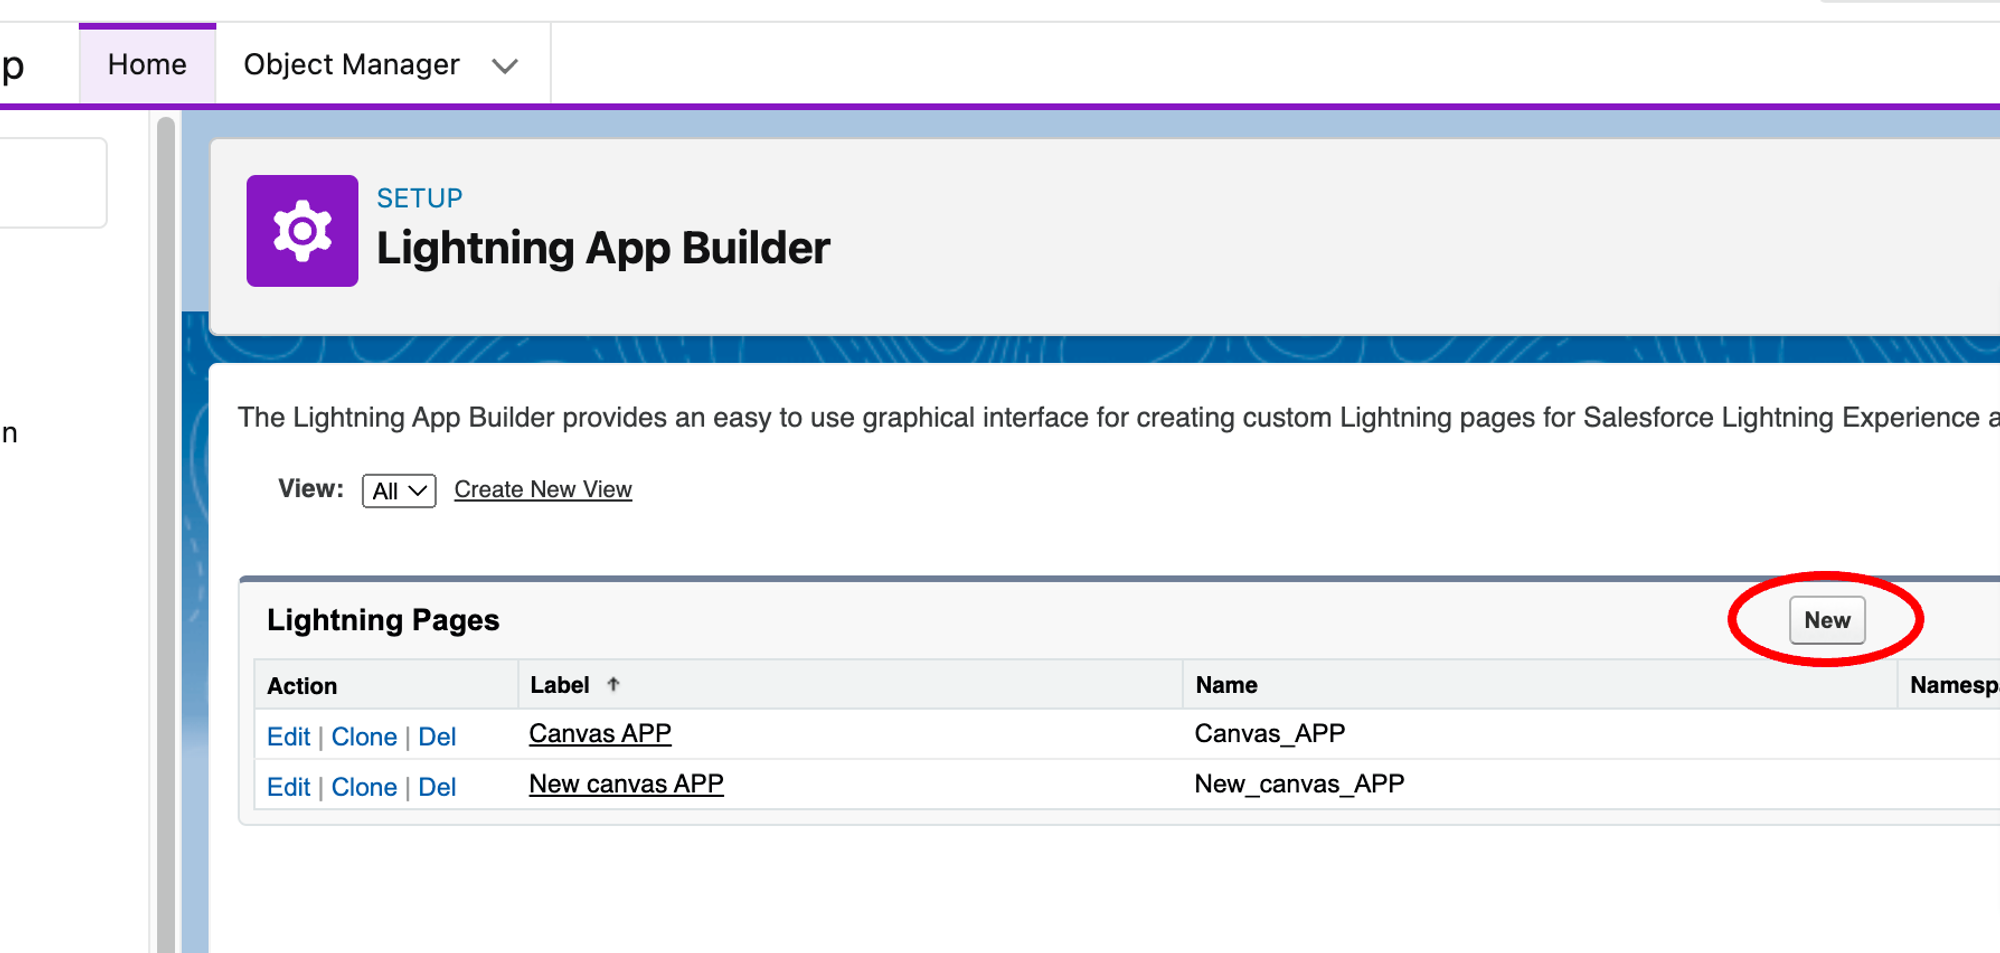
Then, we select the User Interface > Lightning App Builder option from the left side menu.
A list of all applications already created will be displayed. Click "New" at the top of the list.
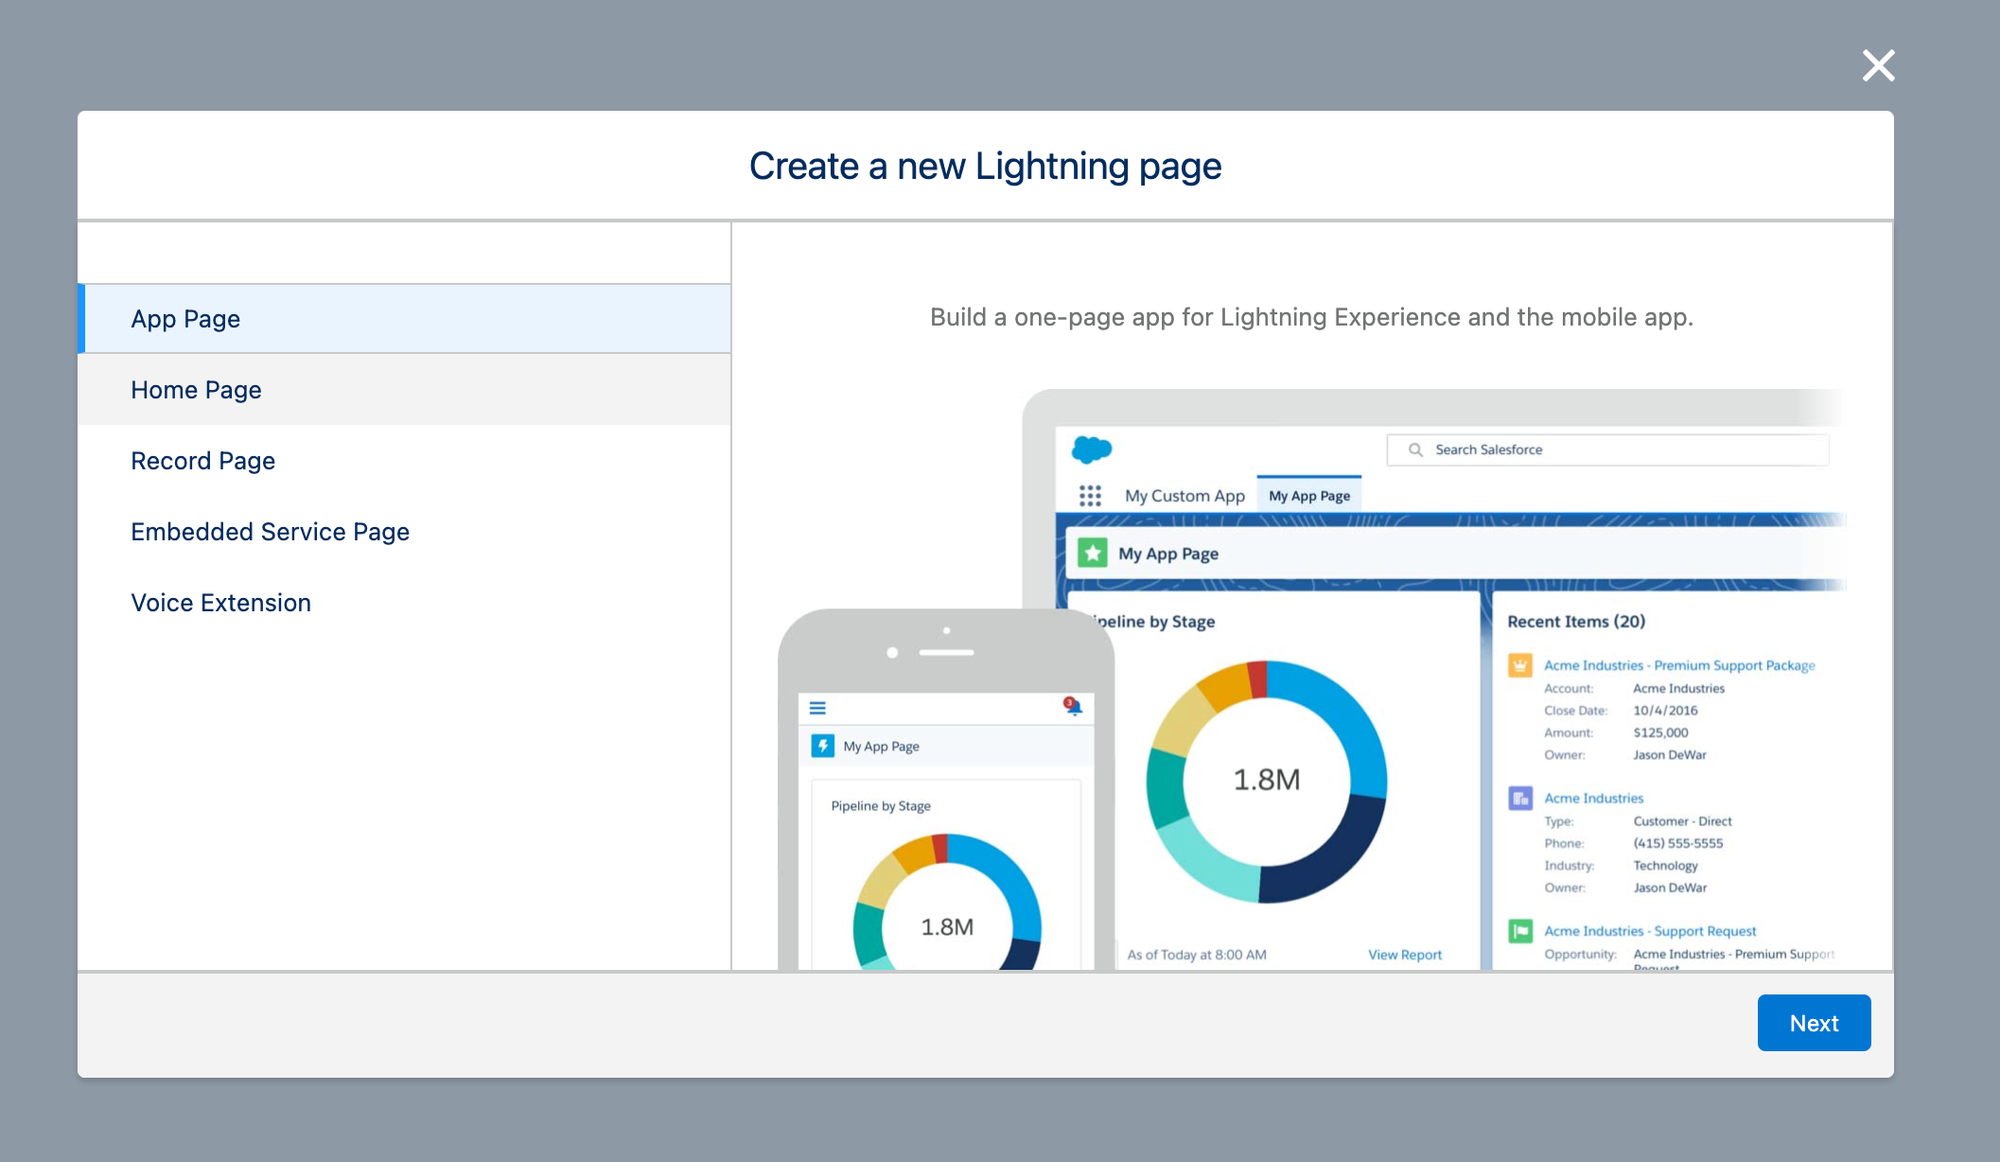
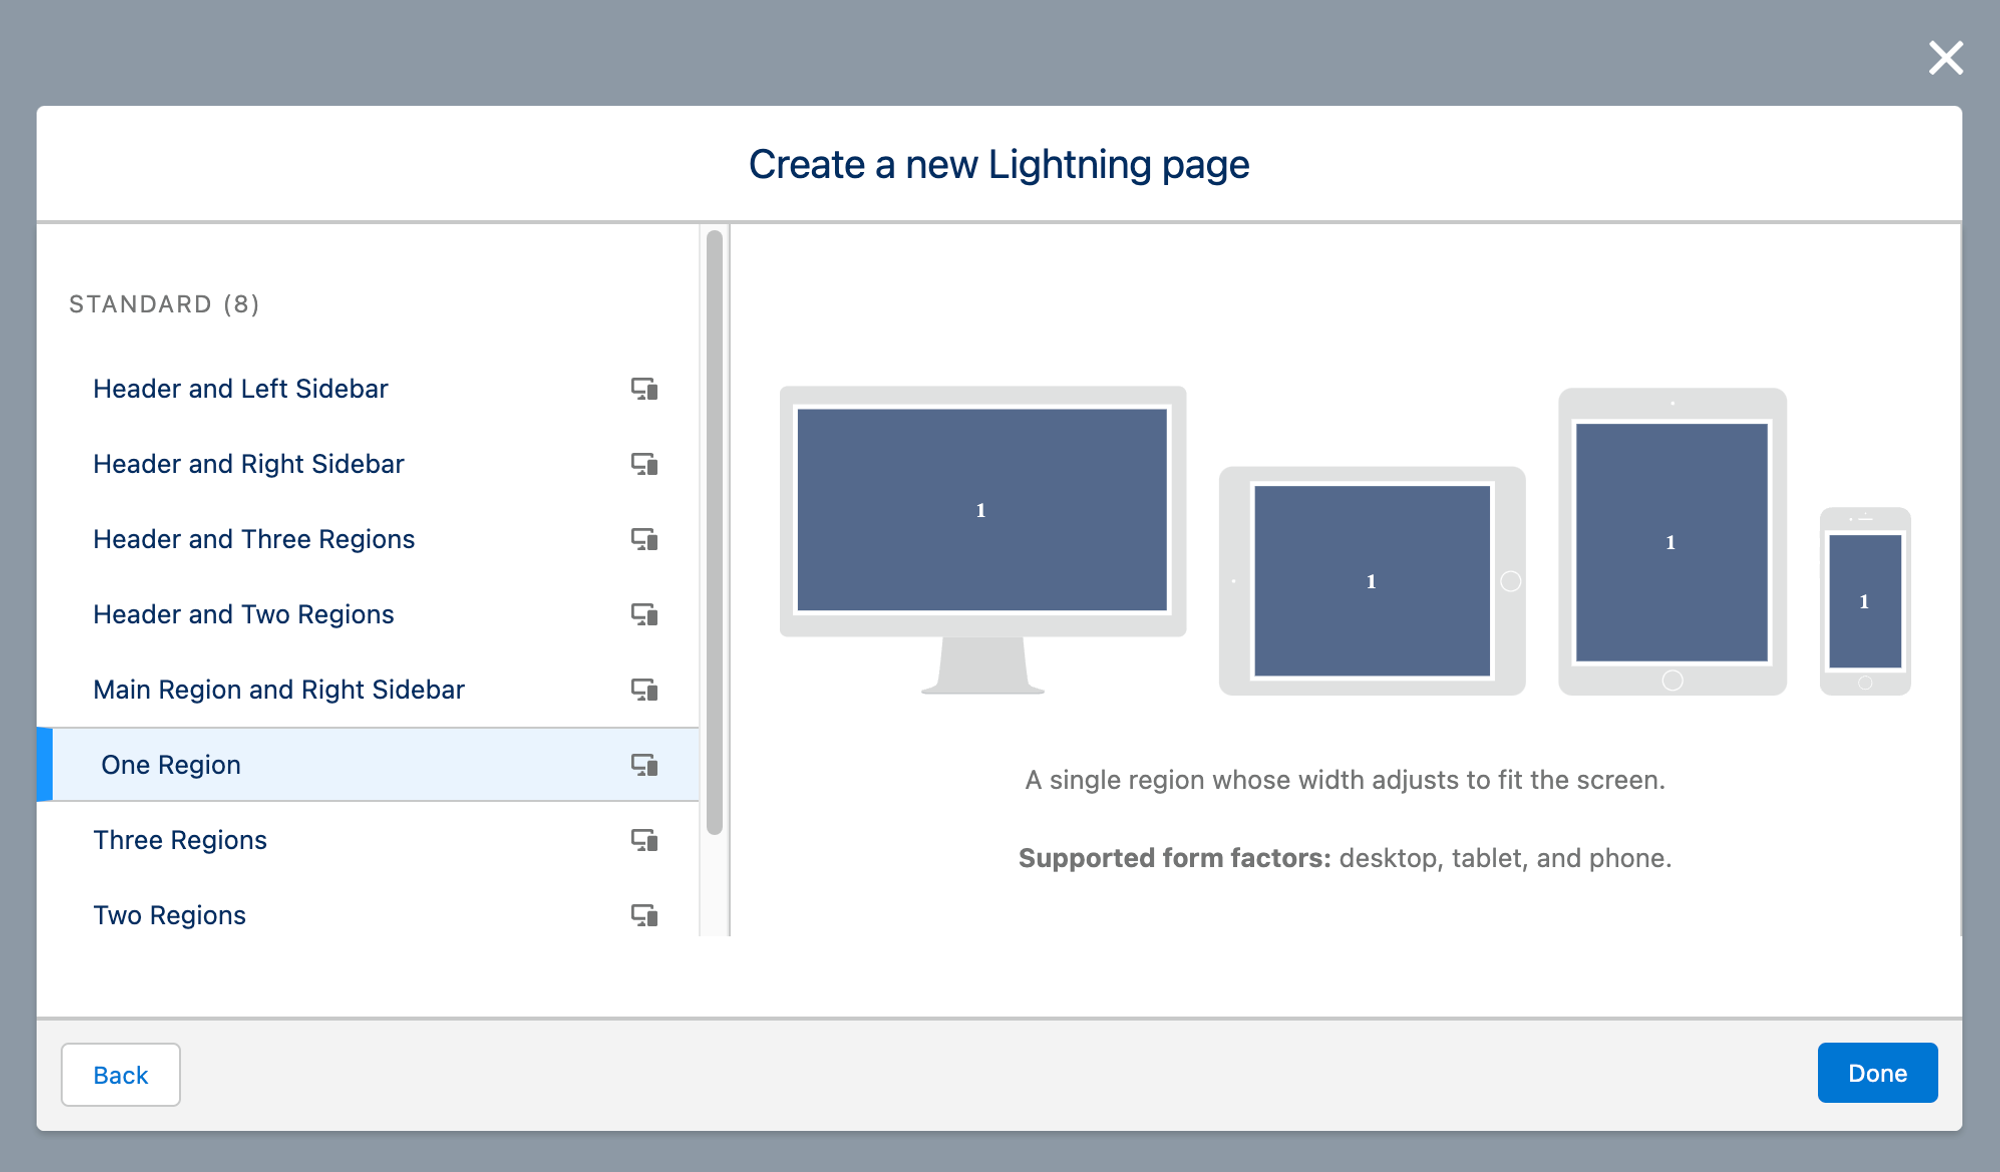
In the modal that appears, select "App Page" and press "Next".
We choose the distribution of the created page, in our case "One region", and press "Next".
Once the initial configuration is completed, we will be shown the design console for the new page. In the central part we can see our page, with a button to add components "Add Component Here". Click the button to add a new one.
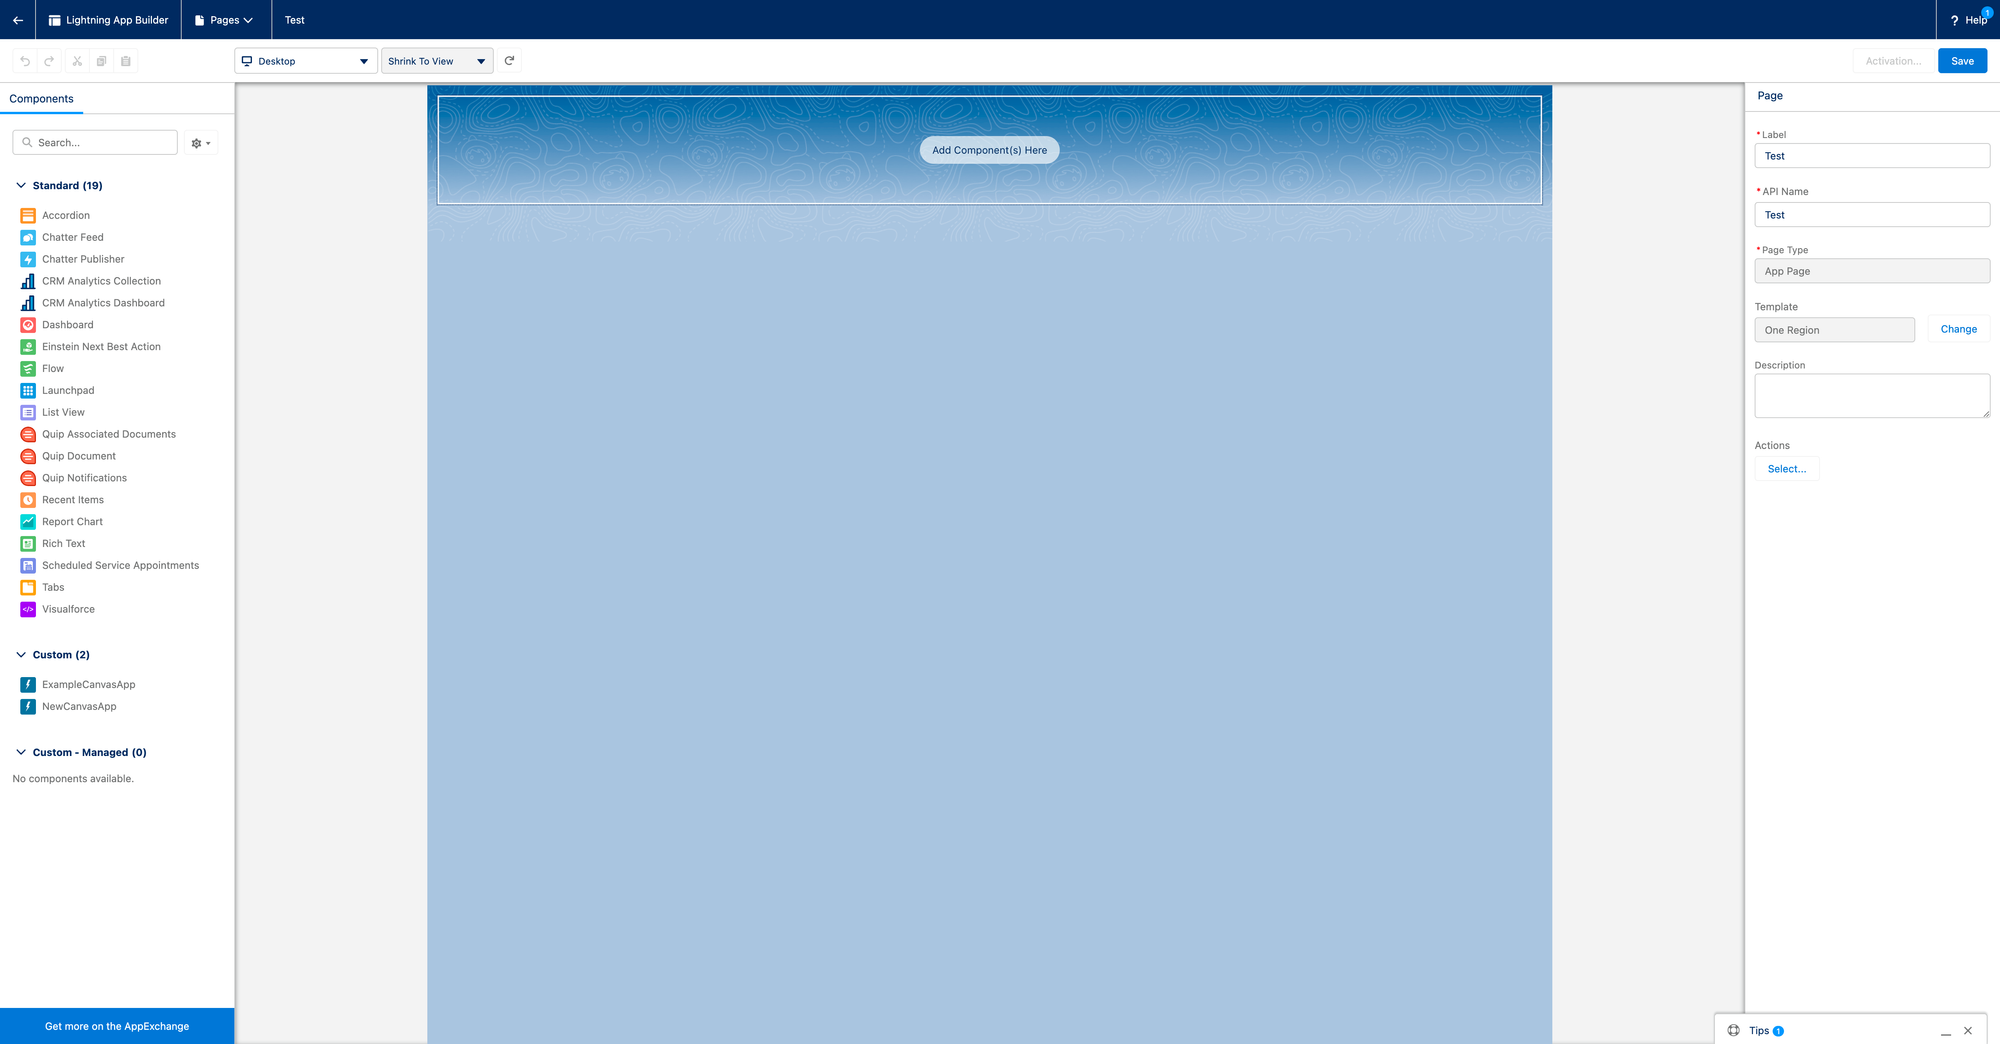
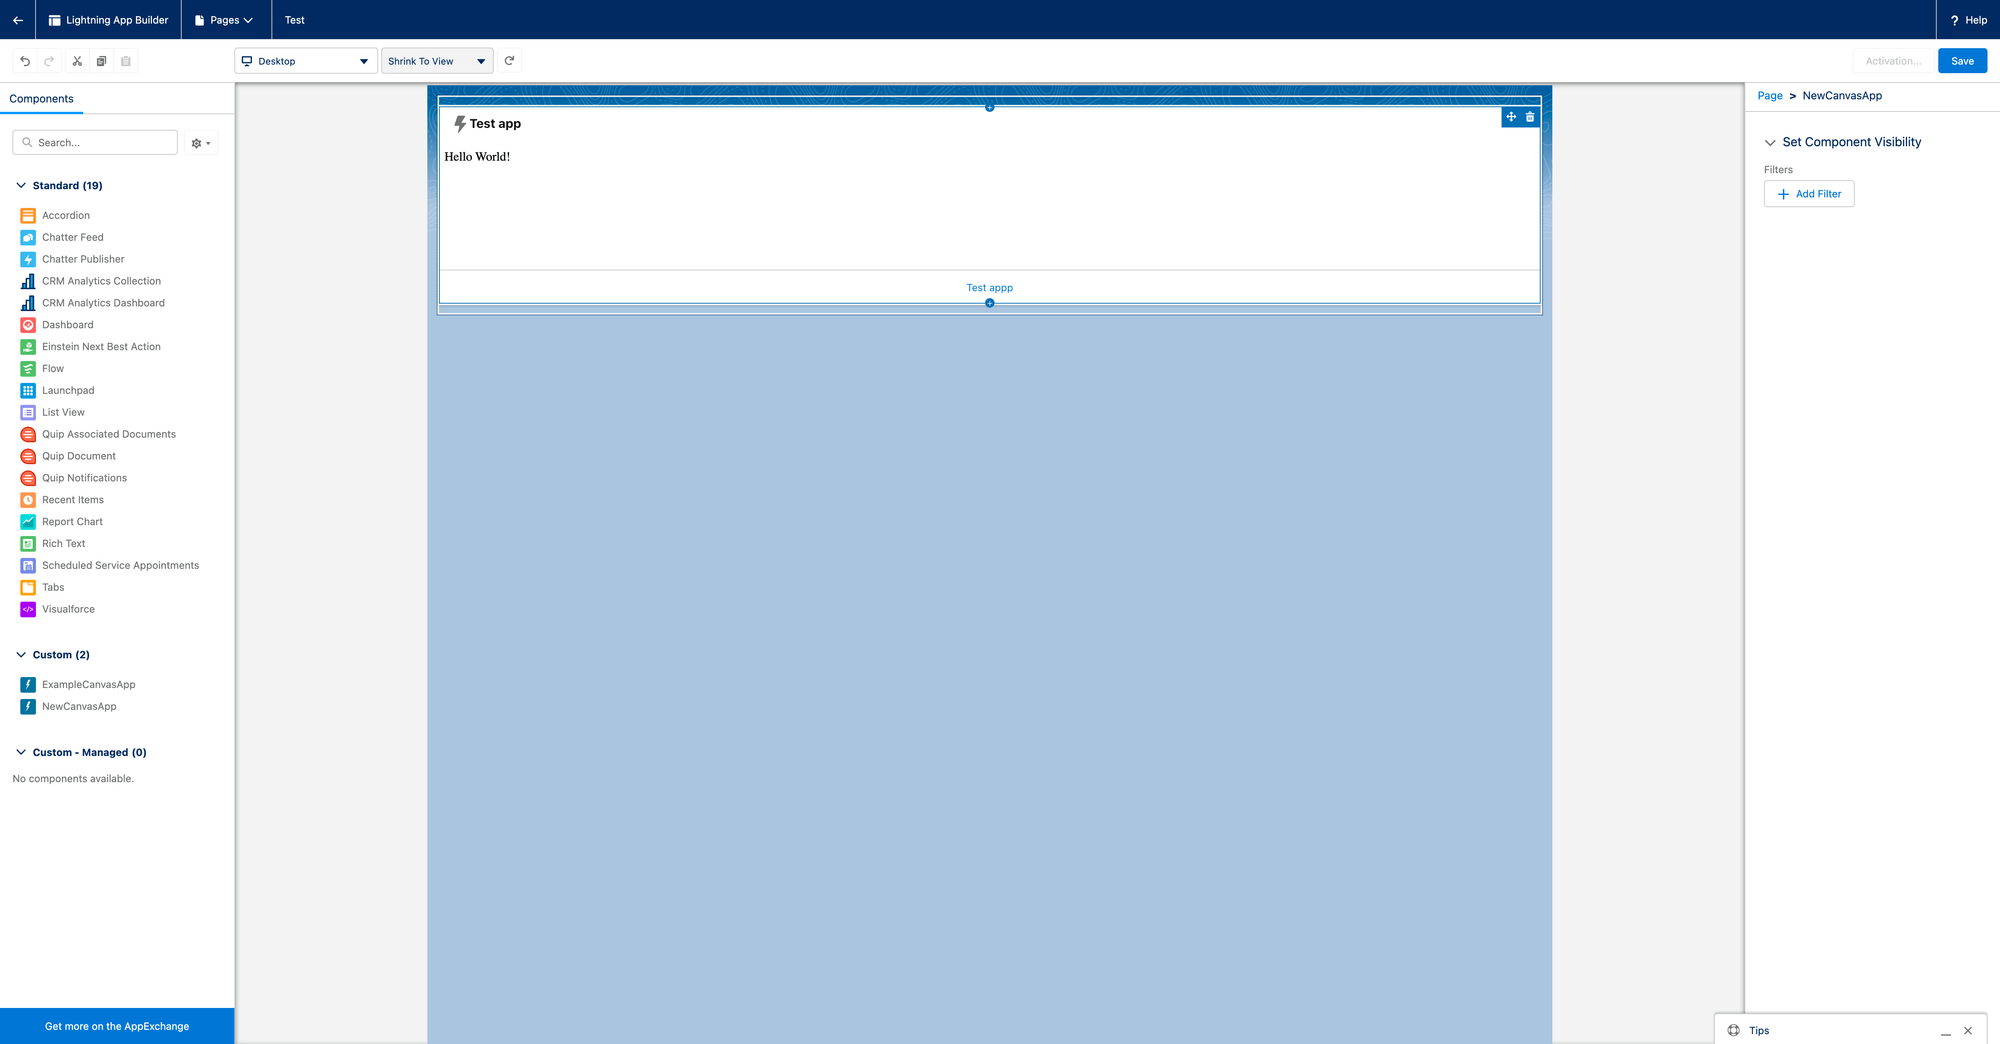
Clicking adds a zone for components. Now we can click on our App, which should appear in the left area, within the "Custom" section. When you click on the app you want, it will be displayed in the central area.
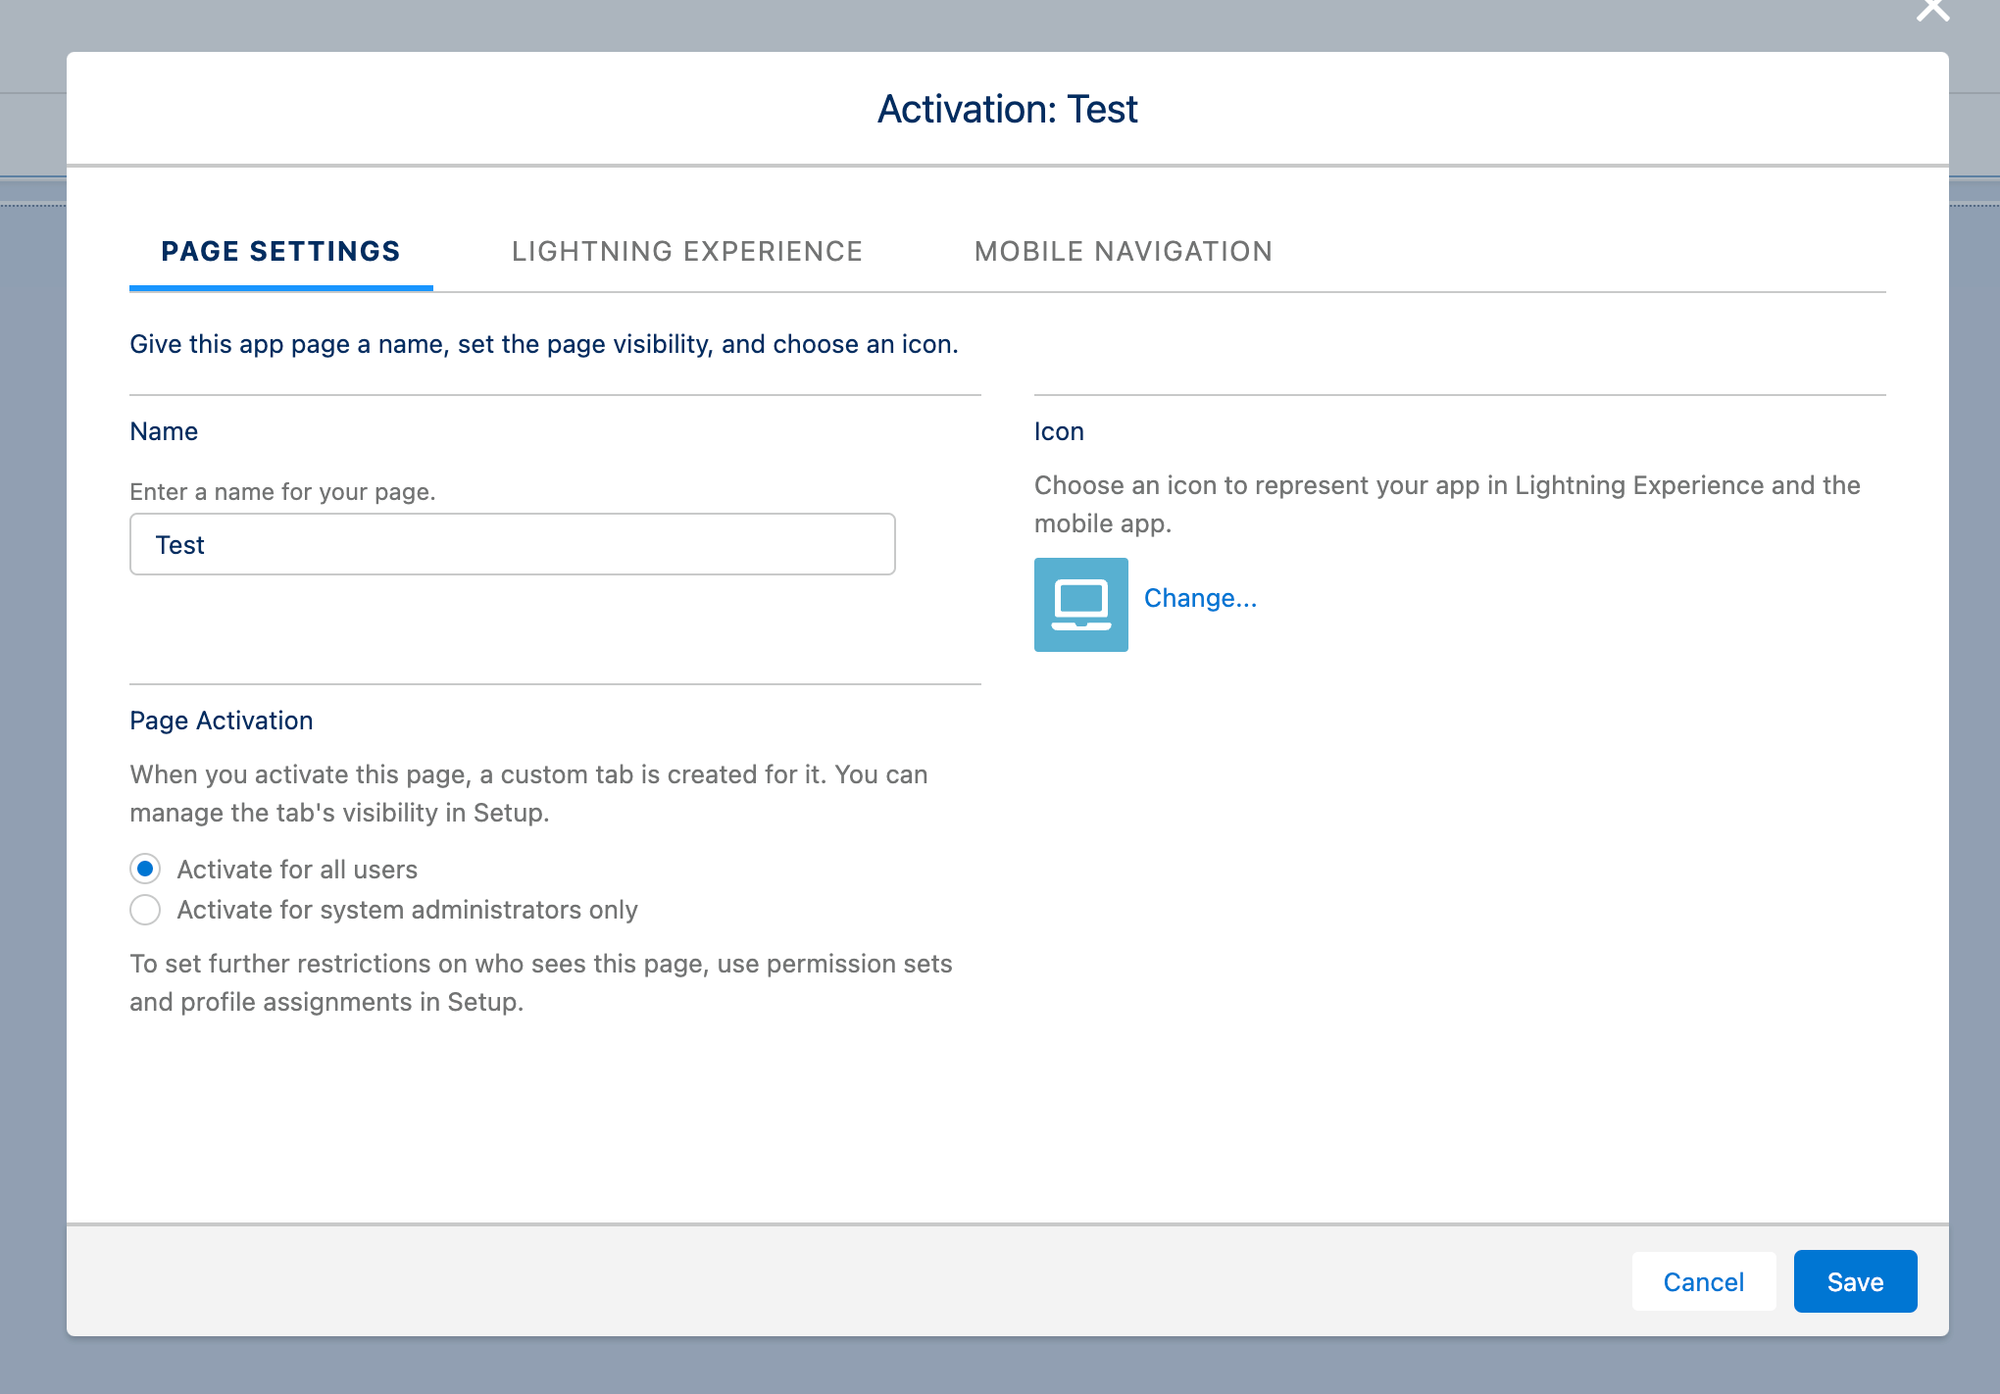
Now by clicking "Save" in the upper right we will be asked if we want to activate the page. Click "Activate".
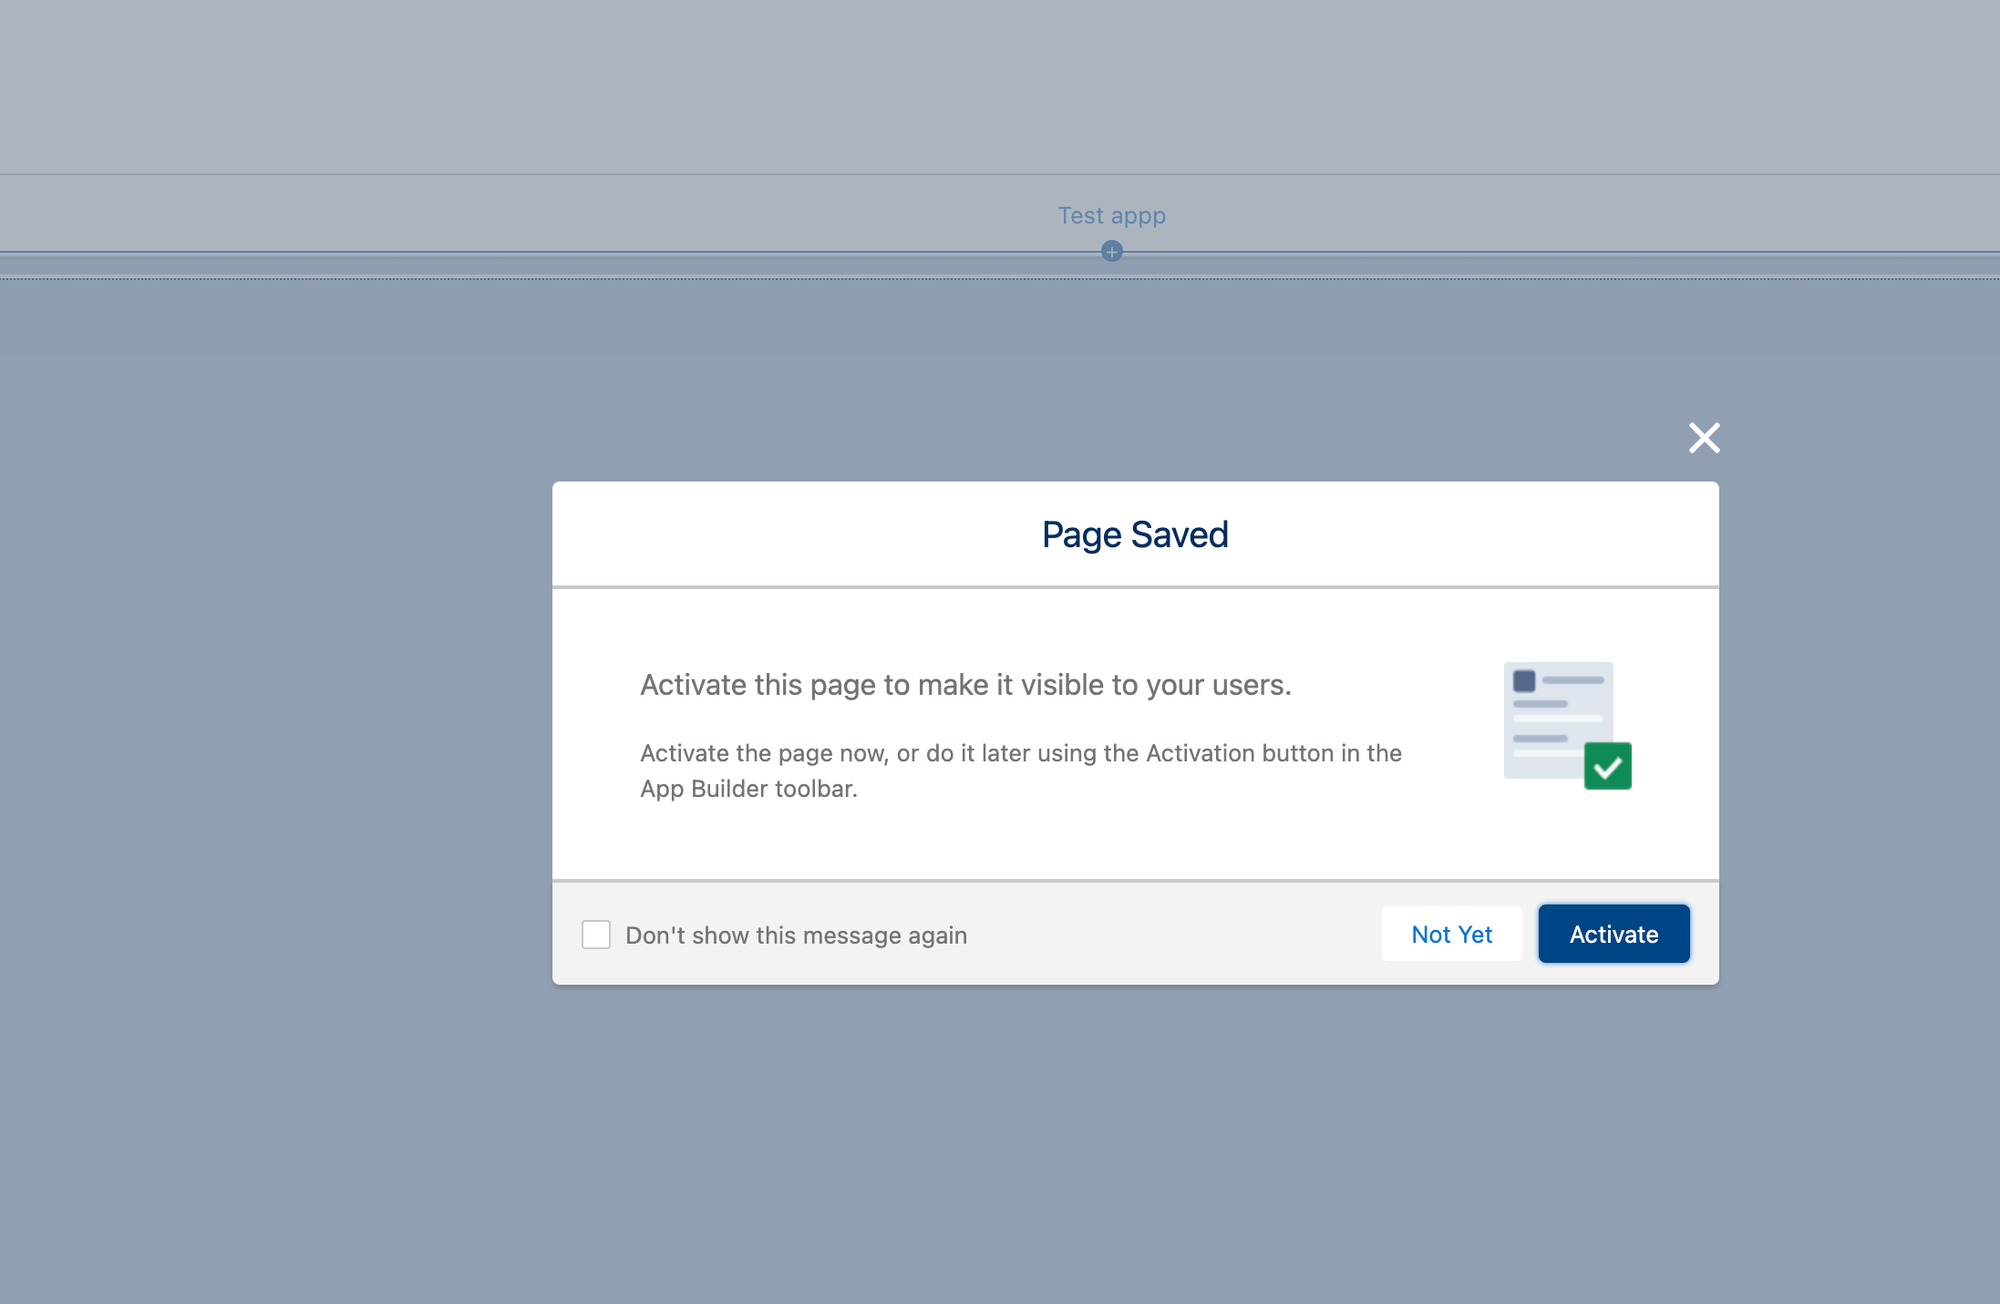
Another modal will be displayed with the information related to the page that we are going to publish. In the section "Page Settings" we can modify the name, icon and decide which users to show the page. Check "Activate for all users".
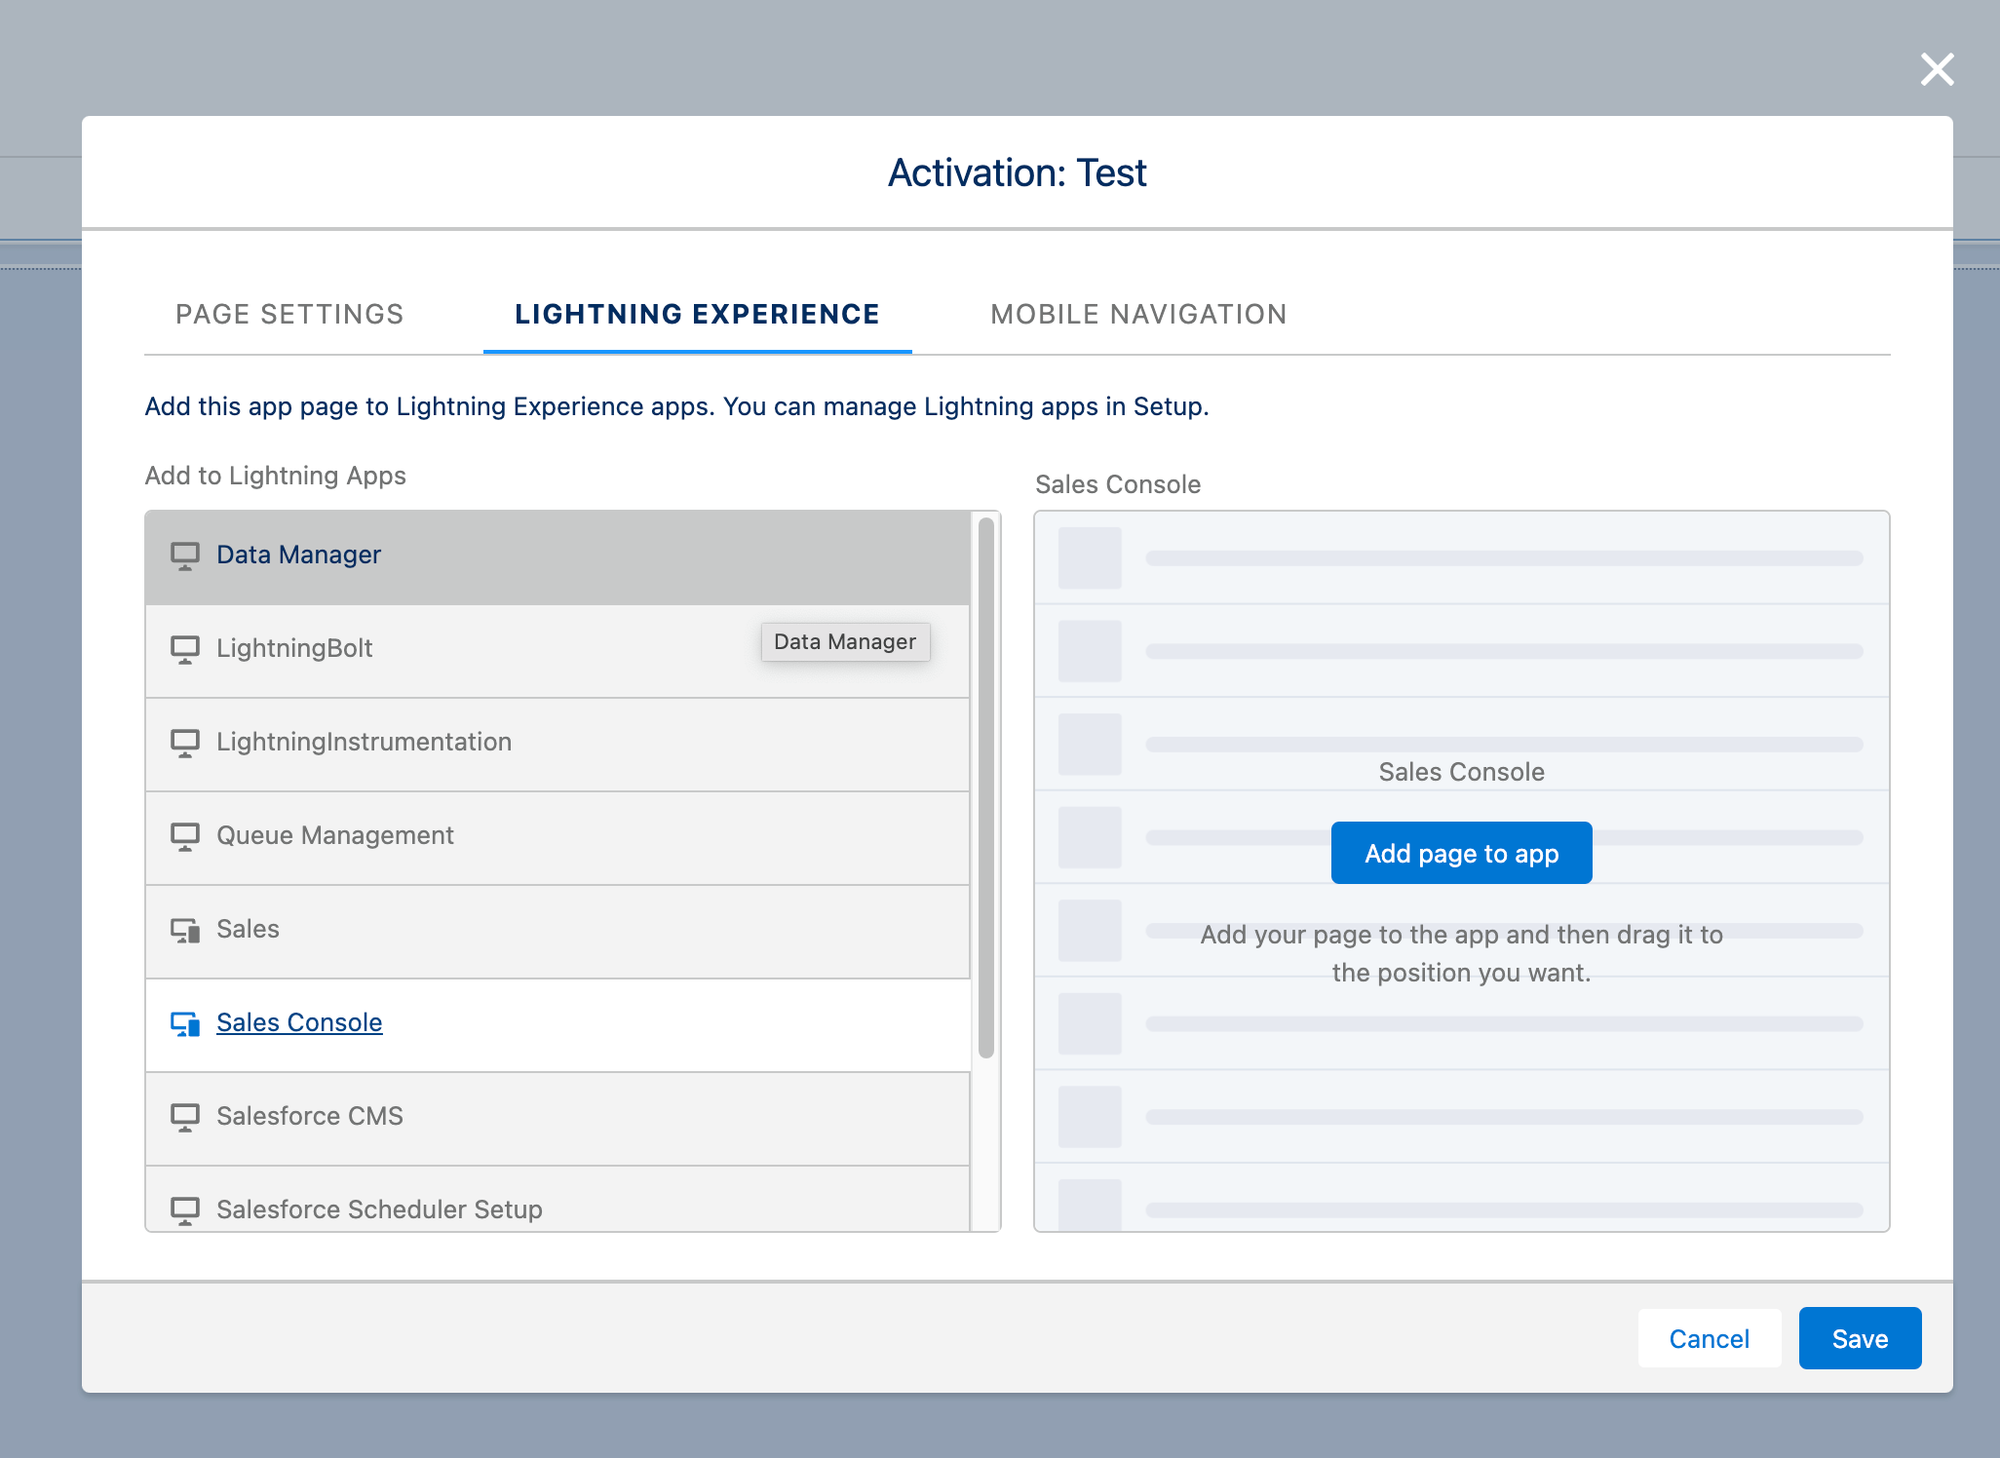
From the "Lightning Experience" tab we can select in which area of Salesforce the page will be displayed. In our case, for this example, select "Sales Console" and click "Add page to app" in the right area.
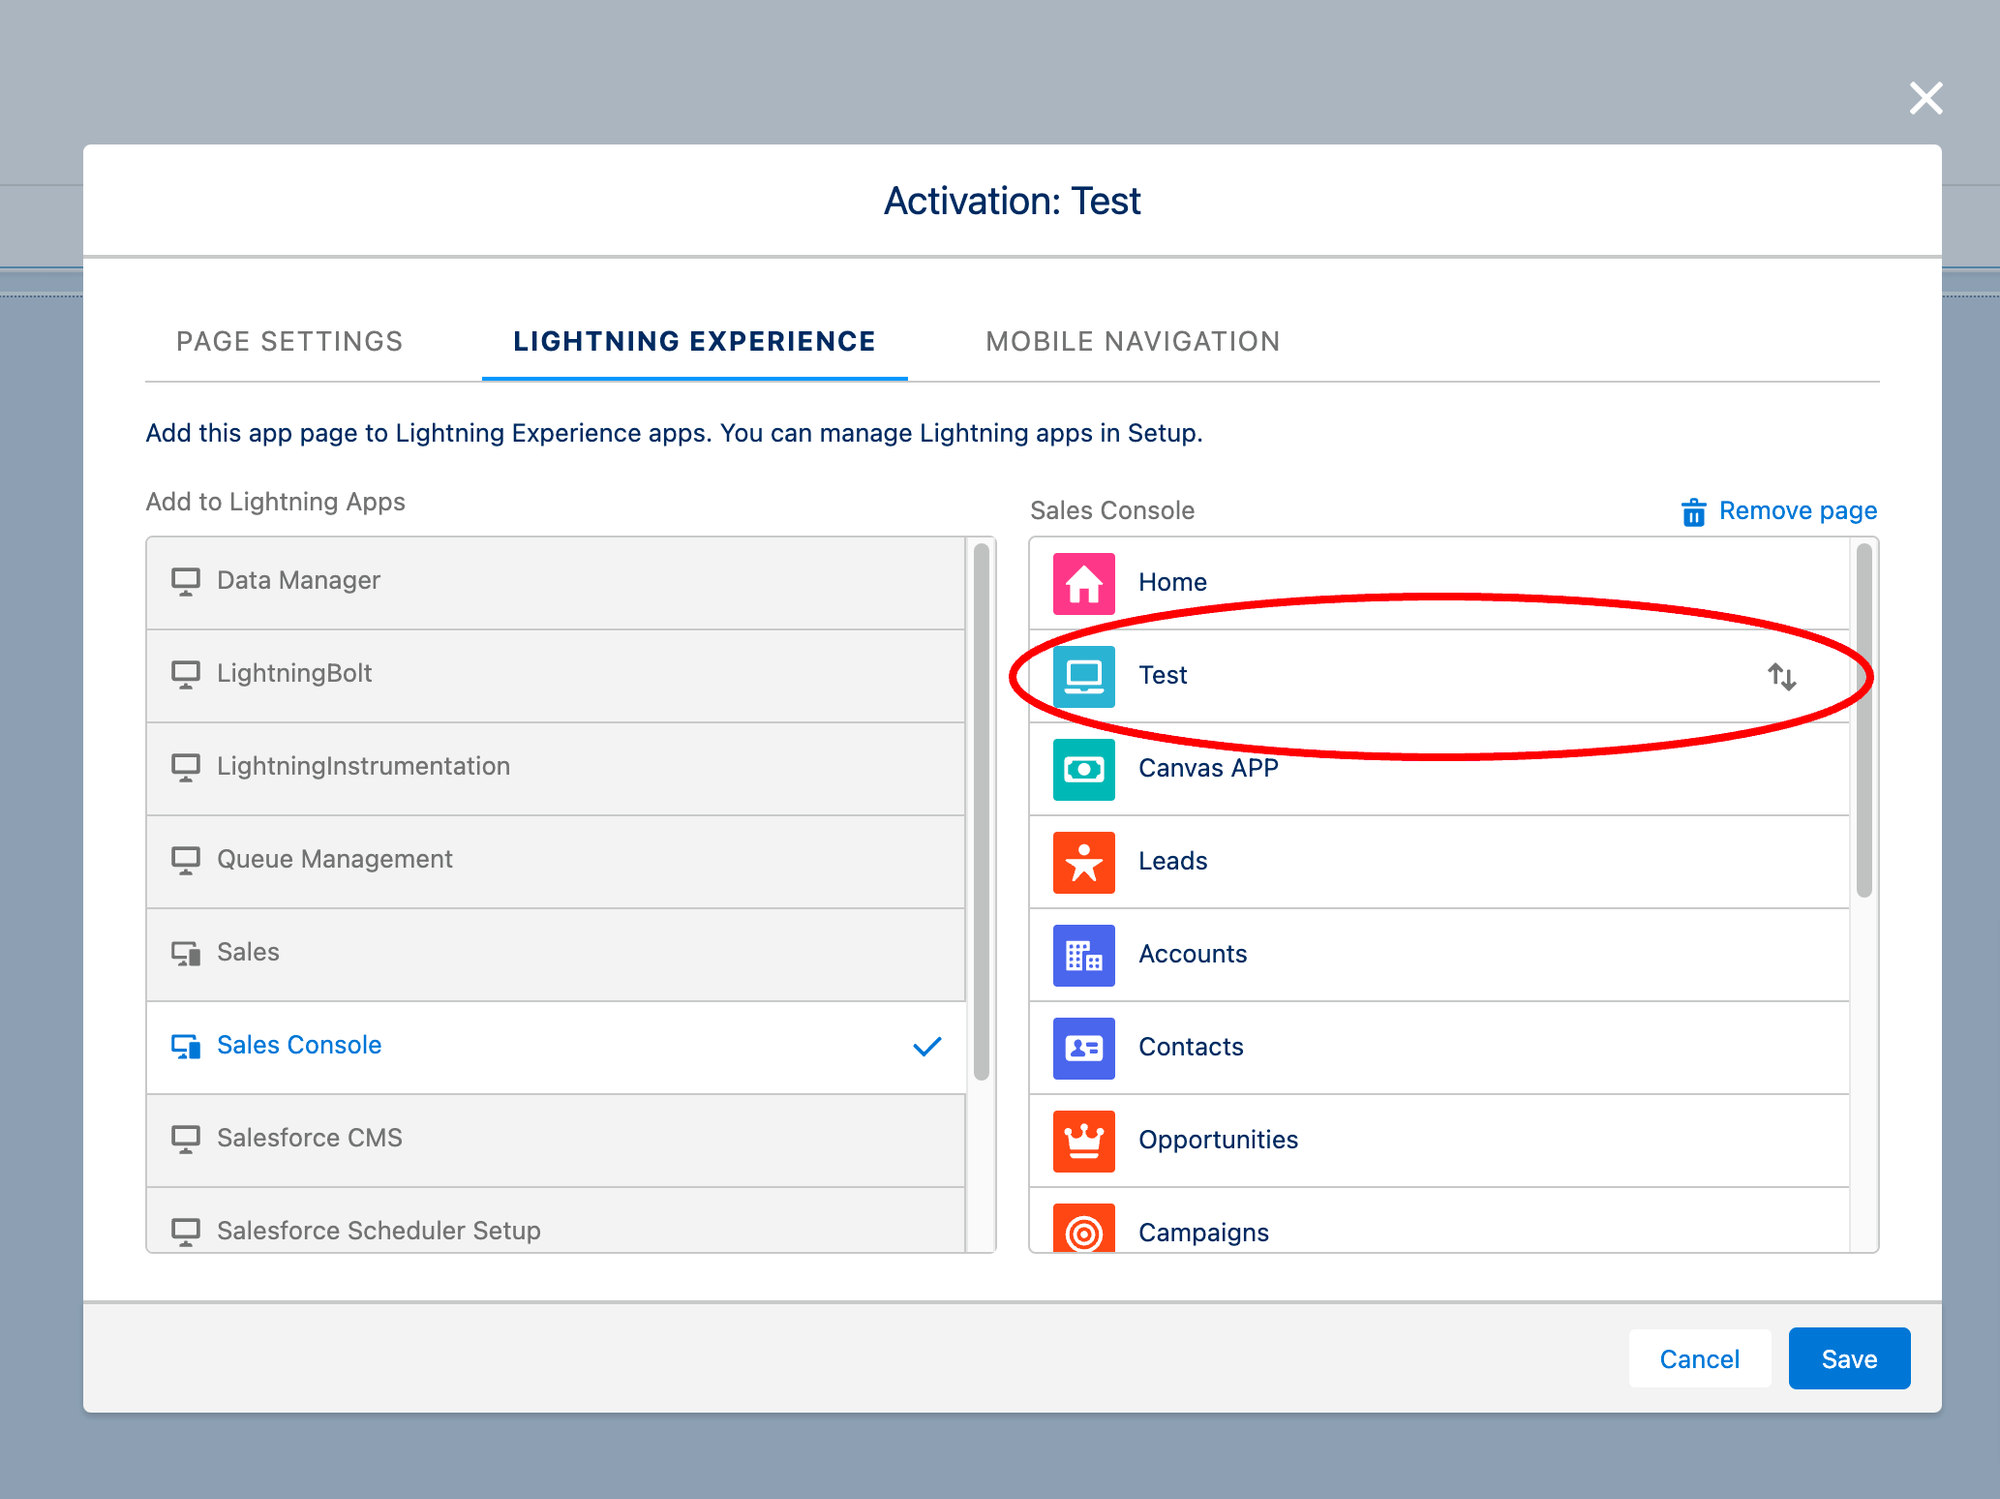
We will see our page among the menu items, being able to modify their position. Now press "Save".
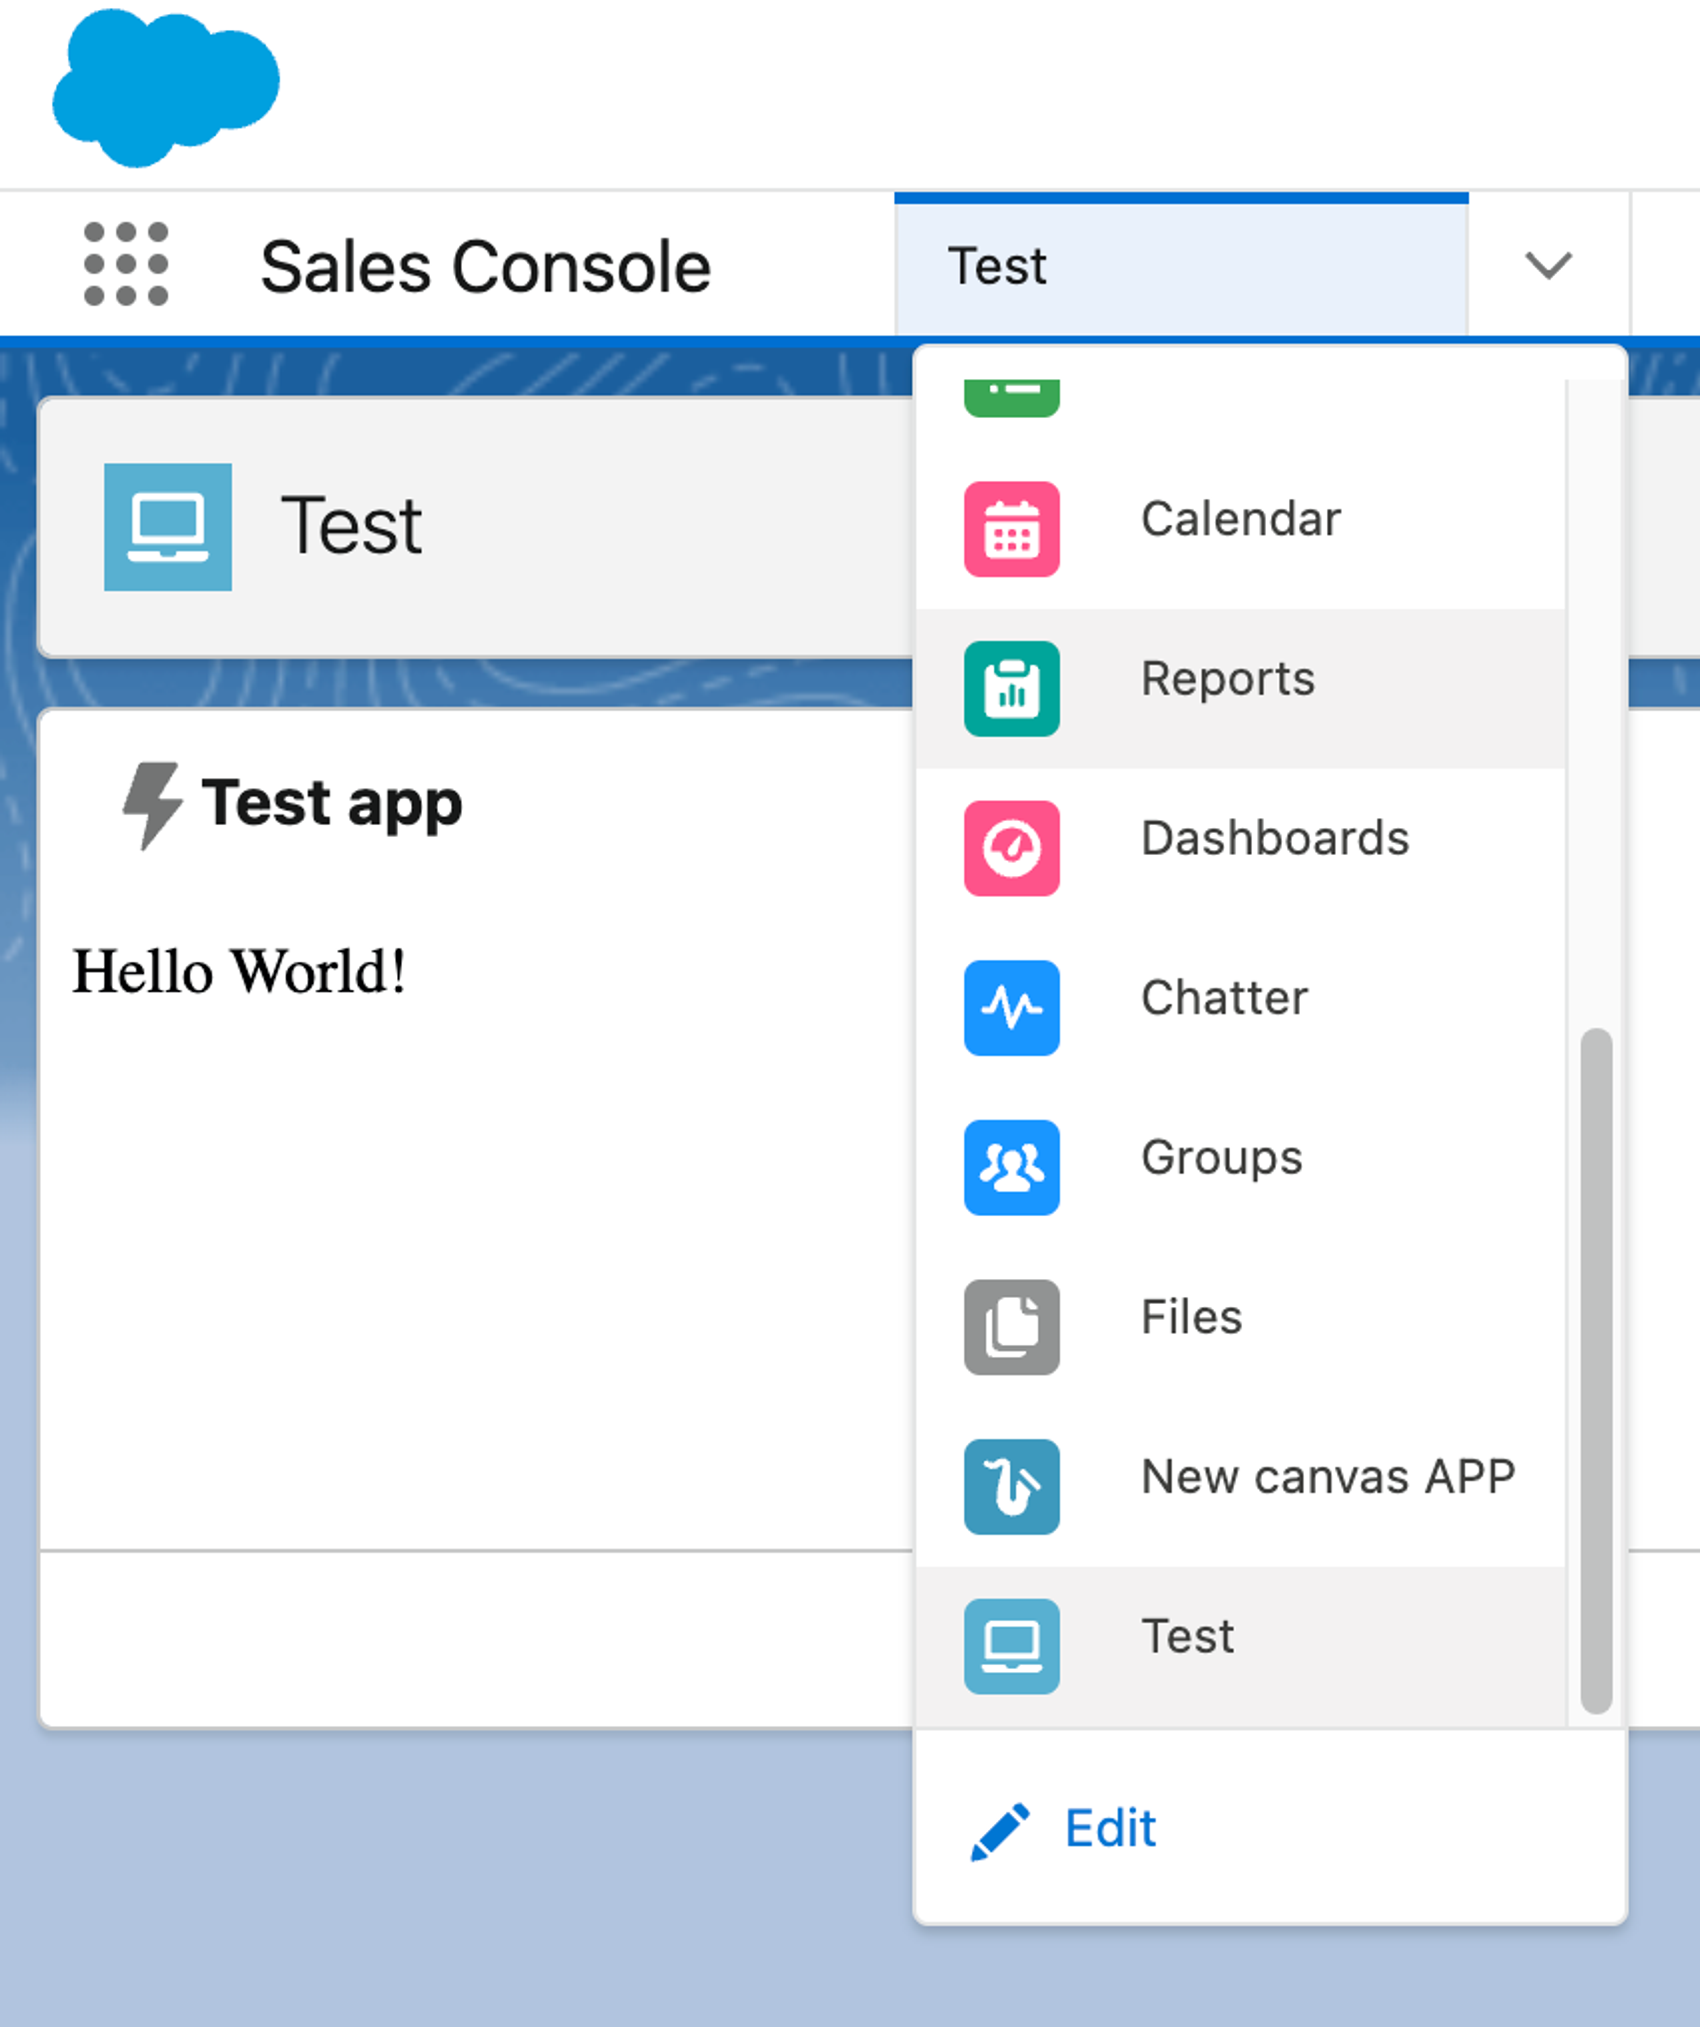
Now, if we go to the "Sales Console" app we can see in the menu (or in the drop-down) the new item.
Updated 8 months ago