
Manage inApp/inWeb
To access the in-app/in-web management area, navigate through the main menu to Campaigns > inApp/inWeb. This section allows you to manage all campaigns created to date.
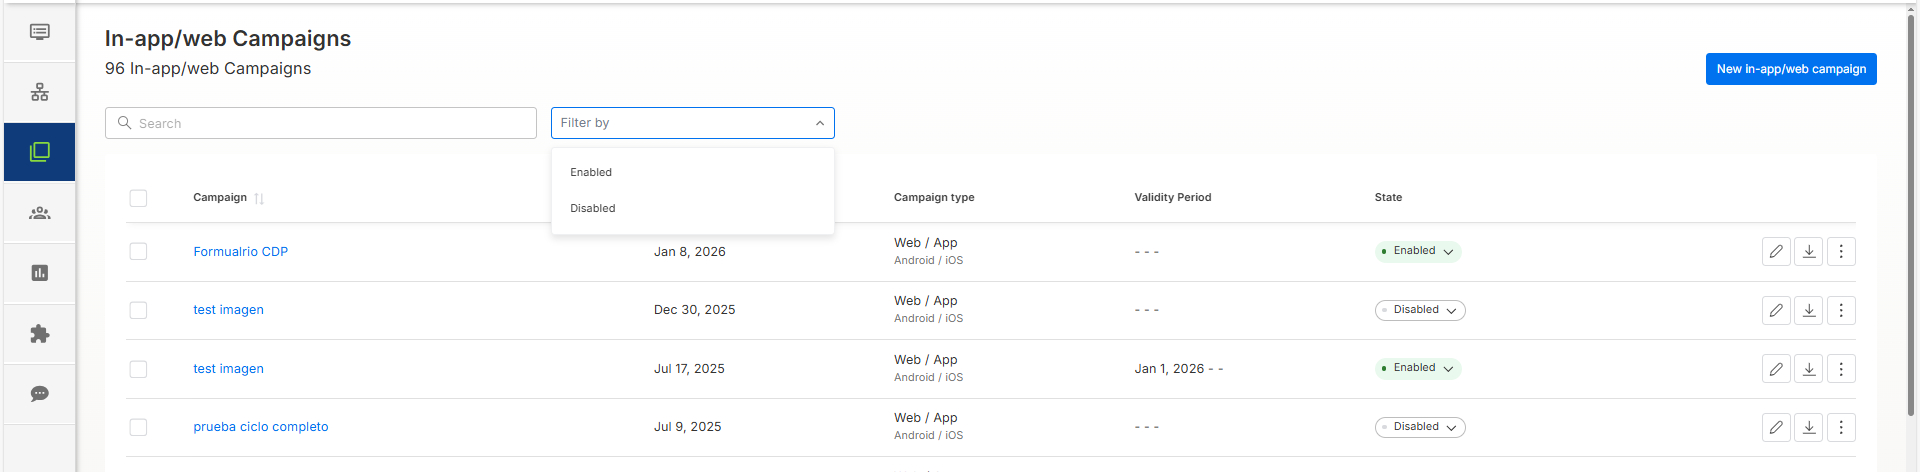
Search and Filter
At the top of the page, you will find:
- Search Bar: Look up campaigns by name.
- Status Filter: Filter campaigns by Enabled or Disabled status.
Campaign List
The table displays the following informative fields for each campaign:
- Campaign: The name of the campaign. You can sort these alphabetically in ascending or descending order by clicking the arrow icons.
- Creation: The date the campaign was created. Use the arrow icons to sort chronologically (from newest to oldest or vice versa).
- Campaign Type: Specifies the platform, such as Web or App (including Android and/or iOS).
- Validity Period: Indicates the campaign's end date. If this field is blank, the campaign has no expiration date.
- State: Shows whether the campaign is Enabled or Disabled. You can toggle the status easily by clicking directly on the label.
Action Buttons
On the far right of each campaign row, there are three action icons:
- Pencil Icon: Edit the campaign details.
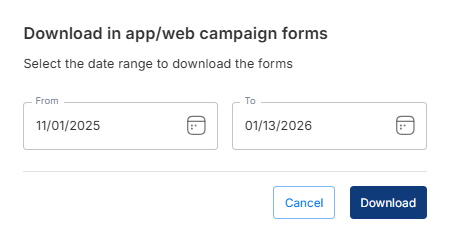
- Download Icon: Export collected form data. You can select the specific date range you wish to download.
- Three-Dot Icon: Open a menu to copy the campaign ID, clone or delete the campaign.
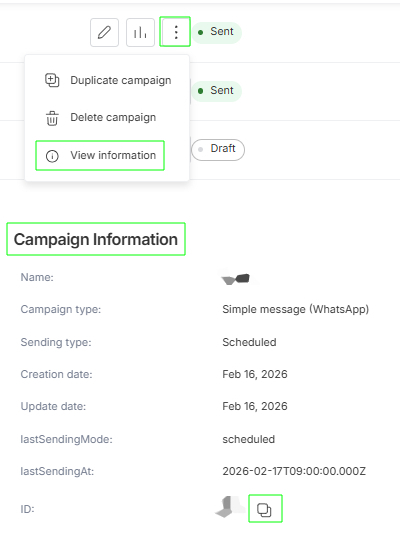
How can I find the Campaign ID?
If you need to retrieve a specific Campaign ID for your records or API integrations, locate the campaign you are interested in within your dashboard. On the right-hand side of the campaign row, click the three vertical dots (icon) to open the action menu.
From the dropdown menu, select the View information option. A details panel will appear, displaying comprehensive data about your campaign or customer journey, including the name, type, and creation date. You will find the ID at the very bottom of this list. You can easily copy it by clicking the "copy" icon next to the ID string.
Alternatively, you can locate the ID by simply clicking on the campaign to open it. Look at your browser's address bar; the number appearing at the end of the URL is the Campaign ID.

Updated 5 months ago