
The CNMC Alias Registry in Spain
To combat identity theft and fraudulent messaging (smishing), the Spanish National Markets and Competitivenes Commission (CNMC) enforces the official Alias Registry.
As an indigitall client sending corporate text messages to Spanish phone numbers, you must register your custom sender ID(s) on the official government portal and explicitly authorize indigitall as an authorized third party to avoid service blocks.
Note: The indigitall Support department will reach out with the details you need. Feel free to contact them if you have any questions or need further explanation.
Step-by-Step Registration Guide
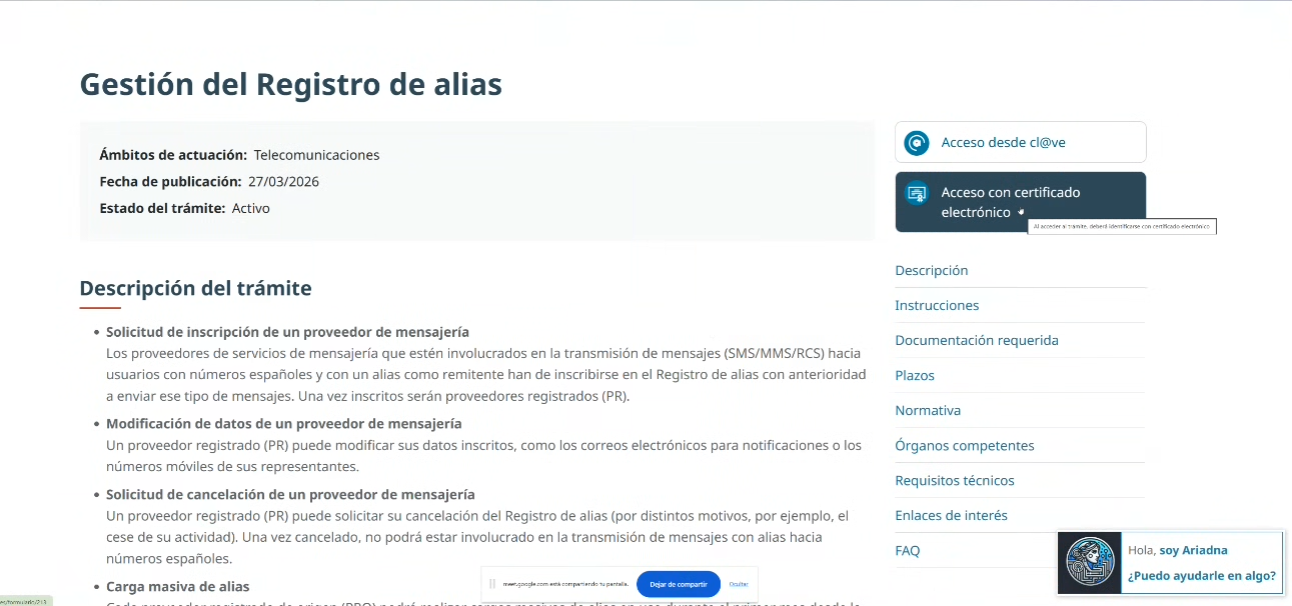
Step 1: Access the CNMC Sede Electrónica
Navigate to the official portal: CNMC Gestión del Registro de Alias. On the right-hand action panel, click on "Acceso con certificado electrónico" to log in securely with your corporate digital certificate, as shown in image below.
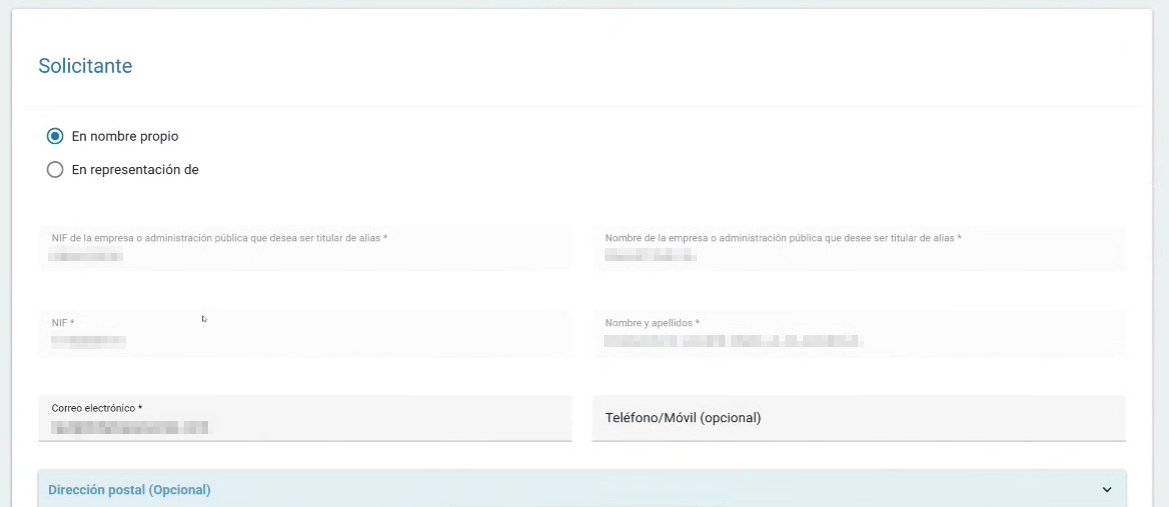
Step 2: Complete Applicant Details
Select "En nombre propio" if applying directly as the business entity and provide the mandatory fields: company NIF, legal company name, applicant's name/surname, contact email address, and phone number.
The Postal Address field initially appears as optional, but you should fill it out right away. Once you select the 'Inscripción de Alias' (Alias Registration) option in Step 3, this section dynamically becomes mandatory, requiring you to complete, at a minimum, all required fields marked with an asterisk (*)
If you select the second radio button, "Persona jurídica" (On behalf of / Representing), you are stating that you are acting as a legal representative for another party. Selecting this option opens or requires the details shown in the modal window in image below, where you must provide two layers of information:
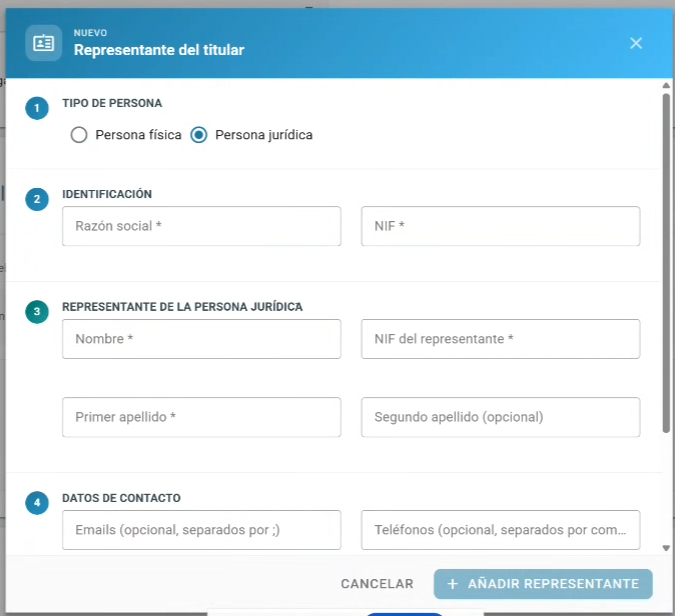
- The Entity Being Represented: You must choose the type of entity. As selected in the image, this is a Legal entity / Corporation. You must then provide the company's official registered name and its corporate Tax ID ("NIF").
- Your Information as the Representative: Under "Representante de la persona jurídica", you must input your personal information as the individual authorized to sign or act for that company. This includes your First Name, Last Name, and your personal Tax ID.
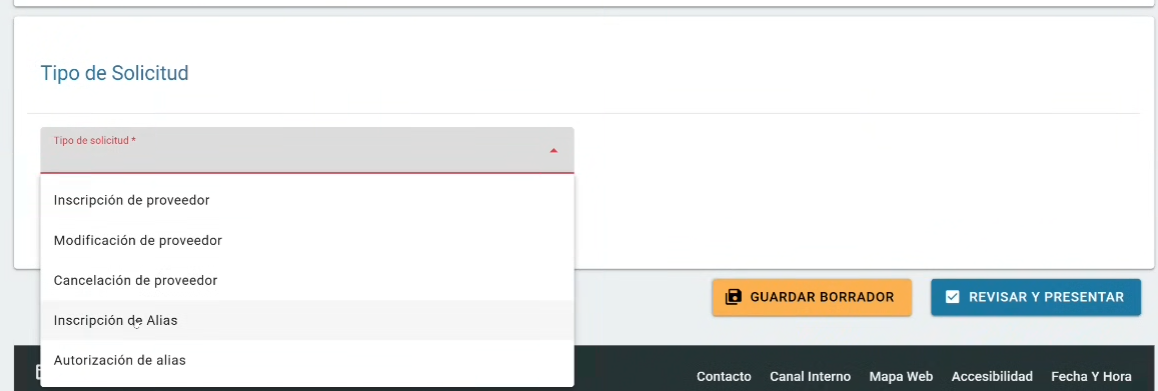
Step 3: Select the Application Type
Open the dropdown menu and select "Inscripción de Alias" to initiate a new sender identity request.
Step 4: Create and Configure Your Sender Alias

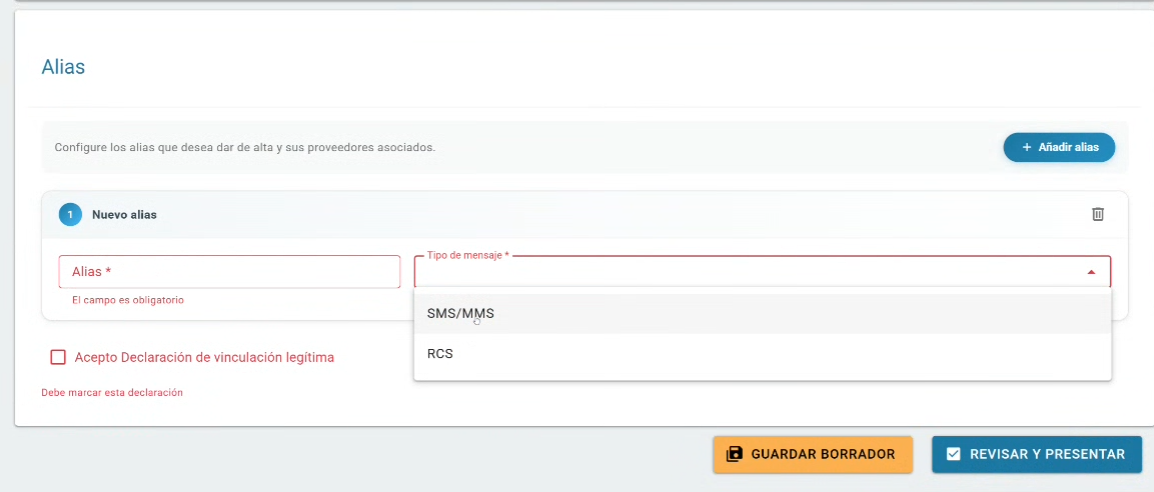
In the top right corner, click "+ Añadir alias" to open the configuration card. Fill out the following options carefully:

- Alias: Enter the exact, case-sensitive alphanumeric sender name you use to message customers. It must contain no spaces or special characters and, for SMS, must be less than 11 characters long.
- Message Type: Open the dropdown to select between SMS/MMS or RCS according to your indigitall service setups.
Important Note for RCS Users: If you use RCS, please note that a dual registration is required. You must register for both SMS and RCS channels to ensure proper delivery.
- Dates: Enter your preferred F. activación (activation date). The F. fin (end date) is optional; leave it blank for permanent business use.
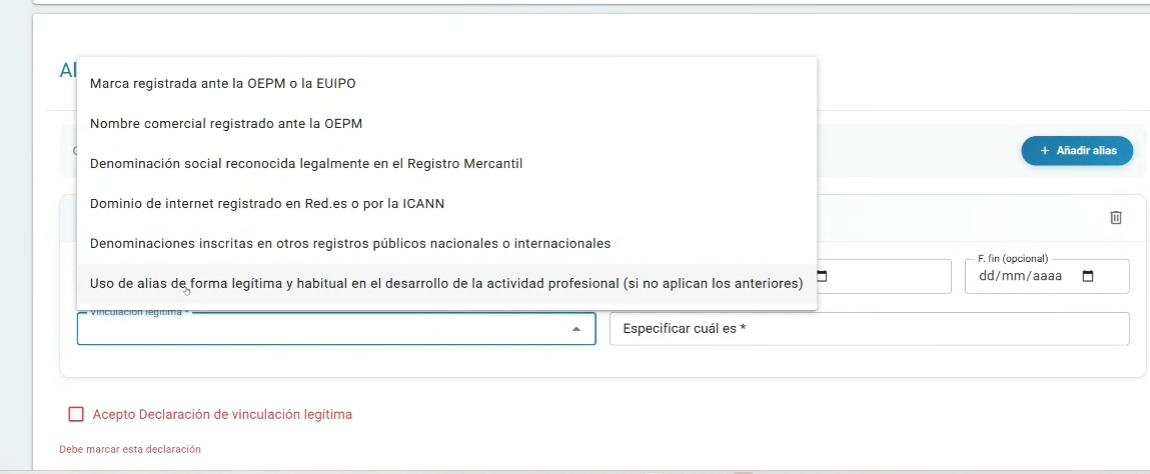
- Legitimate Proof: You must specify your legal right to this name. Select one of the verified categories from the dropdown menu shown in image above and type out the matching registration number, domain name, or exact legal name variant that verifies your choice.
- Assign Authorized Provider: In the providers section, click on "+Añadir proveedor" and enter the specific provider name provided to you by the indigitall support team.
Step 5: Finalizing your Submission
As a final step to complete and submit your application, please note the following required actions:
- Checkbox: You must check "Acepto Declaración de vinculación legítima" to clear the red error message ("Debe marcar esta declaración").
- Primary Action Button: Click the blue "REVISAR Y PRESENTAR" (Review and Submit) button on the bottom right to proceed with the review and submission of your application.
- Alternative Option: You can also click "GUARDAR BORRADOR" (Save Draft) if you wish to save your progress and finish it later.
Updated 7 days ago