
Add Items
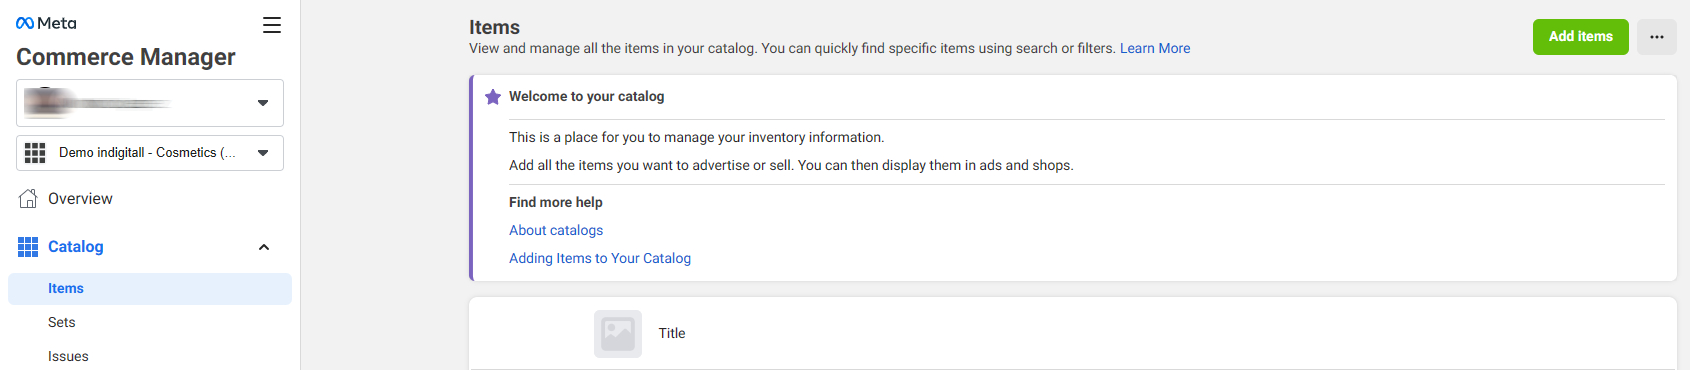
From the left menu Catalog>Items, you can add items to your catalog. Click on the green button: Add items at the right top area.
Then you can choose your preferred option:
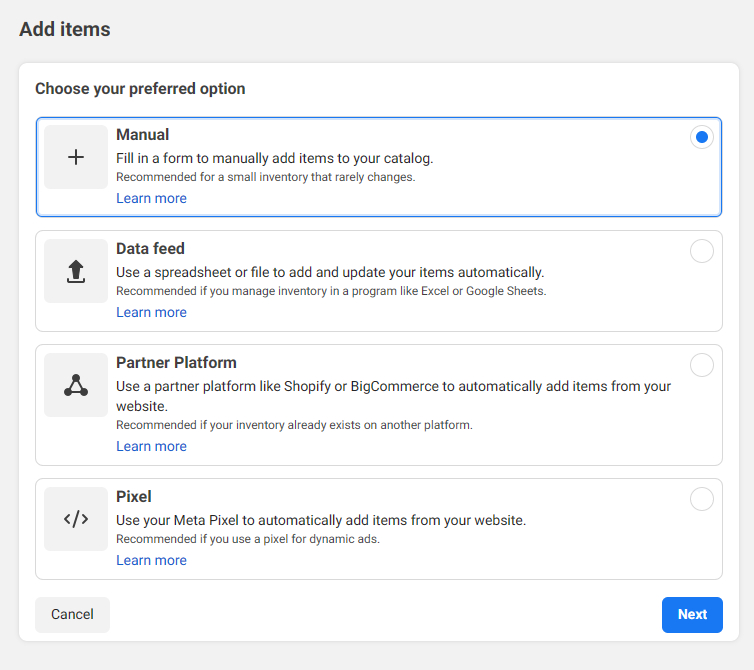
There are four main ways to add items to your catalogue in Commerce Manager. For each item, you can upload information with its details and features. > See here the contents to upload.
- Manual: Add items using a manual form in Commerce Manager.
- Data feed: Upload a spreadsheet or XML file to add items in bulk. You can upload a file once or set up scheduled uploads to happen on a regular basis.
- Partner Platform: Use a partner platform to automatically add items from your website if your inventory already exists on another platform.
- Meta pixel: Import and update items automatically from your website using a pixel. This method is more complex to set up. You may need help from a developer to install microdata tags on your website.
Manual
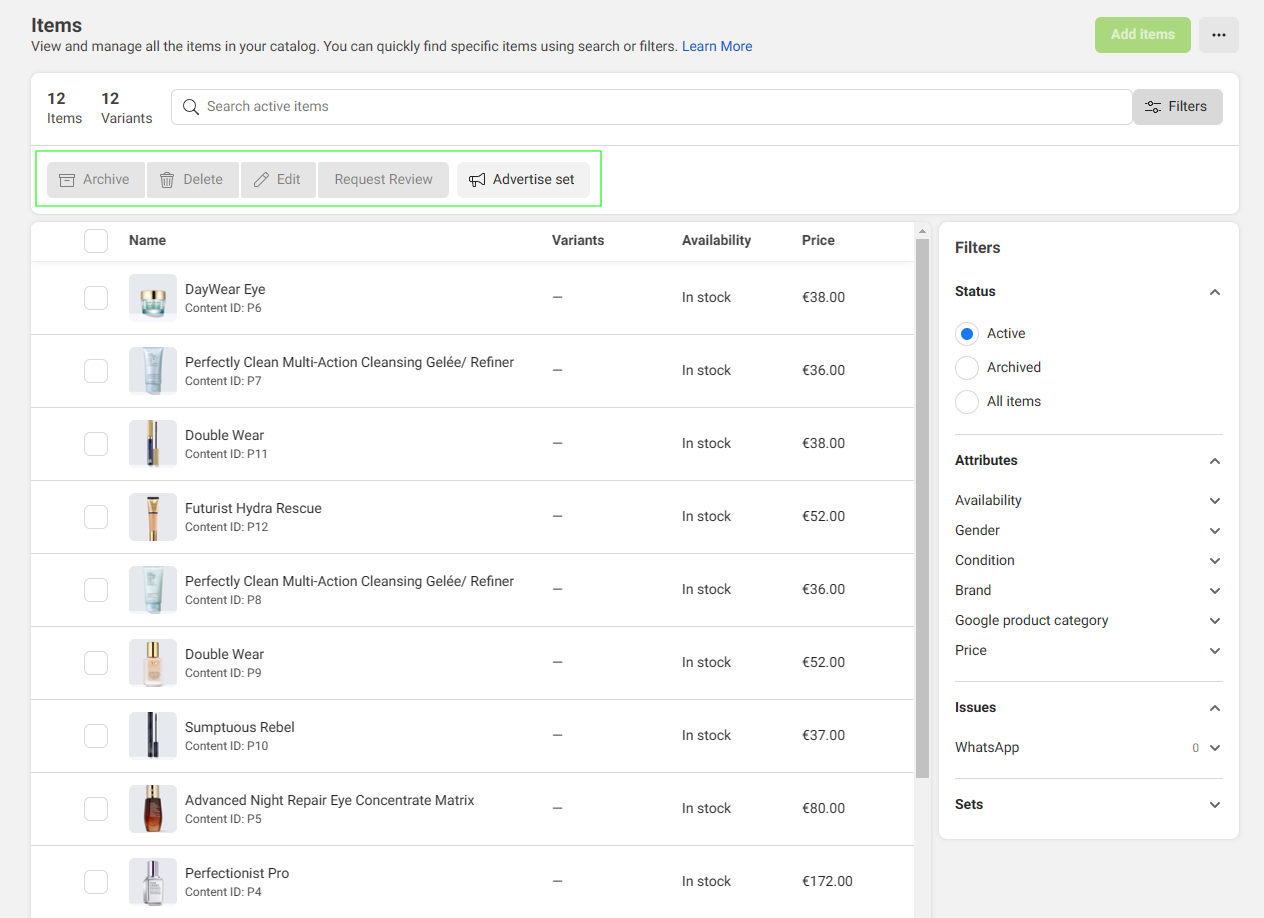
Clicking on the blue button (New item), it is possible to add all items. To facilitate this task you can duplicate or add variants to add faster. To eliminate an item, you must click on the bin icon at the left area of each item. Once you have filled all information, click on the below button: Upload Items.

Here you can see the meaning of all fields.
You can archive, delete, edit and request review selecting the items in an intuitive way.
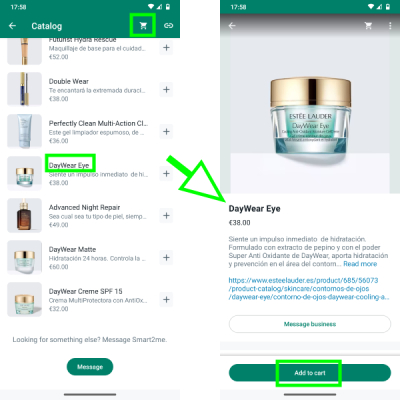
Clicking on the cart icon of WhatsApp, the user will see a list of all products with the option to click on them to see their details and add to cart to buy them. Easy & Fast!
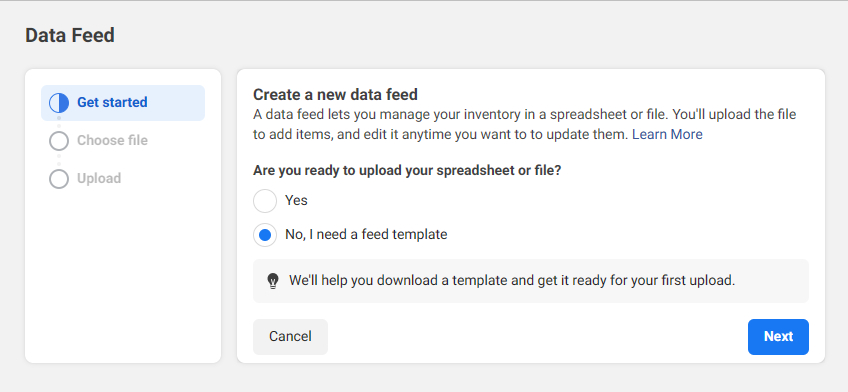
Data Feed
A data feed lets you manage your inventory in a spreadsheet or file. If you haven´t it, Meta helps you with the template. You can download the standard template here.
You can do a customized template adding categories. Each category adds new fields (variants) into the template to define better the product.
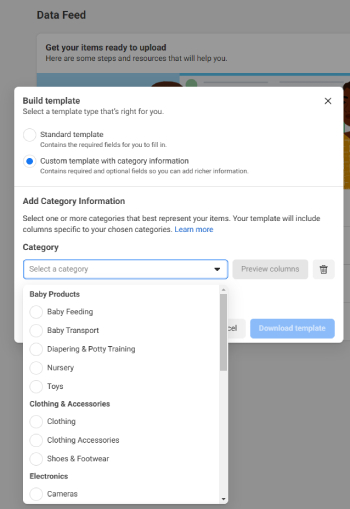
Once you have added the categories, download the template and fill all fields. Please see here the specifications.
Moreover you can add variants using the field item_group_id and then add the different fields to define this variant. Make sure to fill in the same attributes for each variant of an item. For example, if you enter a size and color for one variant, enter a size and color for all the others too. Any variants in the group with mismatched or blank attributes won’t display in your ads or shop.
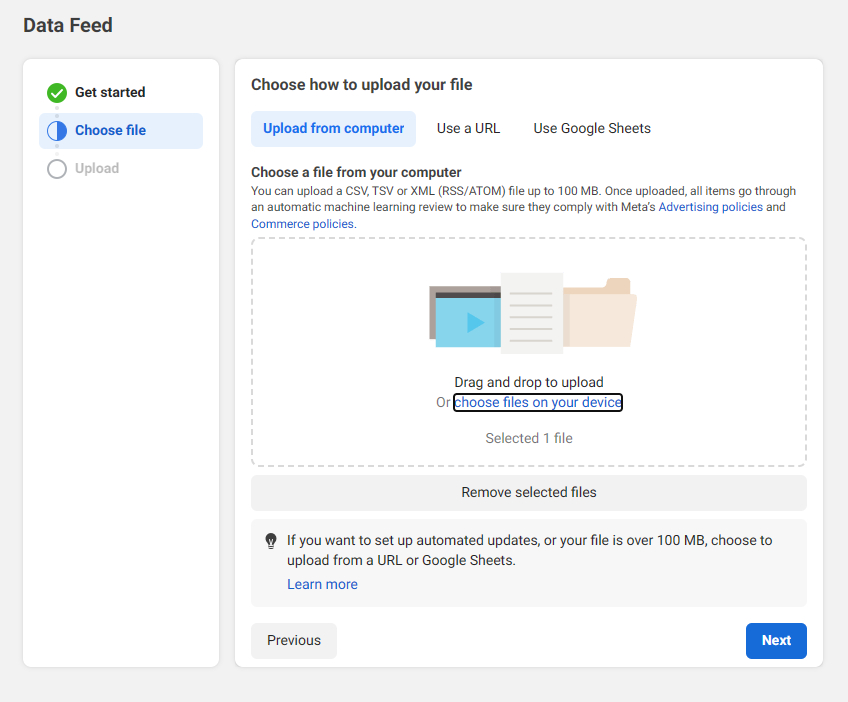
Finally upload the template choosing the method and clicking on Next button:
- Upload from computer: You can upload a CSV, TSV or XML (RSS/ATOM) file up to 100 MB. If you want to set up automated updates, or your file is over 100 MB, choose to upload from a URL or Google Sheets.
- Use a URL: You can link to a CSV, TSV or XML (RSS/ATOM) file up to 8 GB. Save your file on a file hosting website such as Dropbox or Google Drive or your own website and redirect to this link. Please click here for full explanation.
- Use Google Sheets: Remember to only include information in the first tab of your Google spreadsheet. Any other tabs will be ignored when you upload it to your catalog. Please see here for more information.
Partner Platform
Go to your partner platform to complete your catalog setup and create a shop to sell your items.
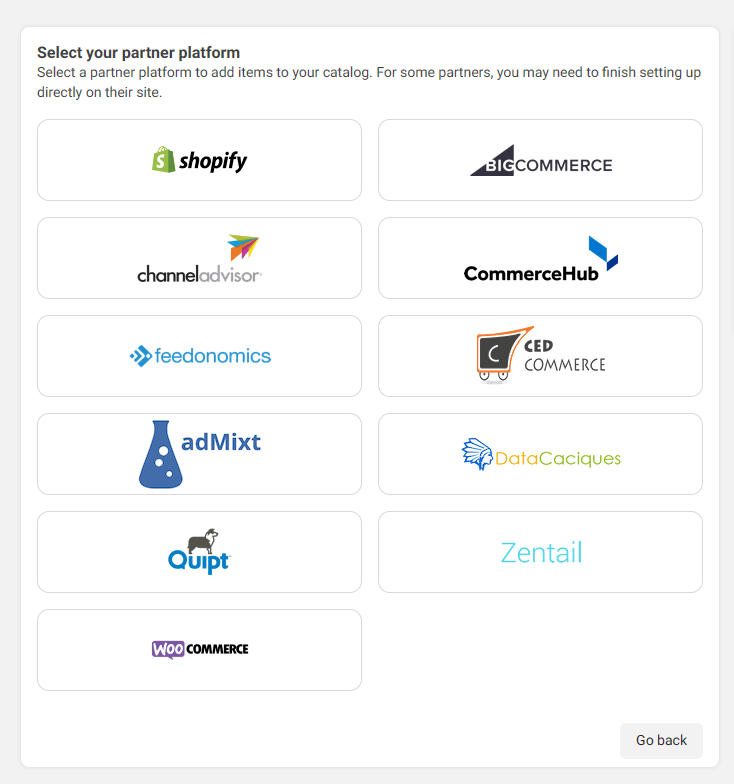
You can continue to manage your inventory from your partner platform. Any changes made to these items will automatically update your catalog.
Meta Pixel
You need a Meta Pixel in order to run dynamic ads. Please see here all information.
With Events Manager, you manage data connections, monitor customer activity view alerts and more. You can see a full explanation here.
How to set up the Meta Pixel
- Go to Events Manager
- Click on Connect data sources and select Web as the image shows:
- Select Meta Pixel and click Connect
- Add your Pixel name
- Enter your website URL to check for easy setup options
- Click Continue
Once you have created your Meta Pixel, you are ready to put the pixel code on your website choosing one option:
- Manually add pixel code to website
- Go to Events Manager.
- Click the Data sources icon on the left side of the page.
- Select the Meta Pixel you want to set up.
- Click Continue pixel setup.
- Select Meta Pixel and click Connect.
- Select Install code manually.
- Copy the pixel base code.
- Find the header of your website or locate the header template in your CMS or web platform.
- Paste the base code at the bottom of the header section, just above the closing head tag as the code shows below:
<!-- Example -->
!DOCTYPE html>
<html lang="en">
  <head>
    <script>...</script>
    insert_pixel_code_here
  </head>
Click Continue.
Optional: Toggle on Automatic advanced matching and verify the customer information you want to send.
Click Continue.
Add events using the event setup tool or by manually adding code to your website.
Event setup tool:
Click Open event setup tool to add events and parameters without additional coding.
Follow the onscreen instructions to add events to your website.
Manual setup - For developers: Learn how to set up Meta Pixel events using code
- Click Done
- Use a partner integration
- Go to Events Manager.
- Click the Data sources icon on the left side of the page.
- Select the pixel you want to set up.
- Click Continue pixel setup.
- Click Use a partner.
- Select a partner from the list.
- Follow the onscreen setup instructions.
- You can also set up your Meta Pixel on your website by going to the Partner Integrations page in Events Manager, selecting your partner and following the onscreen instructions. Learn more about the benefits of using partner integrations to set up your Meta Pixel.
If you don't see your platform, use 1 of the other 2 ways to set up your pixel.
- Email instructions
If someone else updates the code on your website, follow these steps to email them your Meta Pixel setup instructions.
- Go to Events Manager.
- Click the Data sources tab on the left side of the page.
- Select the Meta Pixel you want to set up.
- Click Continue pixel setup.
- Click Email Instructions.
- Enter the recipient’s email address.
- Click Send at the bottom of the page.
Updated 8 months ago