
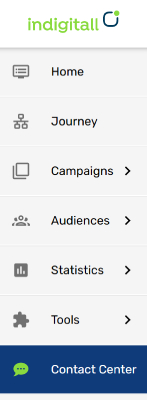
Agent Panel
Entering the Contact Center
In order to enter the contact center, you must enter into the indigitall console with your access credentials, then you can select the project where your chat service is integrated and you go to the section below: Contact Center.
User Agent
This user can enter the contact center and start interacting with customers who communicate with the contact center. The initial screen would be the following:

Panel fields
Each of the variables shown are:
-
Average waiting time: It is the average time that users have waited in the queue waiting for their conversation to be assigned to an agent. This average time is only taken into account for users who waited in queue and were later attended by the agent (it does not include users who were not attended).
-
Maximum waiting time: It is the maximum time that a user has waited in the queue to be attended. This maximum time is only taken into account for users who waited in queue and were later attended by the agent (it does not include users who were not attended).
-
Queued users: It indicates the number of users that are waiting to be assigned to an agent. This queue follows the FIFO (First In First Out) structure for its acronym in English. In order of arrival in the queue, the conversations will be distributed evenly among the online agents accepting new conversations. An agent (by default) has a free space to attend a maximum of 6 conversations at the same time, once these 6 spaces are occupied the following users will queue (assuming that there is only one agent online accepting conversations) being assigned as the agent ends open conversations.
-
Online Agents: It is the number of online agents in the contact center.
Accepting New Conversations
To start receiving conversations, just press the "Accept New Conversations" button, immediately afterwards the agent goes to the "Available" status. While an Agent is "Not Available", the conversations that are entered are added to the queue or are assigned to other agents who are available.

Interacting with Users
When entering a conversation, the ID of that user will appear together with the name that has been configured in their WhatsApp profile (in case the user has contacted through this channel), the channel from which it comes and to identify any new conversation a point green to the left side of the name. Additionally, at a hearing level, we will hear a short audio indicating that a new message has been entered (with the contact center in the foreground or background):

To start the interaction with this user, we only have to select on the conversation that has entered and the chat history with this user (if any) will open on the right with a maximum of 20 messages stored. Upon entering the conversation the green dot disappears:

We write the text in the text box designated for this purpose and send the message. In addition, we can send various types of multimedia content to enrich the conversation.
Sending an image
To send an image we select the clip icon (attach file) and select the image option:

A box will appear that indicates the characteristics that the image to upload must meet:

We look for the file on our computer by clicking on the "Upload Image" button, once uploaded, we send the image.

In this way the image is sent to the user.

Sending a Video
To send a video we select the clip icon (attach file) and select the video option:

A box will appear that indicates the characteristics that the video to upload must meet:

We look for the file on our computer by clicking on the "Upload Video" button, once uploaded, we send the video.

In this way the video is sent to the user.

Sending a Document
To send a document we select the clip icon (attach file) and select the document option:

A box will appear that indicates the characteristics that the document to upload must meet:

We look for the file on our computer by clicking on the "Upload Document" button, once uploaded, we send the document.

In this way the document is sent to the user.

Sending an Audio
To send an audio we select the clip icon (attach file) and select the audio option:

A box will appear that indicates the characteristics that the audio to upload must meet:

We look for the file on our computer by clicking on the "Upload Audio" button, once uploaded, we send the document.

In this way the audio is sent to the user.

Receiving Multimedia
Just as an agent can send multimedia, it is also capable of receiving these same types of files from the user.

On the other hand, we have two options at the top right: "Transfer Conversation" and "End Conversation".
Pre-defined templates
The agent can use several templates to save time allowing a faster response.
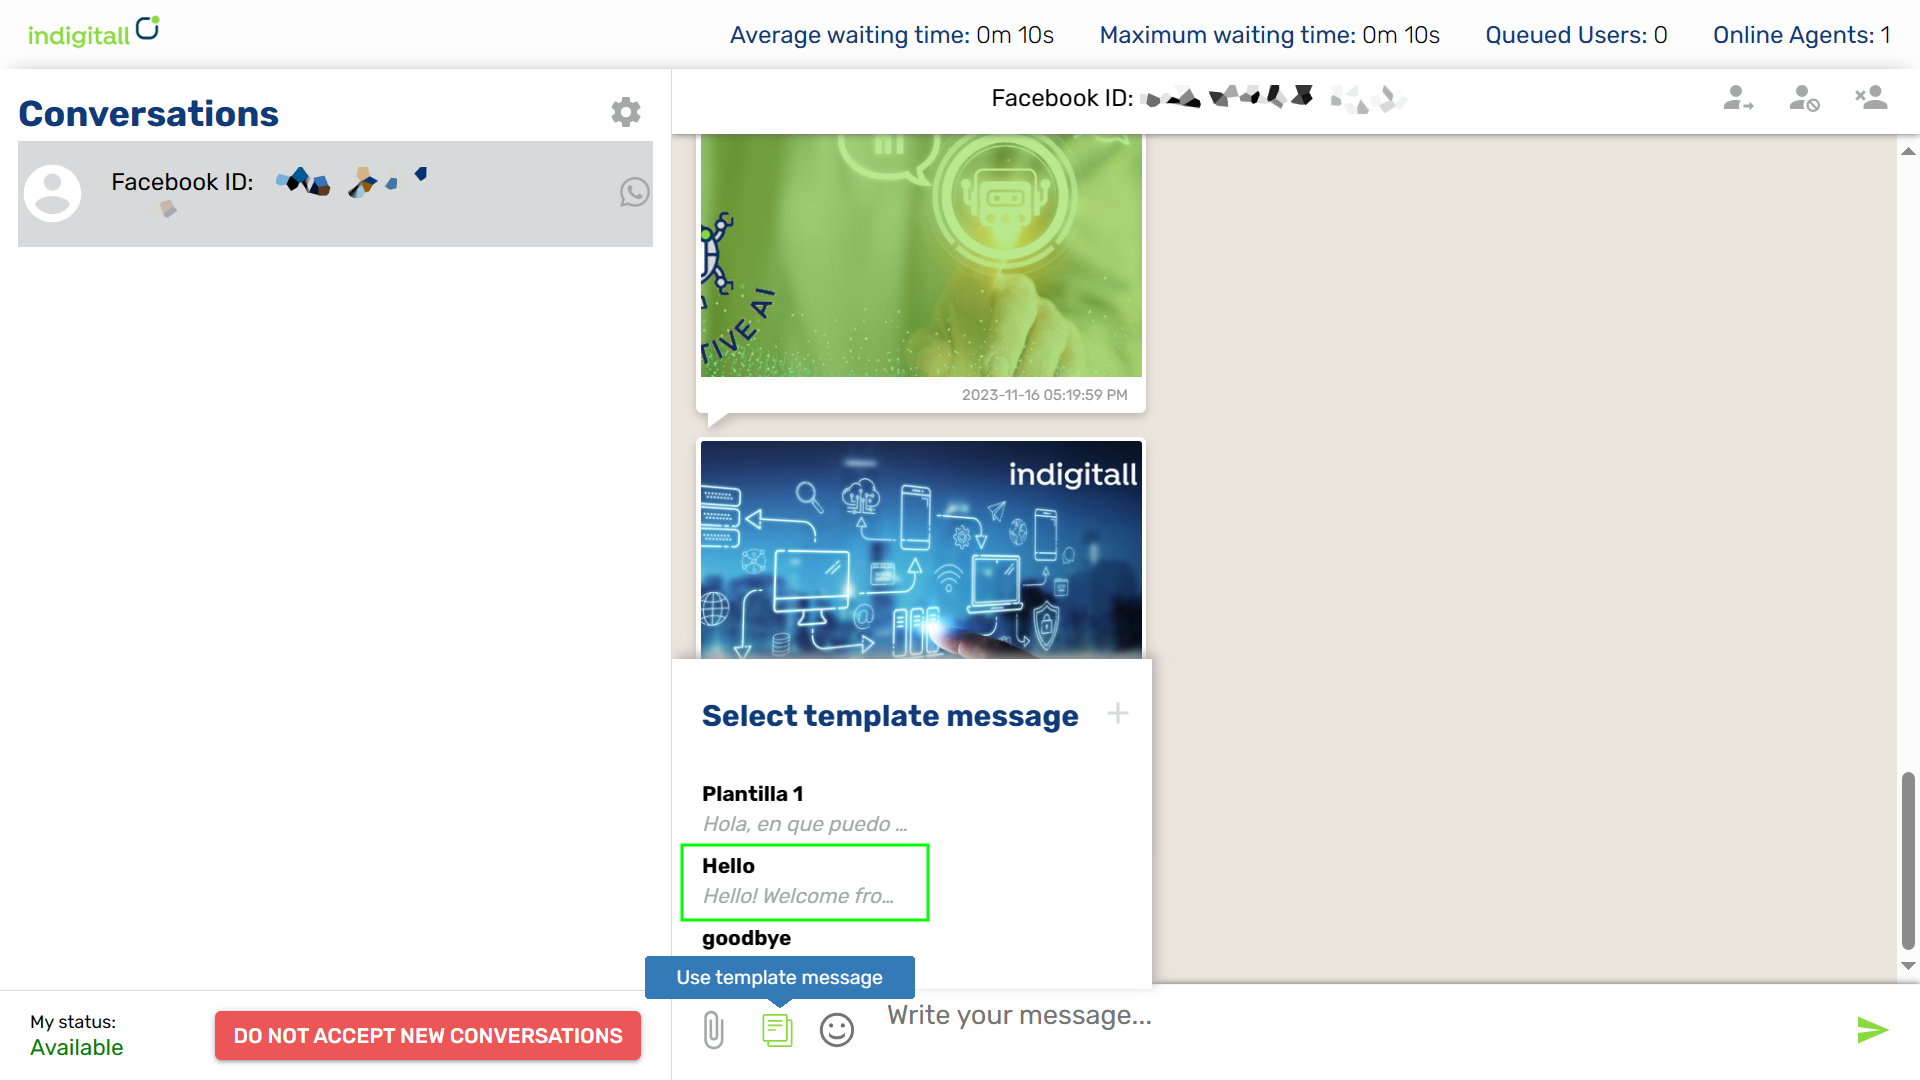
Only it is necessary to select the template. For example, "Hello" as you see in the image.
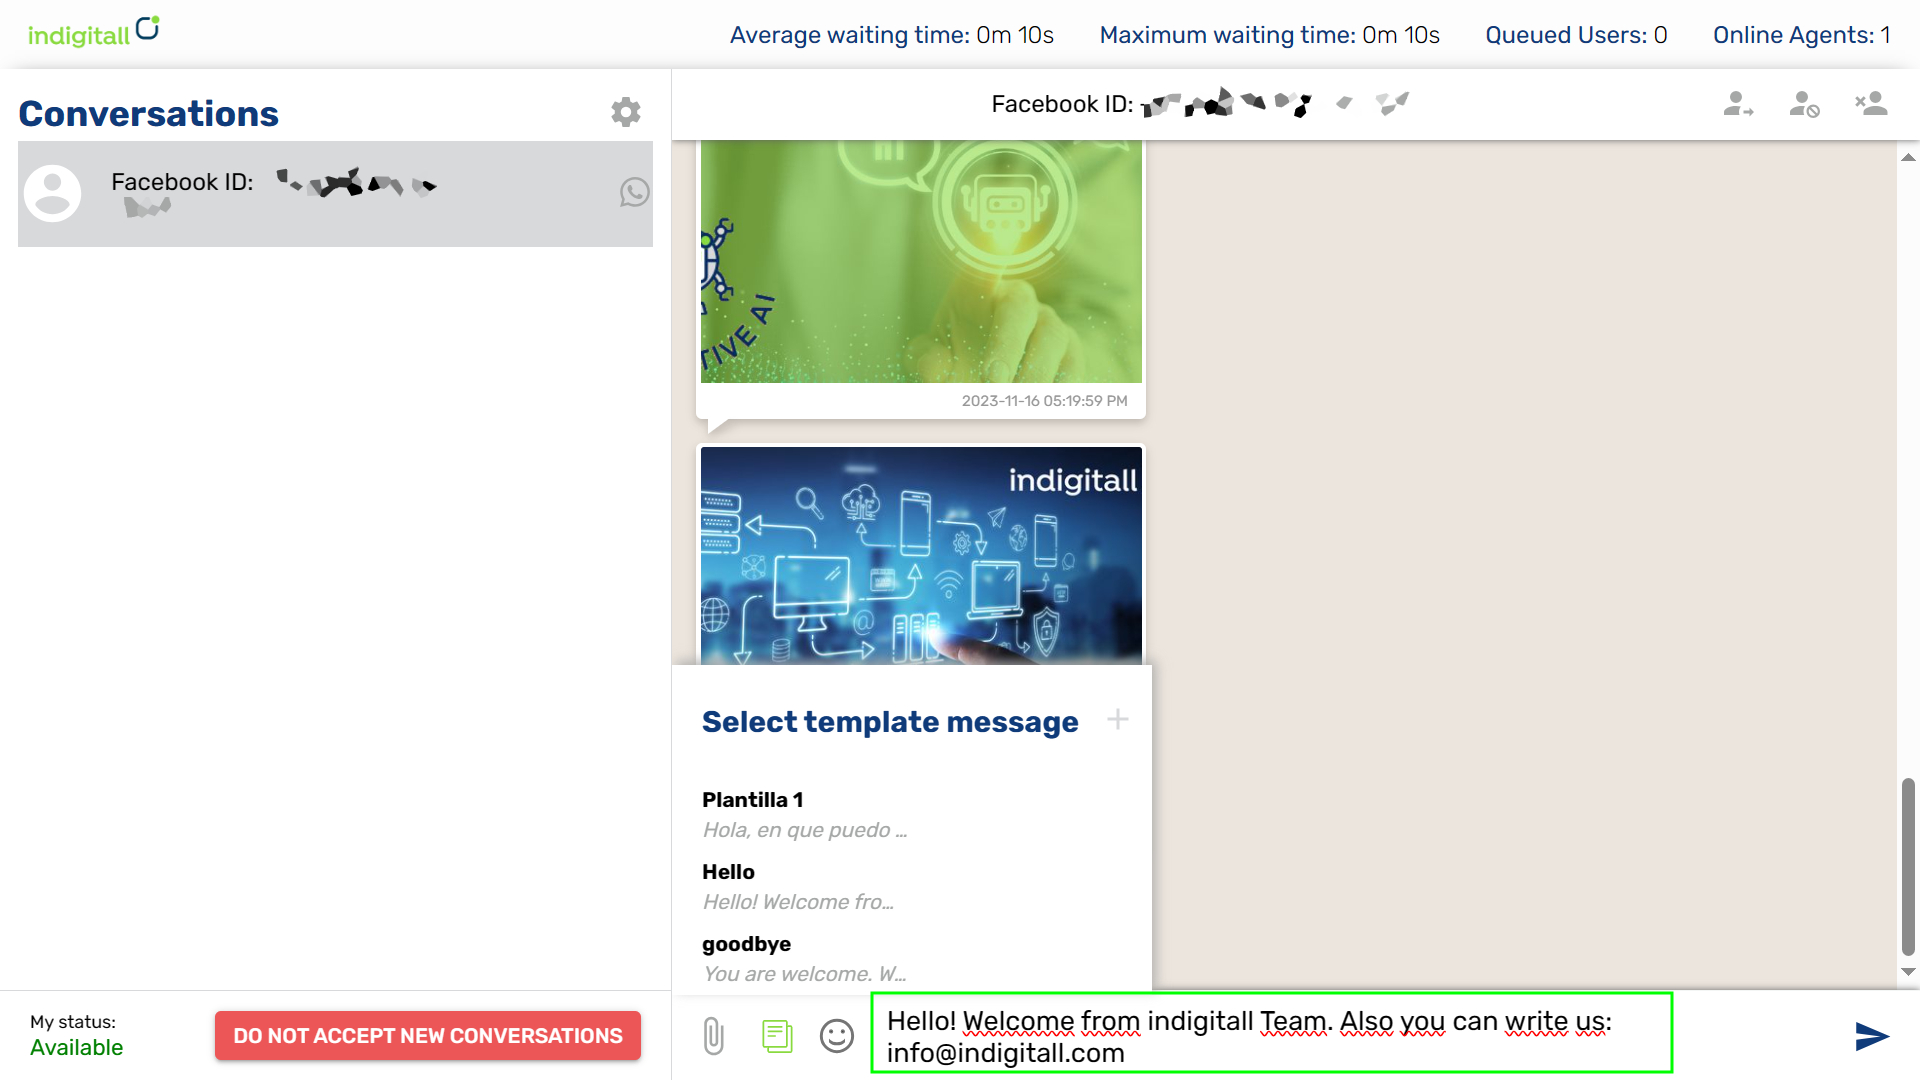
Then, the content of the template is displayed on the text field. The agent can edit it or simply send it.
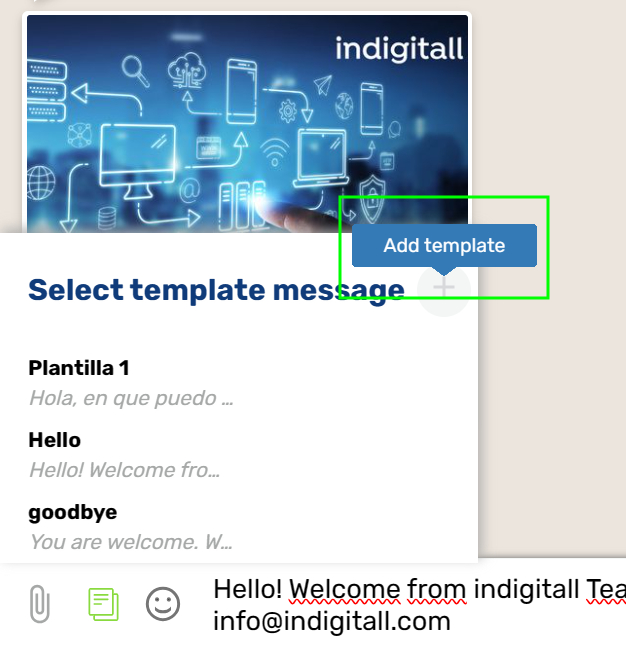
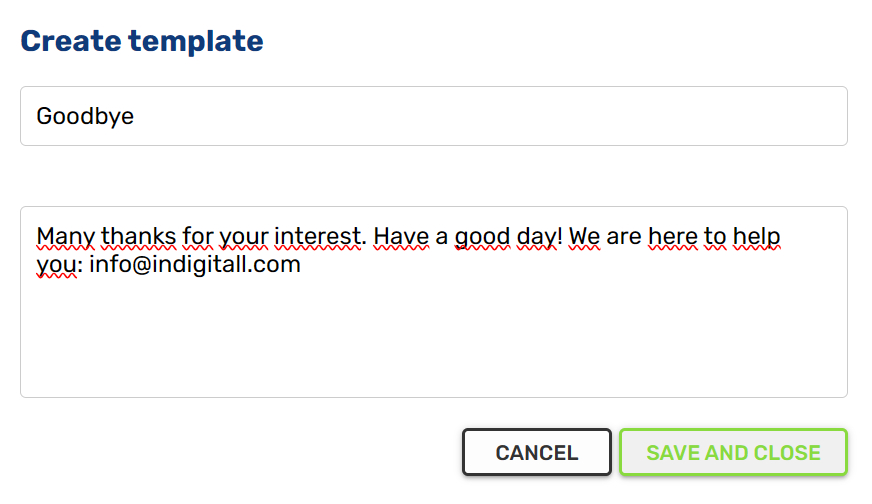
Create template
The agent can create templates quickly selecting the “Use template message” and clicking on the plus button in the top area. Then you write the name of the template and the text for it. To finish, clicking on Save and Close button.
Transferring a Conversation
It is possible to transfer a conversation between available agents. It is very useful when the agent is finishing a work shift and gives his assigned conversations to a colleague or if agents from different departments are handled, it can be transferred to specialists as appropriate.

Ending Conversation
RecommendationAt the end of the working day, it is recommended to end all existing conversations with users to avoid them being part of an assigned conversation
The agent decides when ending the chat session between an agent and the user. At the end of a conversation, a new space is opened in the conversations, assigning a new conversation of the users in the queue (if any) to the agent.

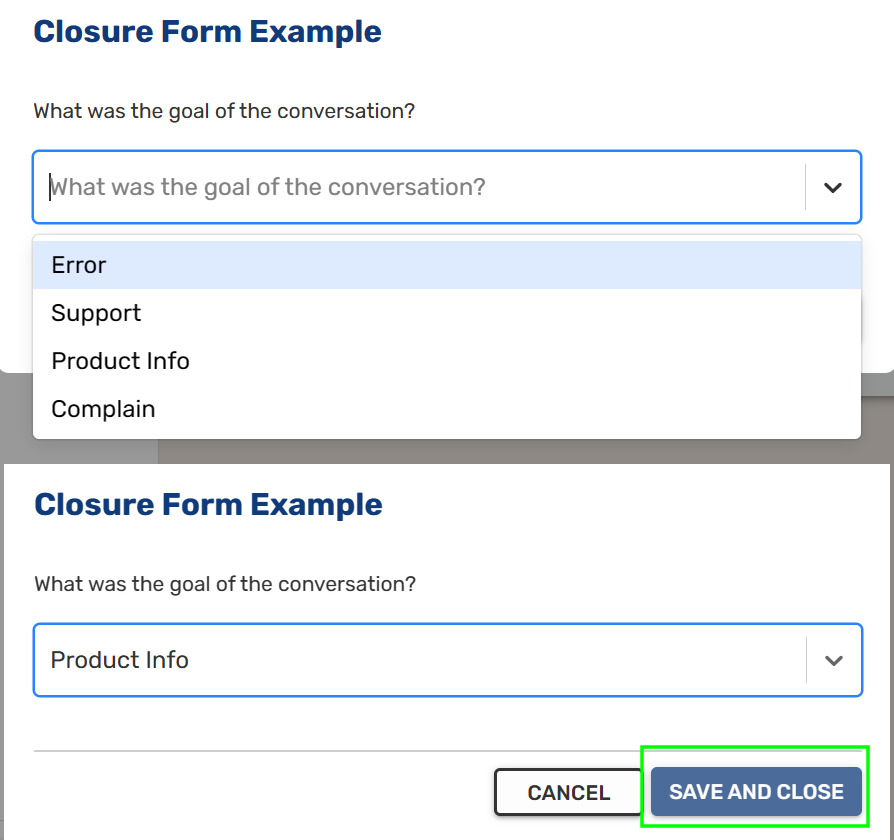
Closure Form
The closure form appears when the agent has closed the conversation. It is a form that can be fully configured by the company to capture the most relevant data. Explore how to configure it here.
Updated 9 months ago