
Journey Management
API
Manage Journeys
The central area of the Journeys section displays all journeys created to date. To find a specific one, you can use the search bar to search by name or apply filters to narrow your results by:
- Status: Active, Inactive, and Deactivated.
- Audience: All Contacts, Filters, Customer List, Event, and Segment.

Each journey in the list includes the following information:
- Journey: The name of the journey. You can click the arrows to sort the list alphabetically.
- Creation: The date it was created. Use the arrows to sort from newest to oldest or vice versa.
- Audience: Displays the audience type (All Contacts, Filters, Customer List, Event, or Segment).
- Status: Shows the current state of the journey (Active, Inactive, or Deactivated).
Action Buttons
On the right side of each journey, you will find the following action icons:
- Pencil Icon: Edit the journey.
- Upload Icon: Upload a contact list. Note: This option is only available when the audience type is Customer List and the journey status is Active.
- Statistics Icon: View performance metrics and reports.
- Three-dot Menu. Click this to:
- Copy the Journey ID.
- Clone the journey.
- Deactivate the journey (only available if it is currently Active).
- Delete the journey (only available if it is Inactive or Deactivated).
Validate and Activate
On the top area, you have two buttons:

-
Validate: The Validate button is created to help you about the creation process. If when you click, a pop-up windon opens to say that it is not possible to validate then something is wrong. Please check all steps to see if any field is empty or wrong.
-
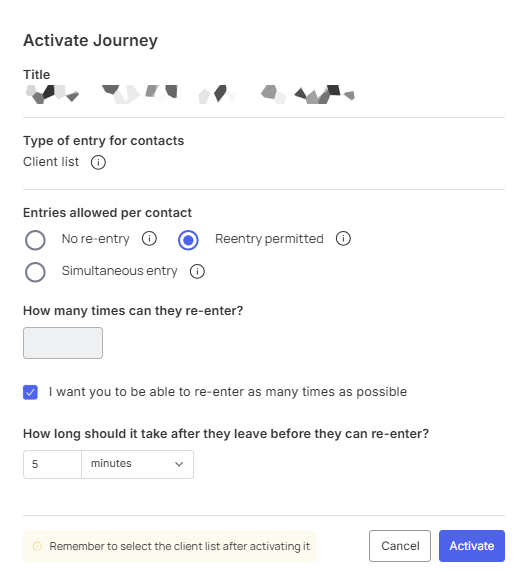
Activate: Once the journey is successfully validated, you can activate it by clicking the blue Activate button. A pop-up will then appear displaying the following details: Title (the journey's name) and Type of entry contacts (describing the entry type for the journey).
Next, you can select the following fields under Entries allowed per contact:
- No re-entry: Once selected, you are finished and only need to confirm activation by clicking the blue Activate button at the bottom.
- Reentry permitted: If enabled, the system will check for conditions every ten minutes. If you want the system to perform this check only once, do not enable this option.
Each contact can enter the journey as many times as defined in this option's configuration. The contact will re-enter the journey once they have left it.- In this section, check the box How many times can they re-enter?: Define how many times you want the customer journey to repeat. If left blank, it will repeat indefinitely (e.g., for birthdays). For instance, if you’re running a week-long discount campaign, you might want to send one promotion daily, so you would set this value to 7
- You also have the option to check the box I want to be able to re-enter as many times as possible (checking this will disable the specific number field as it selects the maximum).
- Finally, you can set the frequency in days, hours, and minutes for the question: **How long should it take after they leave before they can re-enter?**This defines how often the system re-checks the conditions. For date-related journeys, you should set this to 1 day to avoid sending multiple notifications on the same day. After this, it is ready to be activated via the blue button at the bottom.
- Simultaneous entry: Each contact can enter the journey an unlimited number of times without needing to leave it first, meaning they can be in the same journey simultaneously. At this point, you only need to complete the activation.
NOTICEOnce the journey is activated, you can´t edit it. If you need any change, you will clone it and edit with the new needs the new created journey. Remember you need Validate and Activate it to start.
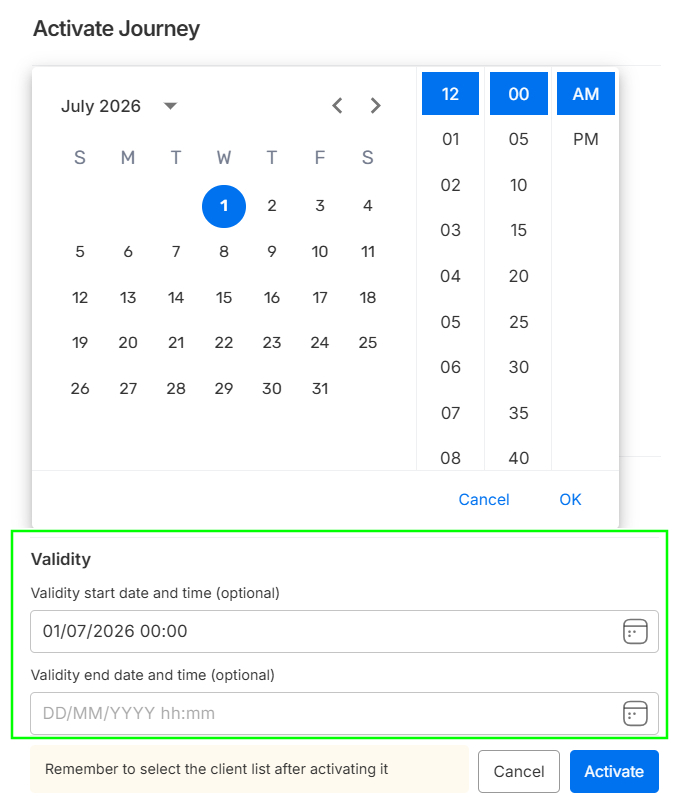
Validity
You now have advanced scheduling control over your journey's active lifespan through the optional Validity settings.
- Validity start date and time (optional): Sets the exact moment the platform will begin listening for event triggers or processing audience lists for this journey. If left blank, the journey will start running immediately after activation.
- Validity end date and time (optional): Sets a hard deadline for your campaign. Once this specific date and hour are reached, the journey will automatically stop accepting new participants.
Clicking on either validity field will open an integrated calendar and time selection tool. This interface allows you to pick a precise day, hour, and minute for deployment:
- Select the Date: Use the interactive calendar grid to navigate through months and click on your desired start or end day.
- Set the Hour and Minute: Scroll through the numerical columns to set the exact execution time (divided into 5-minute increments).
Check the AM/PM Toggle. The time configuration panel uses a 12-hour clock format. You must verify whether you have highlighted AM or PM in the rightmost column. Failing to double-check this toggle can lead to scheduling errors, such as a journey launching at midnight (12:00 AM) instead of noon (12:00 PM).
Finalizing Your Customer List Journey
If you chose to start your journey with a customer list, you must complete the contact upload process after activation is finished. To do this, navigate to the main indigitall journeys dashboard, locate your specific journey, and click the Upload icon (the small arrow).

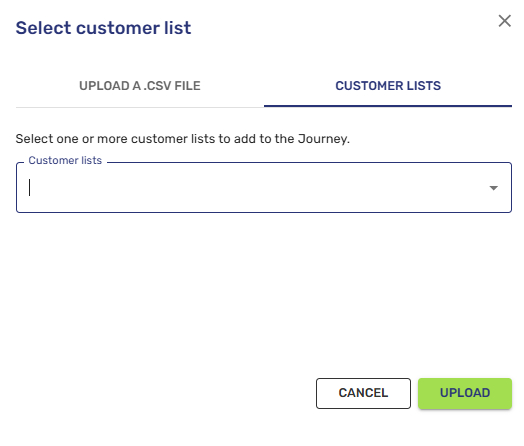
An upload window will appear, offering two primary options:
- Upload a .CSV file: Your file must include a mandatory column named customerId. You may also include as many additional columns as needed for any custom variables you wish to utilize.
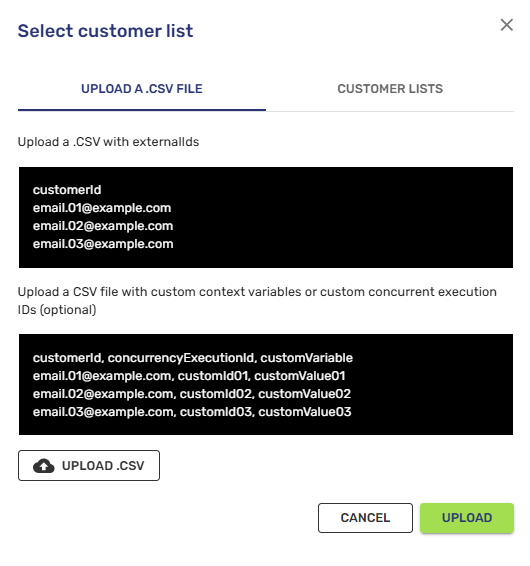
- Select a Customer list: This option allows you to choose from a pre-defined list. A dropdown menu will display all lists previously created in the Audiences > Customer Journey > Customer lists section of the console.
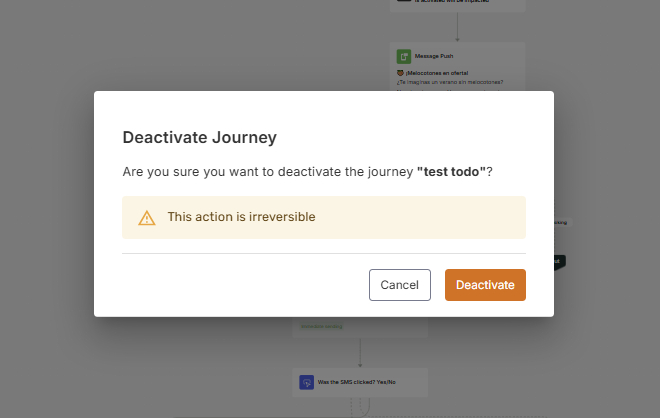
Deactivate
You can deactivate a journey anytime to finish its activity. Be careful; this action is irreversible.

Updated 27 days ago