
Creating an Email
API
To view your email marketing efforts, navigate to Campaigns > Email:

This section displays a comprehensive list of all email campaigns created.
Search and Filters
At the top of the dashboard, you can use the following tools to locate specific campaigns:
- Search Bar: Search by campaign name.
- Journey Filter: Filter the list to show only campaigns created as part of a Journey.
Campaign List
The table includes the following information for each email campaign:
- Campaign: The name of the campaign. Click the arrow icons to sort the list alphabetically in ascending or descending order.
- Sending Type: Indicates the delivery method—whether it was an Immediate/Scheduled send or a campaign integrated into a Journey.
- Status: Displays the current state of the campaign, such as Draft or Sent.
- CTR & Volume: Shows the Click-Through Rate (CTR) percentage and the total number of emails sent.
Action Buttons
On the right side of each campaign, you will find three action icons:
- Pencil Icon: Edit the campaign.
- Stats Icon: View detailed performance statistics and metrics for the campaign.
- Three-Dot Icon: Open a menu to copy the campaign ID, clone or delete the campaign.
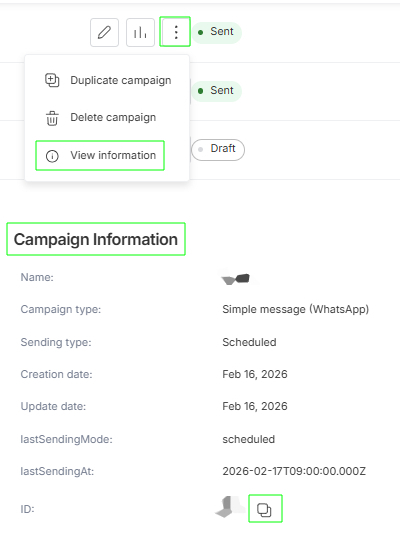
How can I find the Campaign ID?
If you need to retrieve a specific Campaign ID for your records or API integrations, locate the campaign you are interested in within your dashboard. On the right-hand side of the campaign row, click the three vertical dots (icon) to open the action menu.
From the dropdown menu, select the View information option. A details panel will appear, displaying comprehensive data about your campaign or customer journey, including the name, type, and creation date. You will find the ID at the very bottom of this list. You can easily copy it by clicking the "copy" icon next to the ID string.
Alternatively, you can locate the ID by simply clicking on the campaign to open it. Look at your browser's address bar; the number appearing at the end of the URL is the Campaign ID.

New Campaign
After pulsing the New Campaign button at the top right side of the console, you will see this new screen to create the email:
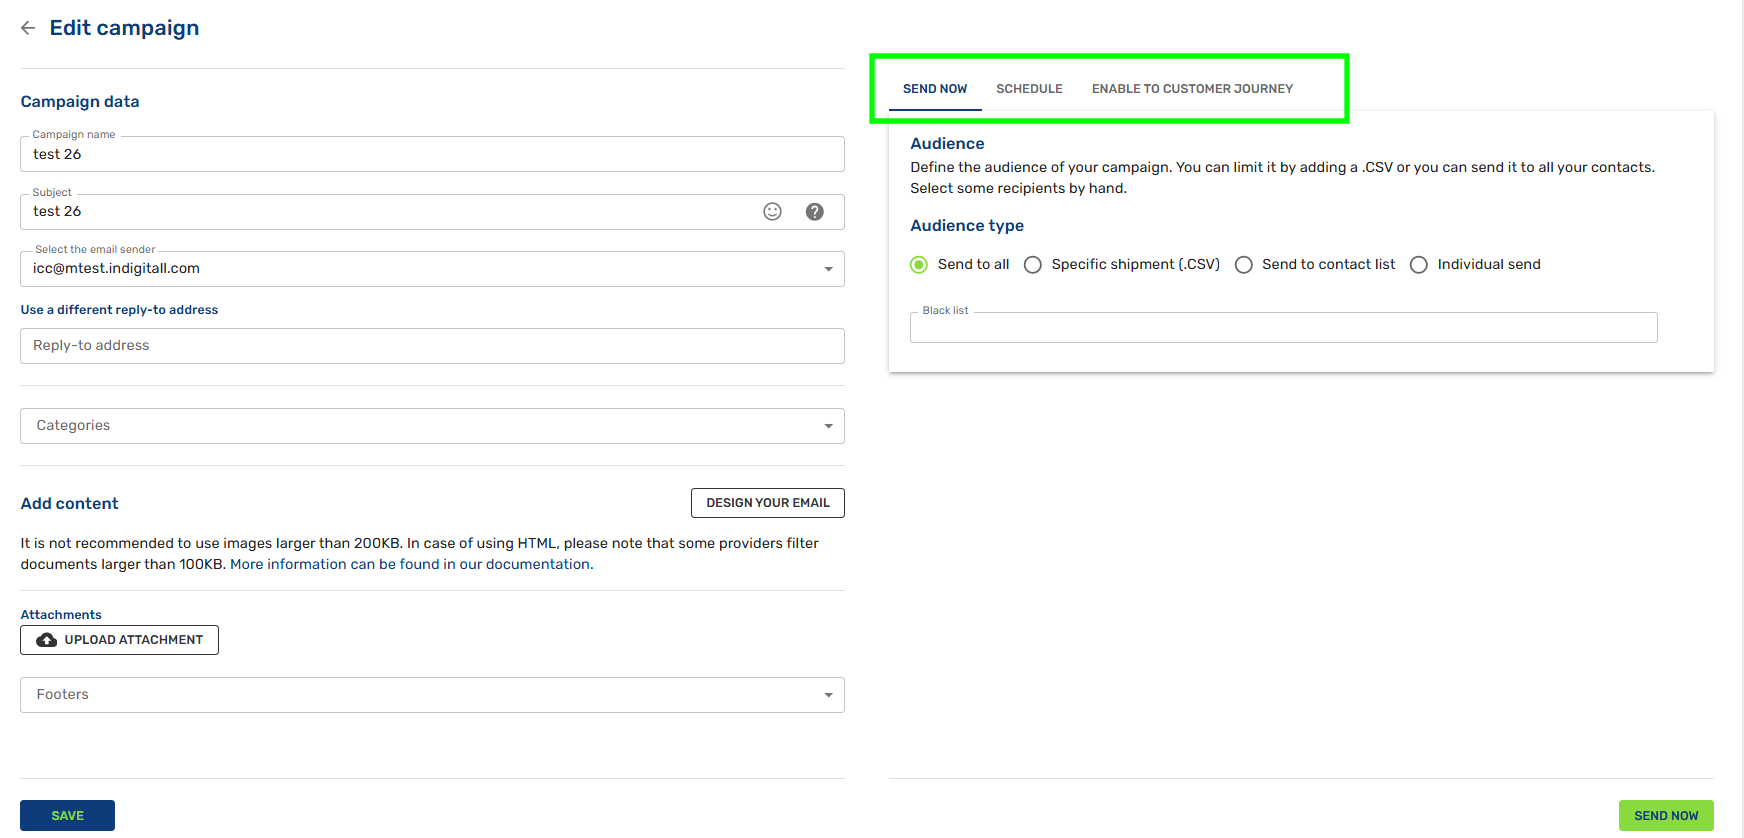
You need to write the campaign data, add content and choose the type of sending (send now, schedule and enable for customer journey).
Updated 5 months ago