
Account User Permissions
On the Users screen you see and manage everyone who has access to your account. To open it, click Configuration in the left sidebar, then click the USERS tab.
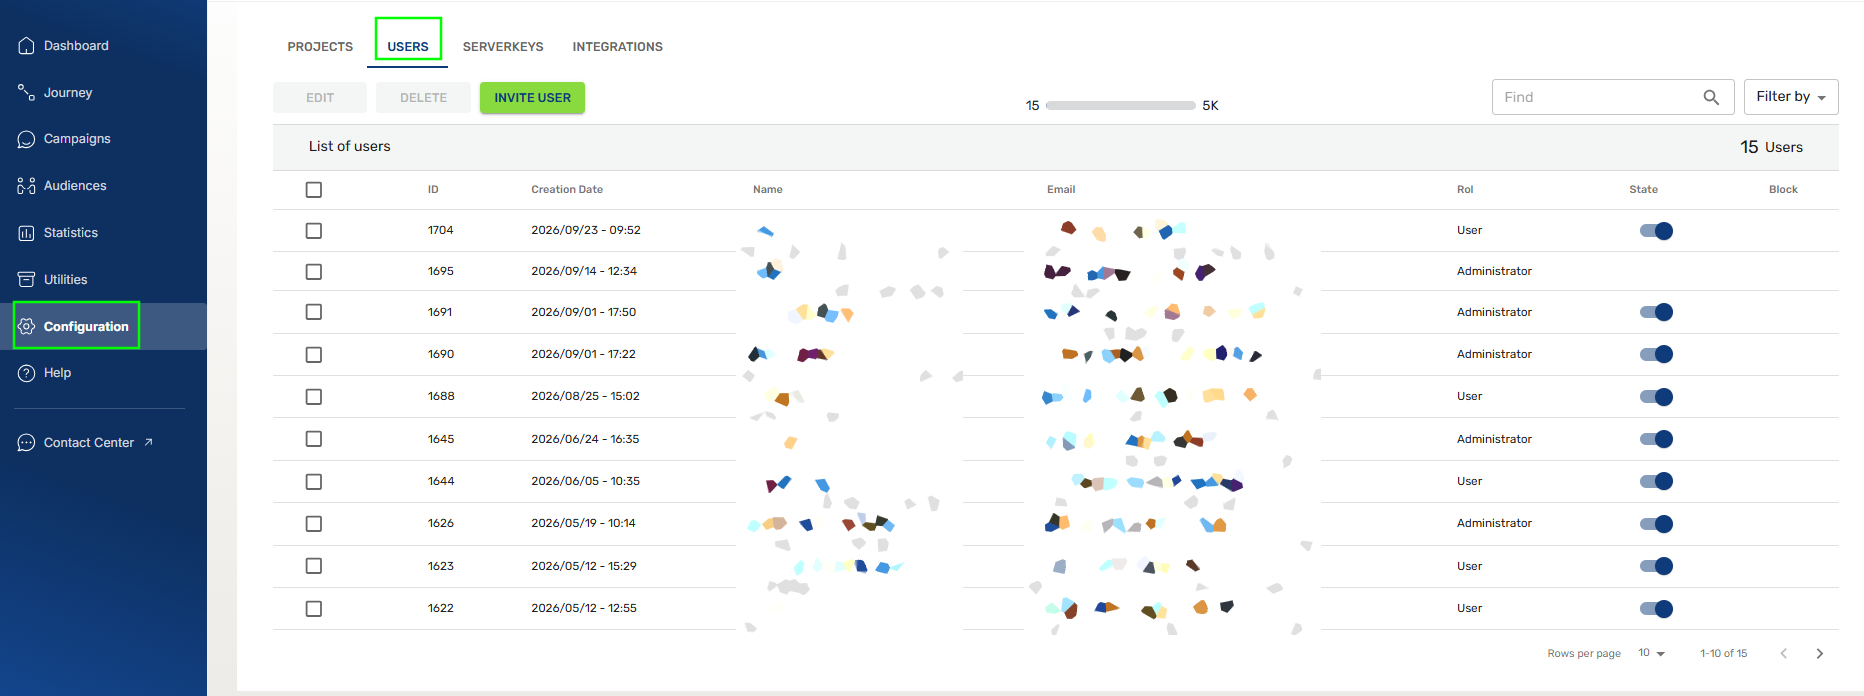
The toolbar provides several key controls for managing account users:
- The Edit option allows you to modify a selected user's details and remains disabled until you choose a user from the list.
- The Delete button removes selected users and is disabled until at least one user is selected.
- Clicking Invite User opens a window to send an invitation to a new user; for detailed steps, refer to "Create new users."
Additionally, the Usage bar displays your current user count alongside the maximum limit allowed (for example, 15 out of 5,000), while the Find search bar and Filter by option allow you to quickly locate or narrow down specific users in the list.
Create new users
From the indigitall console, you can invite new users to the project, as well as create new users for the Contact Center of the associated project. Each invited user gets an email with a link to finish signing up. When you invite someone, you choose their console role and the permission profile they'll have in each Contact Center project.
- Step 1: Start the invitation
Click INVITE USER. The Invite new user window opens.
- Step 2: Enter the user's email address
In the Email field, type the new user's email address. The invitation and registration link will be sent there.
Note: The field shows an Invalid message until you enter a complete, valid email address.
- Step 3: Choose the user's role
Under User Permissions, open the Rol dropdown and pick one of these options: User or Administrator.
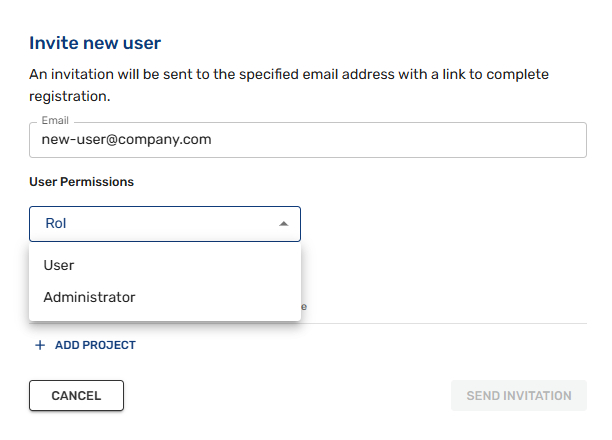
- Add project permissions (User role only)
If you pick User, set the user's access level for each project they need.
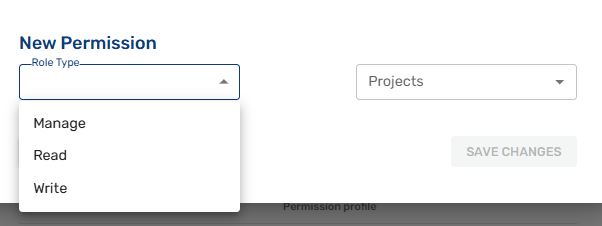
Click ADD PERMISSION. The New Permission window opens.
Open the Role Type dropdown and choose the access level: Manage / Read / Write
Assign Contact Center permission profiles
The Contact Center V2 permission profiles section sets what the user can do in the Contact Center for each project.
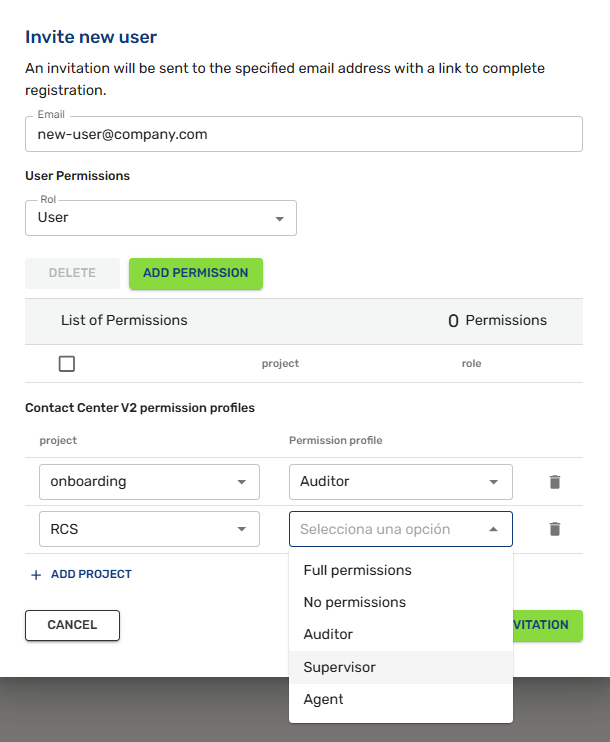
- Step 1: Click + ADD PROJECT. A new row appears with two dropdowns.
In the project dropdown, choose a project. The list shows all projects in your account.
In the Permission profile dropdown, choose one of these profiles:- Full permissions
- No permissions
- Auditor
- Supervisor
- Agent
To give the user access to more projects, click + ADD PROJECT again and repeat. You can give the same user a different profile in each project. For example, they could be Agent in one project and Auditor in another.
-
Step 2: Send the invitation
Check the email, role and project profiles.
Click SEND INVITATION.
The user gets an email with a link to complete registration. To close the window without inviting anyone, click CANCEL.
Roles and permits
Important:For all user roles you must specify the permission to the project to which you will have access, otherwise you will not be able to access it.
The User Roles and Permissions feature offers a very secure and easy way to manage what users can access, view or modify within the indigitall console.
Chat PermissionsSee this section to learn more about the roles for the chat projects.
There are two types of user roles. Depending on the role, there are up to three different types of permissions.
-
Administrator role: allows full access to the account. This role can see and make any possible changes in all sections, such as Campaigns, Tools, Statistics, as well as edit any property of the Account Settings.
-
User role: the console administrator will give this user the appropriate access for each project by choosing one of the following three options:
1. Read: the user will be able to access and read the Statistics and Campaign sections of a project.
2. Write: the user can also create and send campaigns in addition to the read permission.
3. Manage: the user can access and edit the Audience and Tools sections. It is the highest permission level.
Updated 24 days ago