
Geotargeting
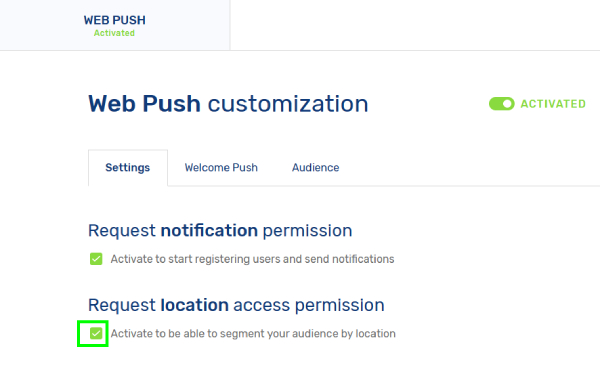
The second option in the Settings area, Request location access permission, is optional but we recommend its activation. If you activate it, then you can segment your audience by location. Only it is necessary to click on the option.
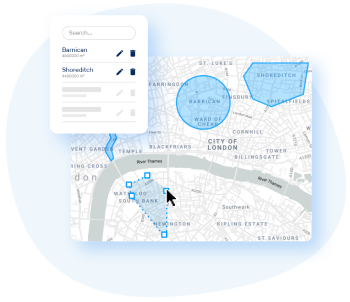
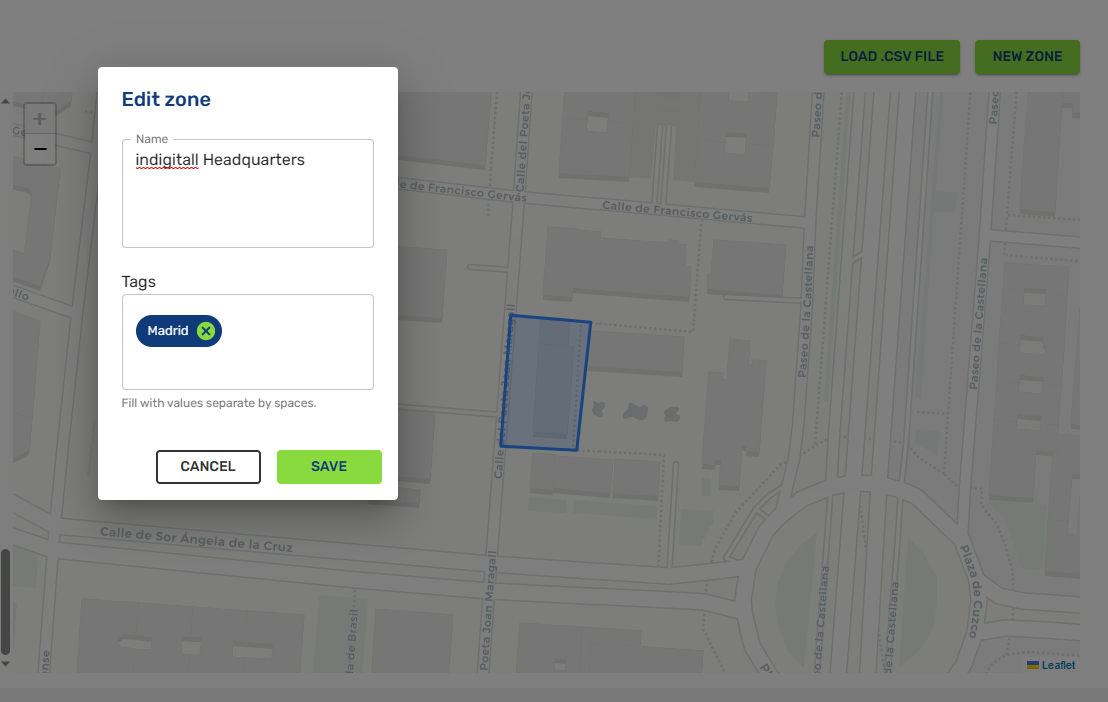
You can create areas in our console to select where to send the notifications. It is very easy: Tools > AppPush/WebPush > Manage areas. You can draw the area on the map or upload a .CSV file with the coordinates. The full explanation is here.
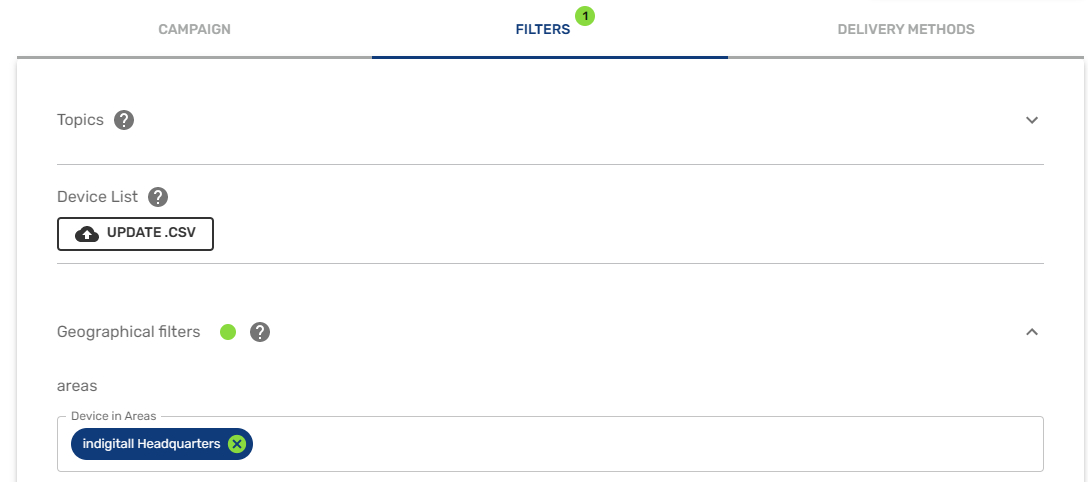
Once the area is created, you can send notifications to all devices inside of this area. Only it is necessary to add the selected area in the filter area while you are creating the web push.
Examples
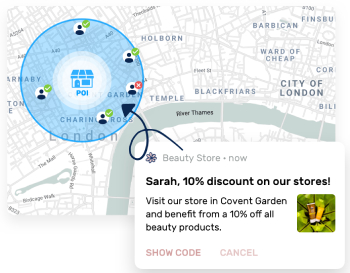
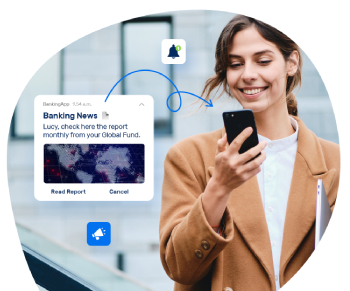
The geotargeting strategy is is very effective to send customized notifications within
a geographical location (city, neighborhood, country, etc.) or specific area. The message impact is high, increasing the conversion rate and sales.
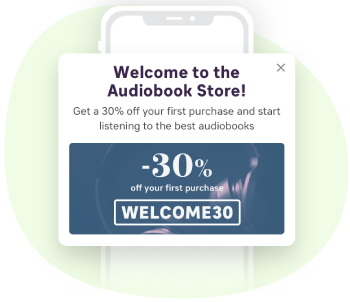
Welcome Push
The second tab - Welcome Push- helps you to send a welcome message for your new subscribers when they accept notification permission. It is very easy! Only need to fill these fields:
- Title
- Text (body)
- Multimedia: Choose and upload your file.
- URL: Add the call to action link

Then the user will receive a welcome message when entering for the first time in your website creating a pleasant experience of belonging to a community with advantages. In this way, you are building customer loyalty and improving the user experience.
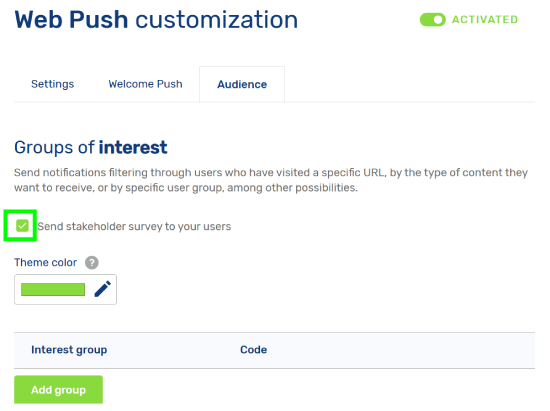
Groups of Interest
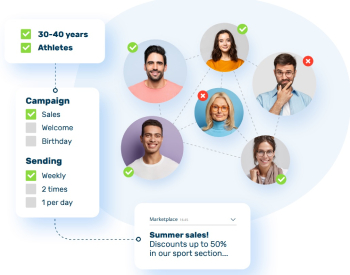
Sending web push notifications with filters is easy and very efficient for your marketing strategy. You can send different messages depending on visitors of a specific URL, the type of content they want to receive or by specific user group, among other possibilities. Only it is necessary to follow these easy steps and you will have a great communication channel to promote your products.
Audience
Once the WordPress plugin (iurny by indigitall) is installed and activated, then you can click on the third tab of the Web Push Customization area: Audience
Please click here for full information about how to install and configure our WordPress plugin
Stakeholder survey
You must click on the field Send stakeholder survey to users. Then the users will receive a communication to choose their groups of interest after allowing the web push notifications.
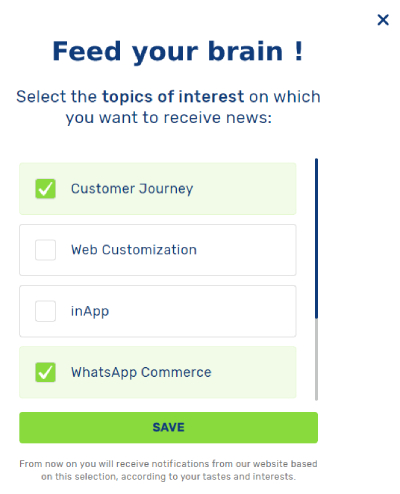
Once the process is finished, a pop-up opens (see image below) for all your website visitors to choose what topics are interested in.
When the users choose the topics, then you can send customized messages for each topic or segment. In this way, you send the most relevant information for each user.
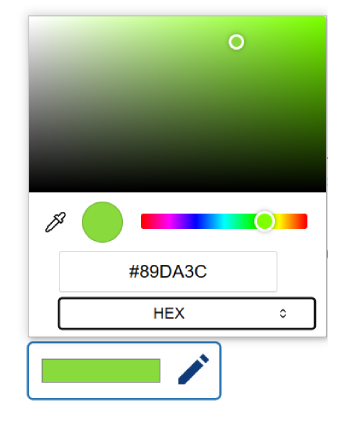
Theme color
In addition, you can customize the color of the pop-up that appears with the different groups of interest. You can choose the brand color of your website. It is very easy! Only need to click on the color bar to select the color. If you know its parameters you can use the arrow icon to select them by RGB (red, green, blue), HSL (hue, saturation, lightness) and HEX code.
Add Group
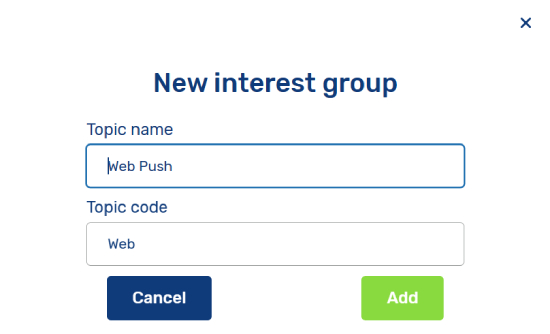
You can click on the green button (Add group) and fill the following fields:
- Topic name: The name of the topic, segment or area of interest. It is visible for users.
- Topic code: The code of the topic, segment or area of interest. It is not visible for users.
For example, we have written Web Push as a topic name and Web as a topic code.
Then you pulse on the Add button. You can add all topics as you need.
Topics
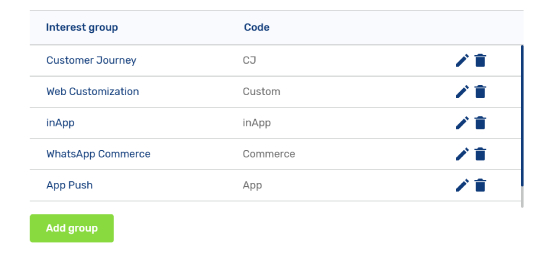
To edit the interest groups, you must click on the pencil icon. The bin icon means removing the selected group.
For example, we have created topics about our products. Then we can send customized messages only for interested users on this solutions.
All topics or interest groups you have created in the WordPress Plugin, you can find them in the console as a segments: Audiences > AppPush / WebPush > Segments. When you do any change, automatically it is also changed inside the console.
Console
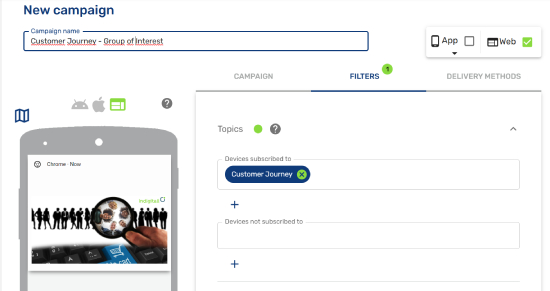
From our console, you can send customized messages for each segment using filters. The full explanation is here.
Example: We have sent a campaign for all users who are registered for Customer Journey.
Go to the indigitall console for advanced features
Examples
The use of interest groups is very usual for different goals. For example:
- Education: To focus on specific knowledge areas and research studies.
- Financial Sector: To send information about different products in accordance with users' interests.
- Food and Beverage Sector: To send information and offers about specific style restaurants or localizations (you can also create interest groups with cities or other geographical areas).
- Healthcare: Send information or offers about services in specific geographical areas or medical specialties.
- Media & Entertainment Industry: To send the news that are more interesting for the users.
- Retail / Consumer Goods Sector: To send offers and recommendations about specific products.
- Travel: To send offers for specific destinations.
- And much more !
Retargeting
The retargeting actions are essential to recuperate abandoned carts and encouraging the sales in the most decisive moments. To activate the action of retargeting, you can use the indigitall console when you are creating webpush notifications clicking on retargeting field. Please see here for more information.
There are two ways to add your events and use them in the indigitall console through our SDK for web and inserting code.
SDK
indigitall SDK for retargeting clicking here.
To insert your events and use them in the indigitall console, you need to send information to indigitall's servers to identify the actions and events that happen in it. This allows you to automate retargeting actions.
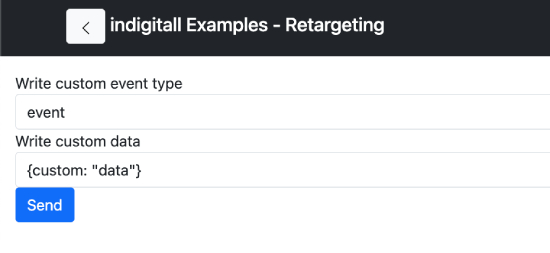
To register these events, you have to call the sendCustomEvent method, passing as a parameter a descriptive ID (you can invent the one you like the most) and the data set you need.
indigitall.sendCustomEvent({
          eventType: "YOUR_CUSTOM_EVENT",
          customData: {}, // add your data
          async: false, // call this event sync/async
        }, (response) => {
          //DO SOMETHING
        },(error)=>{
          //LOG ERROR
        });
Inserting Code
It is possible to directly copy code on your website. This code avoids that your push notifications can show as spam because the user will receive only one notification during 1 day. In line 3 (var frequency), you can modify this time interval as you wish.
In addition, you need to adapt this code with your own variables:
Line 2 (var event_code): Write the code of your event
Line 10 (topicsSubscribe): Write the name of your event
function retargeting_subscribeTopic(event){
var event_code = "abandoned_cart_rmkt";
var frequency = 1 * (24 * 3600 * 1000); // time between retargeting events (in milliseconds) the value 1 means one day
if (indigitall && Notification && Notification.permission === "granted") {
var prevEventSentAt = parseInt(localStorage.getItem("indigitall.custom." + eventCode) || "0", 10);
var now = (new Date()).getTime();
if (now > prevEventSentAt + frequency) {
localStorage.setItem("indigitall.custom." + eventCode, now);
console.log("Add Retargeting y subscribe group of retargeting_abandoned_cart");
indigitall.topicsSubscribe(["abandoned_cart"]);
indigitall.sendCustomEvent({
eventType: eventCode,
customData: {},
async: false,
            });
          }
        }
else{
console.log("There is not subscription permission");
            }
      }