
Retargeting
indigitall SDK for retargeting clicking here
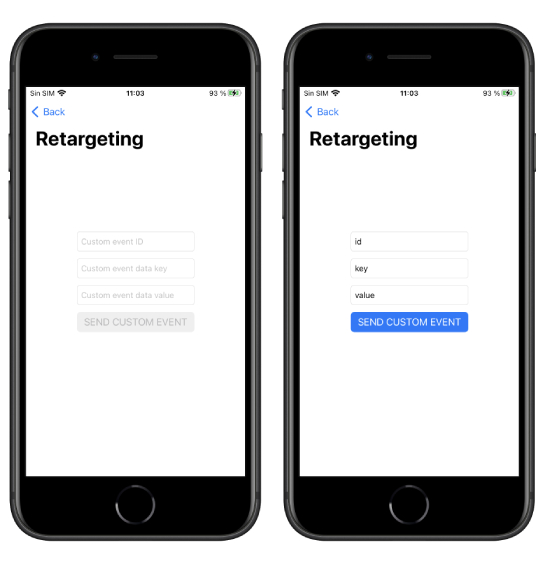
Your app can send information to indigitall's servers to identify the actions and events that happen in it. This allows you to automate retargeting actions.
To register these events, call the sendCustomEvent method, passing a descriptive ID as a parameter (you can invent the one you like the most) and set data you need.
Indigitall.sendCustomEvent("YOUR_CUSTOM_EVENT", eventId: "eventID_optional", eventAt : "eventAt_optional", customData: []) {
   // Do something in success function
} onError: { (error) in
    //ERRROR DO SOMETHING
}
[Indigitall sendCustomEvent:@"" eventId:@"eventID_optional" eventAt:@"eventAt_optional"customData:@[] onSuccess:^{
// Do something in success function
} onError:^(INError * _Nonnull error) {
//ERROR DO SOMETHING
}];Segments/Topics
indigitall SDK for segments clicking here
Our SDK allows you to classify users into different customizable groups. This is very useful for:
- Implement a preferences screen so that the user can choose the topics for which they want to receive notifications.
- Label according to the navigation or actions that the user performs.
- Segment communications according to whether the user has identified or is anonymous.
- Segment based on language, culture, customer category, or based on any other criteria you need.
Remember that you must first define the groups you want to work with in the indigitall console
(Tools> Topics).
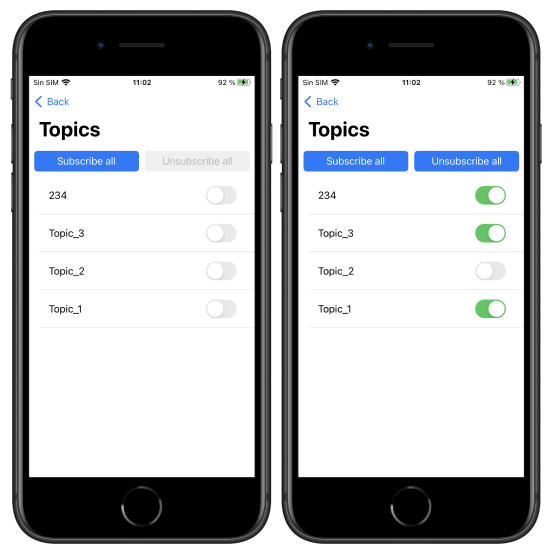
List groups
Use the topicsList method to get the list of groups that are configured in your indigitall project. The callback of this method receives as a parameter an array of INTopics, which contains the information of all the available groups, as well as a flag that indicates whether the user is included in any of them.
Indigitall.topicsListWith(onSuccess: { (topics) in
        print("TOPICS: \(topics)")
    }) { (error) in
        print("Error: \(error.message)")
    }
[Indigitall topicsListWithOnSuccess:^(NSArray<INTopic *> * _Nonnull topics) {
NSLog(@"TOPICS: %@",topics);
} onError:^(INError * _Nonnull error) {
NSLog(@"ERROR: %@", error.message);
}];Manage subscription
To manage the device subscription to one or more groups, there are two methods: subscribe and unsubscribe.
Optionally, both receive a TopicsCallback object as the third parameter, which will return the list of all Topic in the project.
Indigitall.topicsSubscribe(withTopic: [Topic.code, Topic.code], onSuccess: { (topics) in
        self?.topics = topics
    }) { (error) in
        print(error.message)
    }

Indigitall.topicsUnSubscribe(withTopic: [Topic.code, Topic.code], onSuccess: { (topics) in
        self?.topics = topics
    }) { (error) in
        print(error.message)
    }
[Indigitall topicsSubscribeWithTopic:@[Topic[0], Topic[1]] onSuccess:^(NSArray<INTopic *> * _Nonnull topics) {
topics = topics.self;
} onError:^(INError * _Nonnull error) {
NSLog(@"ERROR: %@", error.message);
}];
[Indigitall topicsUnSubscribeWithTopic:@[Topic[0], Topic[1]] onSuccess:^(NSArray<INTopic *> * _Nonnull topics) {
topics = topics.self;
} onError:^(INError * _Nonnull error) {
NSLog(@"ERROR: %@", error.message);
}];Using Topics with modular integrations
The methods shown above are available through the main Indigitall interface, which internally delegates the functionality to the corresponding modules (PushIndigittall and InAppIndigitall).
If your integration uses the full SDK, you should continue using:
Indigitall.topicsList(...)
Indigitall.topicsSubscribe(...)
Indigitall.topicsUnsubscribe(...)
However, in modular integrations where only specific components of the SDK are included, you must call the API from the module that actually manages push subscriptions.
Push-only or InApp-only integrations
Topic management (list, subscribe and unsubscribe) is handled by the Push module.
Therefore:
- If you are not using the core Indigitall wrapper
- And you only integrated PushIndigittall
- Or you are working directly with the push module from an InApp-only setup
you must use the PushIndigittall class instead of Indigitall.
PushIndigittall.topicsList(...)
PushIndigittall.topicsSubscribe(...)
PushIndigittall.topicsUnsubscribe(...)
Collection of push data
In the event that you would like to obtain the push object of type json to carry out checks or actions that your application requires, we leave you this code that will help to obtain it:
@available(iOS 10.0, *)
func userNotificationCenter(_ center: UNUserNotificationCenter, didReceive response: UNNotificationResponse, withCompletionHandler completionHandler: @escaping () -> Void) {
    Indigitall.handle(with: response ,withCompletionHandler: { (push, action) in
        print("Push object:", push)
        print("Push action app:", action.app)
    })
}

//@DEPRECATED
func application(_ application: UIApplication, didReceiveRemoteNotification userInfo: [AnyHashable : Any], fetchCompletionHandler completionHandler: @escaping (UIBackgroundFetchResult) -> Void) {
    print("Push notification received: \(userInfo)")
    let data = userInfo["data"]
    let push = INPush(data as! NSMutableDictionary)
    print("Push object : \(push)")
- (void) userNotificationCenter:(UNUserNotificationCenter *)center didReceiveNotificationResponse:(UNNotificationResponse *)response withCompletionHandler:(void (^)(void))completionHandler{
[Indigitall handleWithResponse:response withCompletionHandler:^(INPush * _Nonnull push, INPushAction * _Nonnull action) {
NSLog(@"Push object: %@", push);
NSLog(@"Push object app: %@", action.app);
}];
}
//@DEPRECATED
- (void) application:(UIApplication *)application didReceiveRemoteNotification:(nonnull NSDictionary *)userInfo fetchCompletionHandler:(nonnull void (^)(UIBackgroundFetchResult))completionHandler{
NSLog(@"Push notification received: %@", userInfo);
NSMutableDictionary *data = userInfo[@"data"];
INPush *push = [[INPush alloc]init:data];
NSLog(@"Push object: %@",push);
}Register statistics if the Push action is involved
If you decide to treat the action of the Push independently without going through our SDK, once the push has been collected as explained in the previous section, in the userNotificationCenter: didReceive method of the AppDelegate itself, in order to record the statistics you must add the next method.
Indigitall.registerStatistics(response)[Indigitall registesStatistics: response];Push Secure Received Event
Only on API use of Push Secure Sending
If you want to receive an event that indicate if the push comes with sendEventAck flag and the encrypted pushes are active, add the following on AppDelegate on didReceived method:
func application(_ application: UIApplication, didReceiveRemoteNotification userInfo: [AnyHashable: Any], fetchCompletionHandler completionHandler: @escaping (UIBackgroundFetchResult) -> Void) {
  Indigitall.didReceivePush(withNotification: userInfo) { push in
    print("Push notification with push secure: \(push.pushId)")
  }
}
Custom Push Notification Sounds
By default, iOS notifications use the system sound. If you want to customize the notification sound, you can provide your own audio file and configure it in the Notification Service Extension.
When to Consider a Custom Sound
Custom sounds can make certain notifications stand out, for example:
- Highlighting critical alerts.
- Differentiating between categories of notifications.
- Offering a branded user experience.
Caution: Using a sound that is too long, loud, or unusual can feel intrusive and negatively impact user experience. In many cases, the system default sound is the safest and most user-friendly option.
Adding a Custom Sound File
- Place your audio file (e.g., alert.caf, alert.aiff, or alert.wav) in the root folder of your Notification Service Extension target.
- Make sure the file name matches exactly what you reference in code (case-sensitive).
Implementing in Code
Inside your NotificationService.m file, you can assign the custom sound like this:
@implementation NotificationService

- (void)didReceiveNotificationRequest:(UNNotificationRequest *)request
                 withContentHandler:(void (^)(UNNotificationContent * _Nonnull))contentHandler {
    self.contentHandler = contentHandler;
    self.bestAttemptContent = [request.content mutableCopy];

    // Set custom sound
    self.bestAttemptContent.sound = [UNNotificationSound soundNamed:@"alert.caf"];

    // Create a new notification request with updated content
    self.request = [UNNotificationRequest requestWithIdentifier:request.identifier
                                                        content:self.bestAttemptContent
                                                        trigger:request.trigger];

    [Indigitall didReceiveNotificationRequest:self.request
                         withContentHandler:self.contentHandler];
}
@end
import UserNotifications

class NotificationService: UNNotificationServiceExtension {
    var contentHandler: ((UNNotificationContent) -> Void)?
    var bestAttemptContent: UNMutableNotificationContent?
    var request: UNNotificationRequest?

    override func didReceive(
        _ request: UNNotificationRequest,
        withContentHandler contentHandler: @escaping (UNNotificationContent) -> Void
    ) {
        self.contentHandler = contentHandler
        bestAttemptContent = (request.content.mutableCopy() as? UNMutableNotificationContent)

        if let bestAttemptContent = bestAttemptContent {
            // Set custom sound
            bestAttemptContent.sound = UNNotificationSound(named: UNNotificationSoundName("alert.caf"))

            // Create a new notification request with updated content
            self.request = UNNotificationRequest(
                identifier: request.identifier,
                content: bestAttemptContent,
                trigger: request.trigger
            )

            Indigitall.didReceive(self.request!, withContentHandler: contentHandler)
        }
    }

    override func serviceExtensionTimeWillExpire() {
        // Called just before the extension will be terminated
        if let contentHandler = contentHandler, let bestAttemptContent = bestAttemptContent {
            contentHandler(bestAttemptContent)
        }
    }
}
Important Notes
- iOS only supports .aiff, .wav, and .caf files.
- The sound file must be under 30 seconds. Longer files will cause the system to fall back to the default sound.
- If the file cannot be found or loaded, the system default sound will be used.
- The sound must be packaged with the app; you cannot download or load it dynamically at runtime.
Add notification badge to the app icon on iOS programmatically
Since iOS 17, Apple recommends using UNUserNotificationCenter.setBadgeCount(_:withCompletionHandler:). The old property UIApplication.shared.applicationIconBadgeNumber is deprecated starting from iOS 17.
Requirement
Import UserNotifications:
import UserNotificationsRequest permission to modify the badge
Before using the badge, the app must request permission for the .badge option:
UNUserNotificationCenter.current().requestAuthorization(options: [.badge]) { granted, error in
    if let error = error {
        print("Error requesting badge permission: \(error)")
        return
    }
    print("Badge permission granted: \(granted)")
}
Set a specific number
func setAppBadge(_ count: Int) {
    if #available(iOS 17.0, *) {
        UNUserNotificationCenter.current().setBadgeCount(count) { error in
            if let error = error {
                print("Error updating badge: \(error)")
            }
        }
    } else {
        UIApplication.shared.applicationIconBadgeNumber = count
    }
}
Example:
setAppBadge(5)The badge should be updated every time your app detects a new relevant notification. Since this is handled programmatically, you decide when to increment or reset the counter.
1. When receiving a notification (recommended)
🔹 Remote notification (when it arrives to the app)
func application(_ application: UIApplication,
                 didReceiveRemoteNotification userInfo: [AnyHashable: Any],
                 fetchCompletionHandler completionHandler: @escaping (UIBackgroundFetchResult) -> Void) {

    incrementBadge()

    completionHandler(.newData)
}
2. Clear the badge
To remove the badge from the app icon:
func applicationDidBecomeActive(_ application: UIApplication) {
    resetBadge()
}
Internally, this is equivalent to setting the counter to 0.