---
updatedAt: 2026-09-16T14:37:13.000Z
agentTools:
projectIndex: https://documentation.indigitall.com/llms.txt
---
# WordPress Plugin
The indigitall plugin is a powerful, all-in-one solution designed to bridge the gap between your website and your customers through **WhatsApp Chat** and **Web Push Notifications**. To get started, you can choose the installation method that best fits your workflow: you can search for and install the plugin directly from the official WordPress Plugin Directory within your dashboard, or manually **[upload the provided .zip folder](https://documentation.indigitall.com/reference/wordpress-plugin#upload-and-install-the-plugin)** for a quick and customized setup. Both methods grant you full access to our suite of engagement tools in just a few clicks.
You can easily install the **indigitall plugin** directly from your WordPress Dashboard to integrate both **WhatsApp Chat and Push Notifications** into your site. Alternatively, you can download the plugin manually from this page.
Watch our Quick Guide Video below for a step-by-step walkthrough of the installation process.
## Integration
1. In the left side menu, click on **Plugins> Add new**
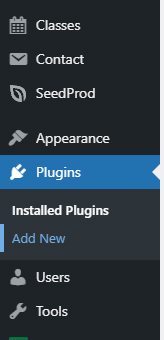
2. Use the search bar at the top right to find our plugin by typing the word *indigitall:*
3. Only need to click on **Install Now.**
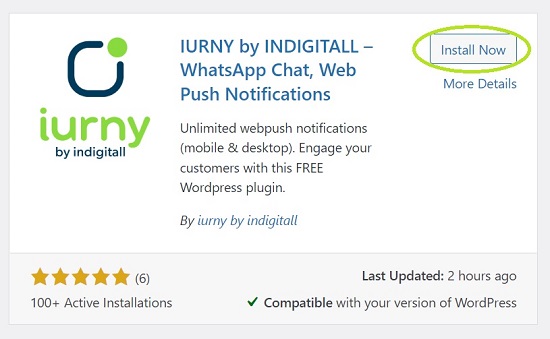
4. After installing, please click on **Activate**.
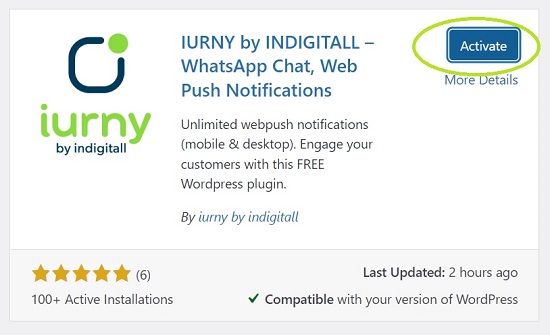
5. Once the plugin is activated, it will appear in the plugin area. Find out and click on **Settings**.

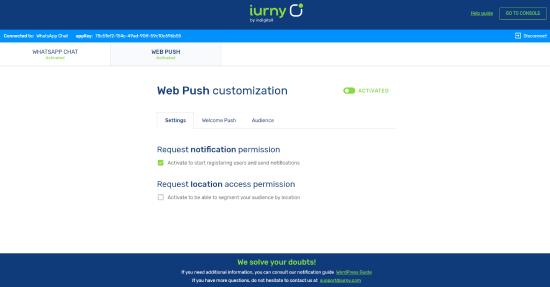
Now you can enter into the principal area where you see two tabs, at the left area, to choose the service you want to activate: **WhatsApp Chat** and **Web Push**. As usual you can develop the web push campagins via indigitall console but WhatsApp Chat is only [configurable](https://documentation.indigitall.com/docs/whatsapp-chat-customization) from the iurny by indigitall plugin.
## Web Push Features
If you click on Web Push tab and want to activate, you click on the screen and then a login pop up appears to write your user and password. Watch our video to see how to activate it:
## Login / Create account
If you don't have it, you can create a FREE account by clicking on the **Create account** button. To create a free account, please fill your email and password. And pulse on Create Account.
Now you have activated your web push service to send pushes. Congratulations!
## Request notifications permission
It is necessary to click on the first option: **Request notifications permission** in the Web Push Customization area. If you don't click, then the service is deactivated. The second option, **Request location access permission**, is optional (we recommend its activation). If you activate it, then you can segment your audience by location. Please click [here](https://documentation.indigitall.com/reference/wp-use-cases#geotargeting) to see use cases.
## Check the integration
To confirm that everything works, follow these steps:
Access your website and see if the Show notifications box is displayed. Click **Allow** to accept them.
Open the developer console (F12 key) and go to the Console tab, you should see something like this:
```javascript
[IND]Client: Method: PUT
URL: https://device-api.indigitall.com/v1/device?appKey=xxxxxxxx-xxxx-xxxx-xxxx-xxxxxxxxxxxx&deviceId=xxxxxxxx-xxxx-xxxx-xxxx-xxxxxxxxxxxx
Request Body: {
[...]
"pushToken": "https://fcm.googleapis.com/fcm/send/xxxx",
"browserPublicKey": "xxxxxxxxxxxxxxxxxxxxxxxxxxxxxxxxxxxx",
"browserPrivateKey": "xxxxxxxxxxxx"
}
Response Code: 200
Response Message: OK
Response Body: {
"deviceId": "xxxxxxxx-xxxx-xxxx-xxxx-xxxxxxxxxxxx",
"enabled": true,
"platform": "webpush"
}
```
Notice that **Response Code** has the value 200.
If everything is correct, congratulations, you can start sending notifications!
If you have had problems, please contact us [here](https://indigitall.com/english/contact/).
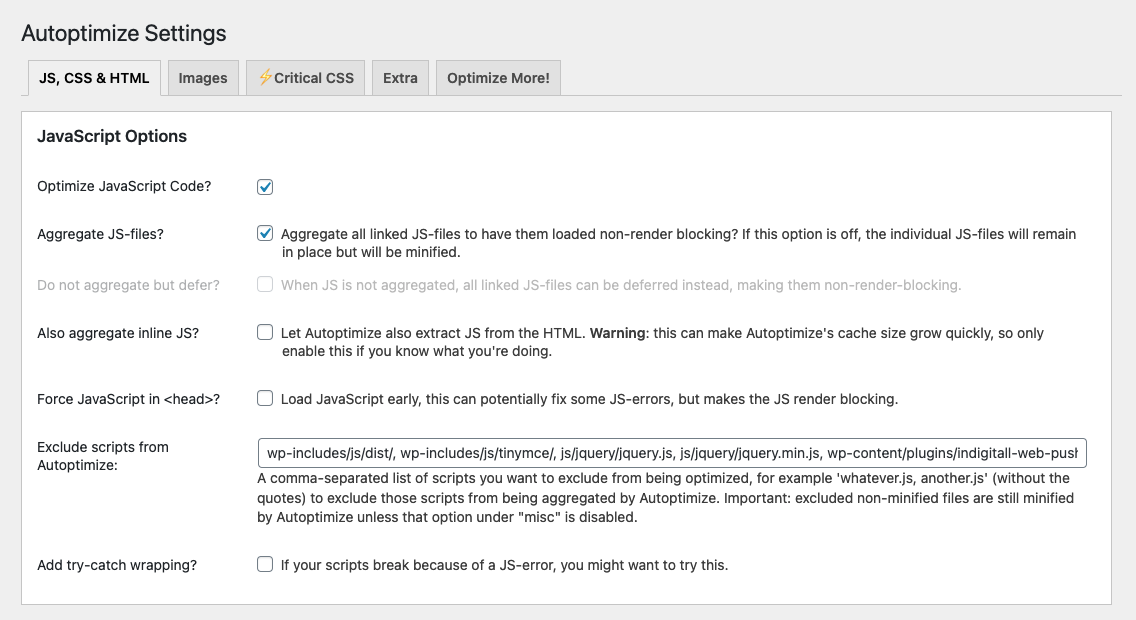
### Some WordPress optimization plugins as Autoptimize block our plugin execution.
If you have this problem, add the folder "wp-content/plugins/indigitall-web-push-notifications" to your exception list.
It is necessary to click on the first option: **Request notifications permission.** If you don't click, then the service is deactivated. The second option, **Request location access permission**, is optional (we recommend its activation). If you activate it, then you can segment your audience by location.

## Upload and Install the Plugin
This guide will walk you through the manual installation of our WordPress plugin using the **.zip file** provided to you.
**Prerequisites**
Before starting, ensure you have:
1. The **indigitall-plugin.zip file saved** on your computer.
2. Administrative **access to your WordPress Dashboard**.
3. Your indigitall **App Key** (available in the indigitall console).
### Step 1: Upload and Install the Plugin
Since you have the plugin file in a compressed format (.zip), follow these steps to upload it directly to your WordPress site:
1. Log in to your **WordPress Admin Dashboard**.
2. In the left-hand menu, navigate to **Plugins > Add New**.
3. At the top of the page, click the **Upload Plugin** button.
4. Click Choose File and select the **indigitall-plugin.zip** file from your local storage.
5. Click **Install Now**.
6. Once the installation is complete, click the **Activate Plugin** button.
### Step 2: Initial Configuration
After activation, a new menu labeled indigitall will appear in your WordPress sidebar.
1. Click on the indigitall menu.
2. To complete the integration, you will need your unique **App Key**. You can find this credential within the indigitall console by navigating to your **Project Settings** and selecting the **General** tab.
For a detailed visual guide on where to find your project credentials, please see this page.
3. Paste your key into the designated field and click **Save Settings**.
### Step 3: Enabling Features
Our plugin allows you to manage multiple engagement channels from a single interface:
* **Web Push Notifications**: Enable this toggle to start collecting subscribers and sending browser notifications. You can configure the appearance of the permission prompt directly from the settings tab. For a full breakdown of customization options, please refer to the [Web Push Features](https://documentation.indigitall.com/reference/wordpress-plugin#web-push-features) section above.
* **WhatsApp Chat**: Enable the Chat feature to add a floating WhatsApp button to your site. You can customize the phone number, the welcome message, and the button's position. For a full guide on customizing your chat interface, visit [this page](https://documentation.indigitall.com/docs/instant-chat-customization).
### Step 4: Verification
To ensure everything is working correctly:
* Open your website in an *Incognito/Private window*.
* Verify that the WhatsApp button appears (if enabled) and check if the browser asks for permission to "Show Notifications" (if Web Push is enabled).
**Troubleshooting & Support**
* **File Size Errors**: If WordPress prevents the upload due to file size limits, please contact your hosting provider to increase the upload\_max\_filesize in your PHP configuration.
* **API Connection**: If the App Key is not validating, double-check that there are no extra spaces before or after the key when pasting it.